
Tracking fixed assets manually can be time consuming and error-prone. Fortunately, Microsoft
Dynamics 365 Finance and Operations (D365 F&O) offers built-in barcode generation
capabilities for fixed assets, improving accuracy, physical verification, and reporting.
Here’s a step-by-step guide to help you configure barcode functionality for fixed assets in D365
F&O:
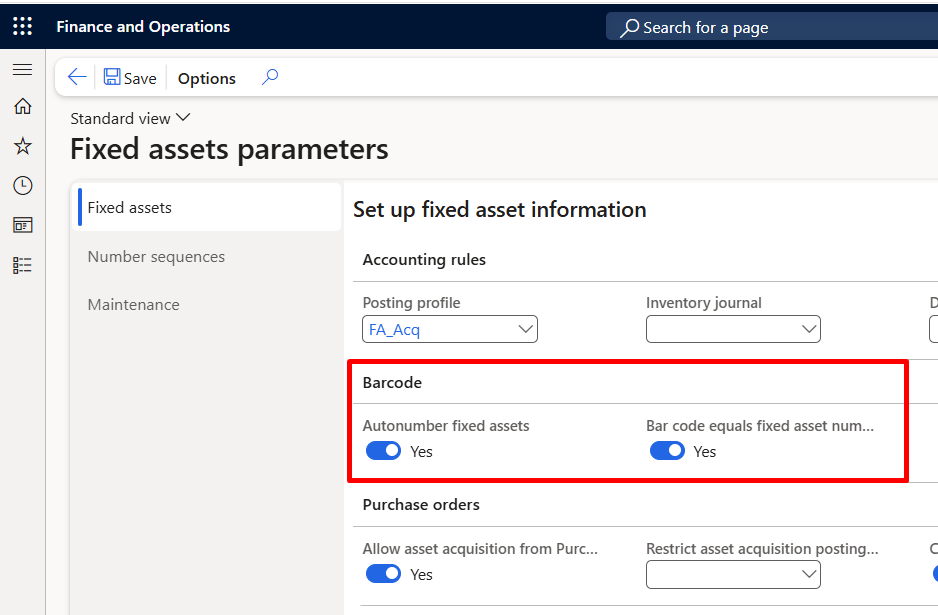
Step 1: Enable Barcode Settings in Fixed Asset Parameters
Path: Fixed Assets > Setup > Fixed asset parameters
• Enable Auto number fixed assets – This allows D365 to generate asset numbers
automatically.
• Enable Barcode equals fixed asset number – This sets the barcode value to match the
fixed asset number. (You can still override this if needed.

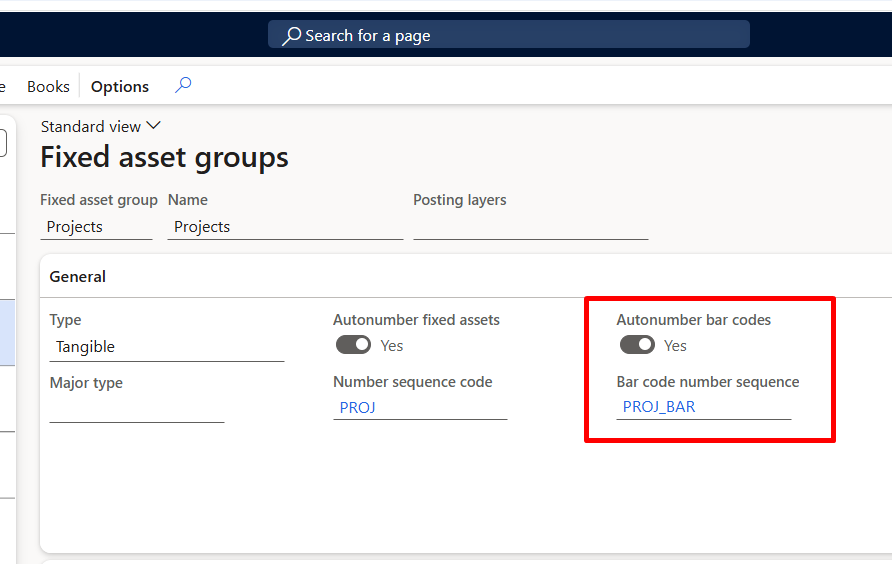
Step 2: Configure Fixed Asset Groups
Path: Fixed Assets > Setup > Fixed asset groups
In the General tab:
• Enable Auto number barcode
• Assign a Barcode number sequence
Each asset created under this group will now receive a barcode number automatically

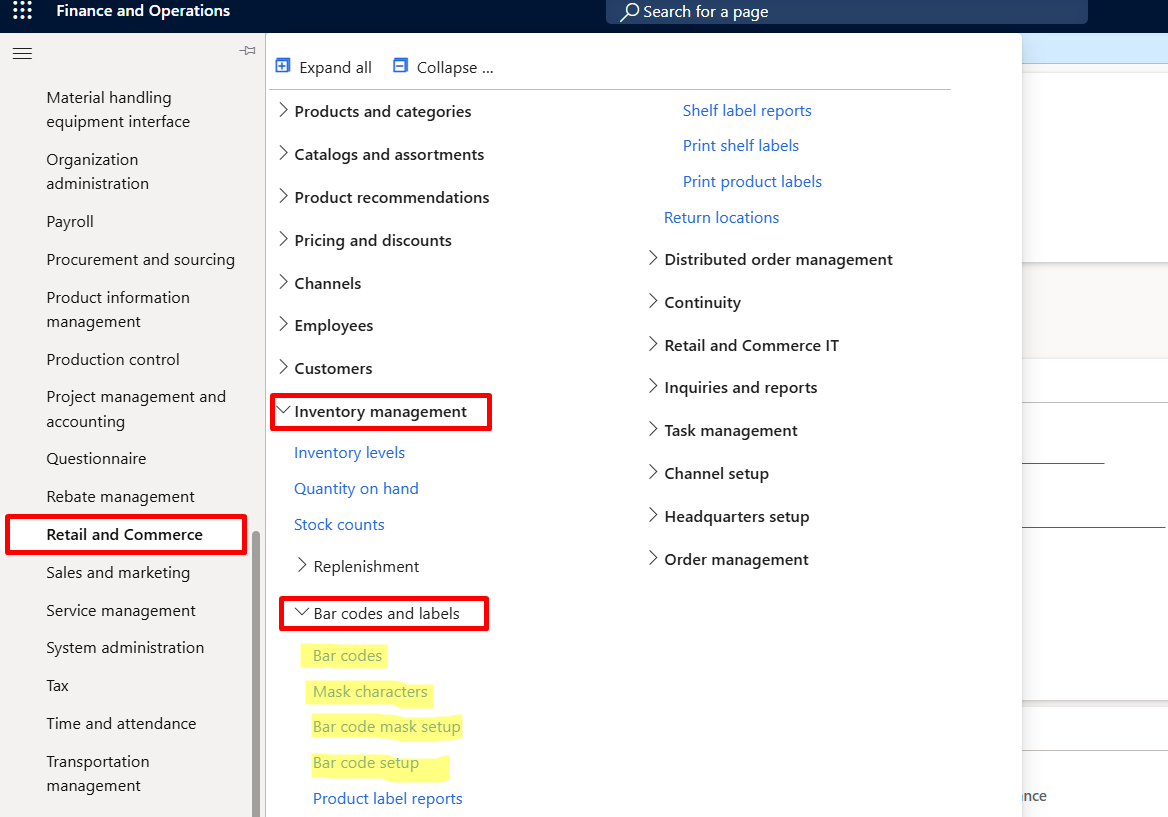
Step 3: Configure Barcode Setup via Retail and Commerce Module

Step-by-Step Barcode Configuration Process
1️. Create Barcode Mask Characters
Before you create a Barcode Mask, you must first create Barcode Mask Characters.
These characters define the placeholders used in the barcode mask format (e.g., numbers, letters,
constants).
Path: Retail and Commerce > Inventory management > Barcodes and labels > Barcode mask
characters.


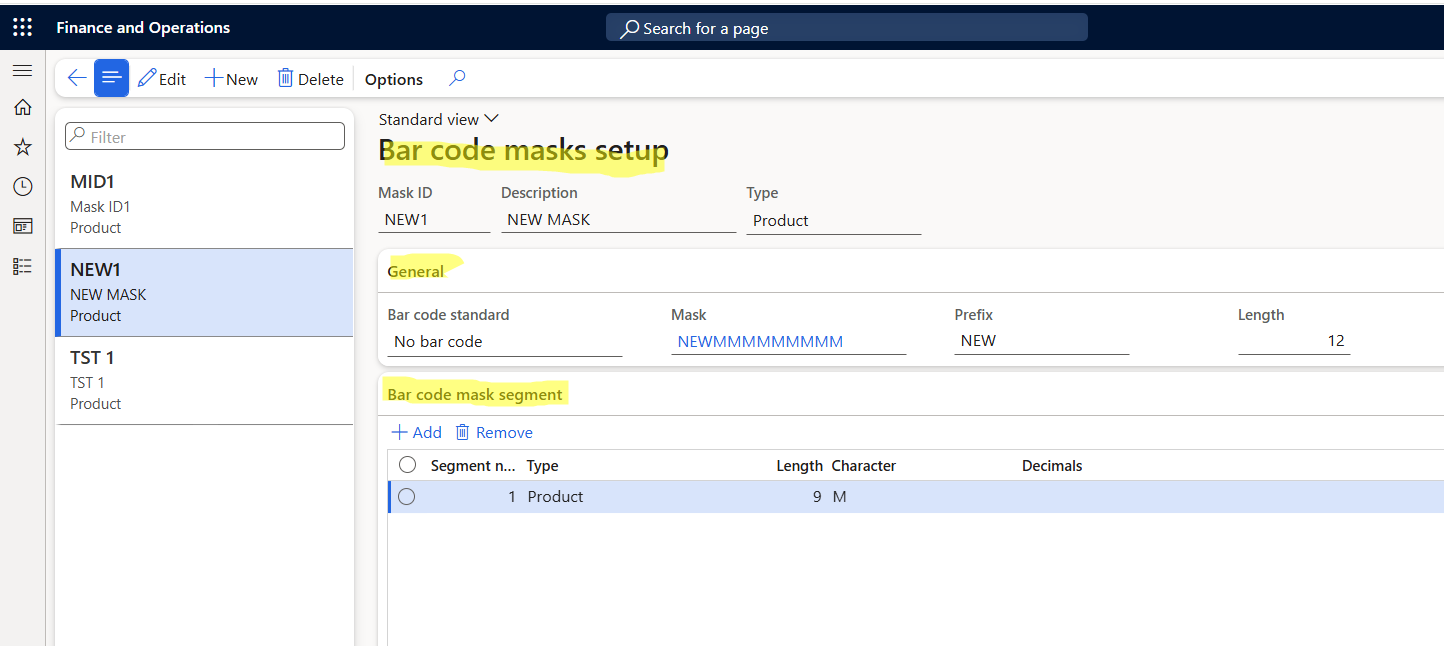
2. Create Barcode Mask
Once the characters are defined, you can create a Barcode Mask using those characters.
Path: Retail and Commerce > Inventory management > Barcodes and labels > Barcode masks
• This defines the structure/format for how barcodes will be generated.

3. Create and Configure Barcode
Now, create a new barcode using the mask.
Path: Retail and Commerce > Inventory management > Barcodes and labels > Bar codes
• Select Barcode Type (Code 39 or Code 128)
• Font is auto-filled based on barcode type
• Assign Barcode Mask ID (mandatory)
• Enter Barcode Size and Maximum Length


Step 4: Automatically Generate Barcodes for New Assets
Once all configurations are complete:
• When a new fixed asset is created, a barcode will be automatically generated (matching
asset number if that option is enabled).
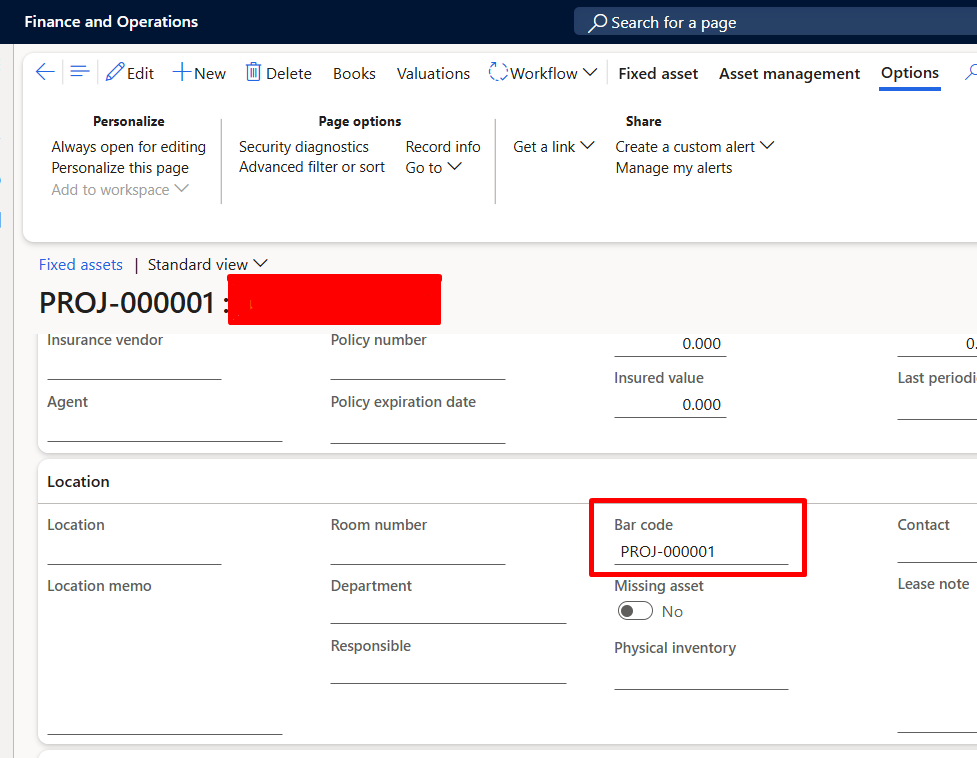
• You can view the barcode number on the Fixed asset master > Location fast tab.
• If needed, you can manually assign a different barcode number.

Step 5: Assign Barcodes to Existing Fixed Assets
Path: Fixed Assets > Periodic tasks > Assign fixed asset number to barcode
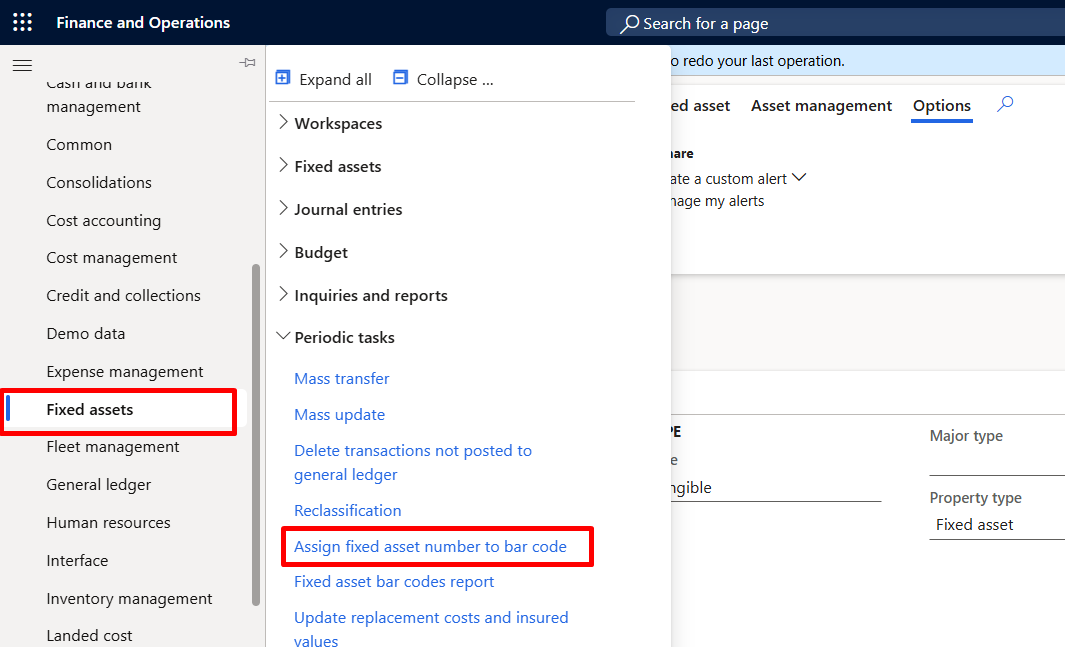

This function allows you to assign barcode numbers to pre-existing assets:
• Assign by specific assets or asset group
• Useful for onboarding older assets into the barcode system.


This is useful for companies already maintaining fixed assets without barcodes.
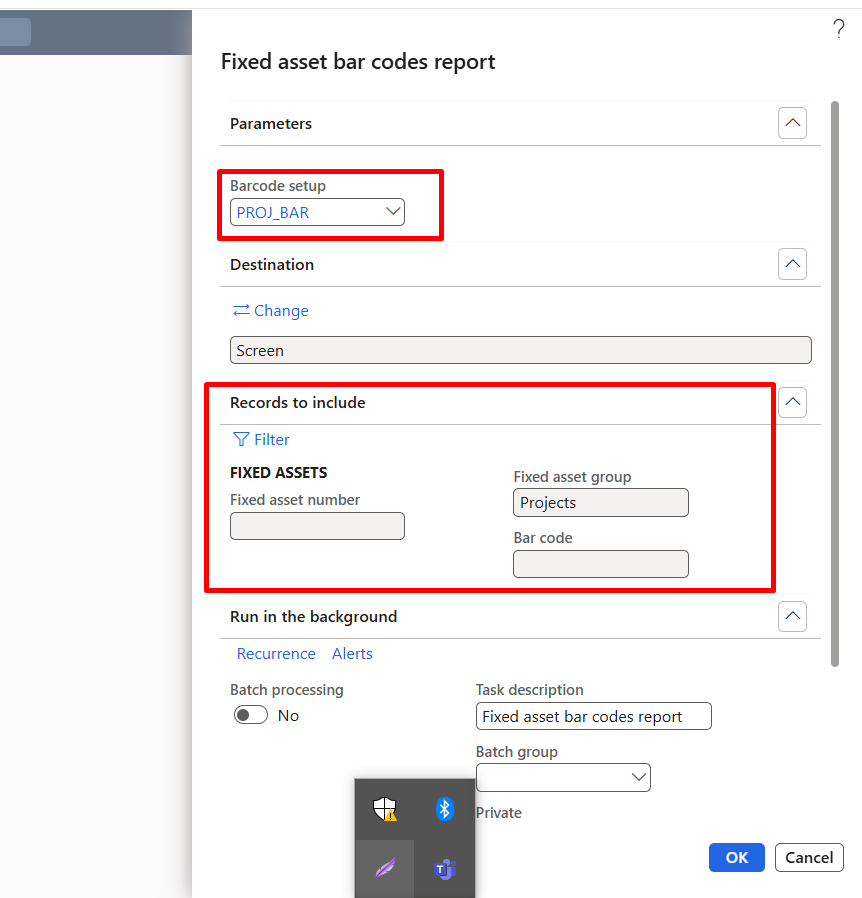
Step 6: View and Print Barcode Reports
Path: Fixed Assets > Periodic tasks > Fixed asset barcode reports


You can generate barcode reports based on:
• Specific Fixed Asset number
• Fixed Asset Group
• Barcode number
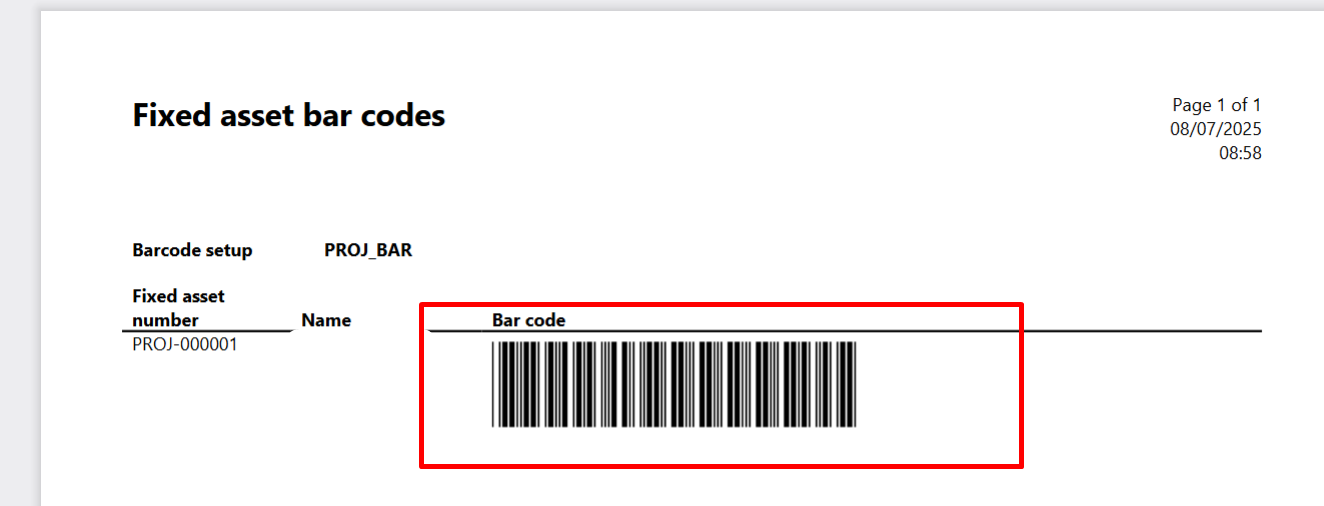
These reports include scannable barcode images ready for printing.

The report displays the barcode image, which can be printed and used as a physical label.

Summary of Benefits:
• Improved physical tracking & audits
• Barcode support (Code 39, Code 128)
• Seamless integration with asset lifecycle
• Automated number generation & reporting
• Centralized asset management
Pro Tip: Always test your barcode on a scanner before finalizing labels for widespread use