
Microsoft Dynamics Supply Chain Management-Goods in; purchase inventory, stores
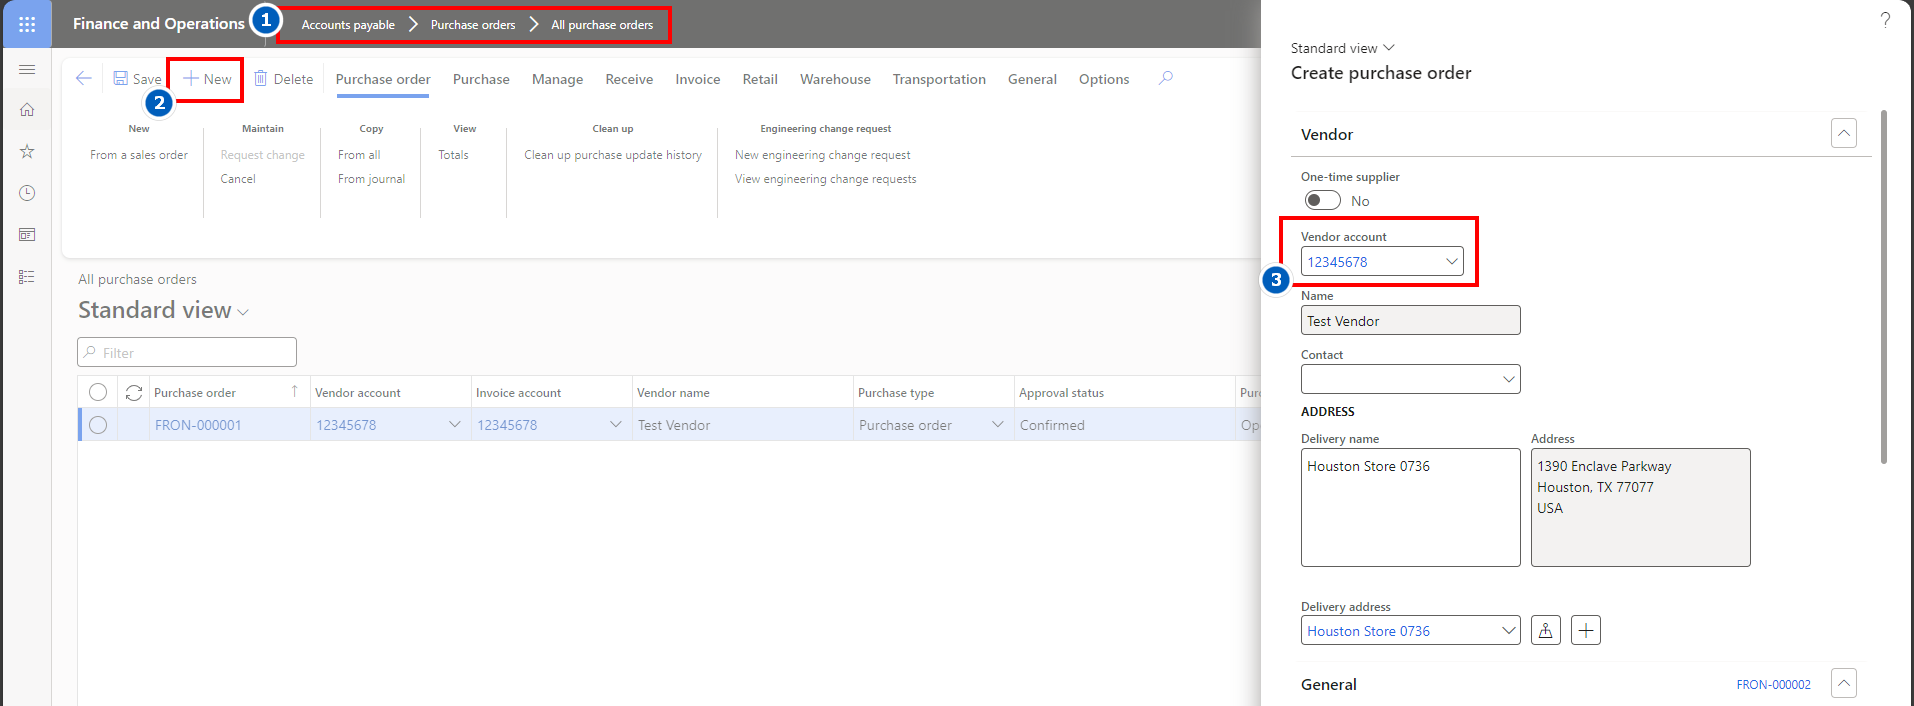
Add a new purchase order:
Add a new purchase order and select the vendor:
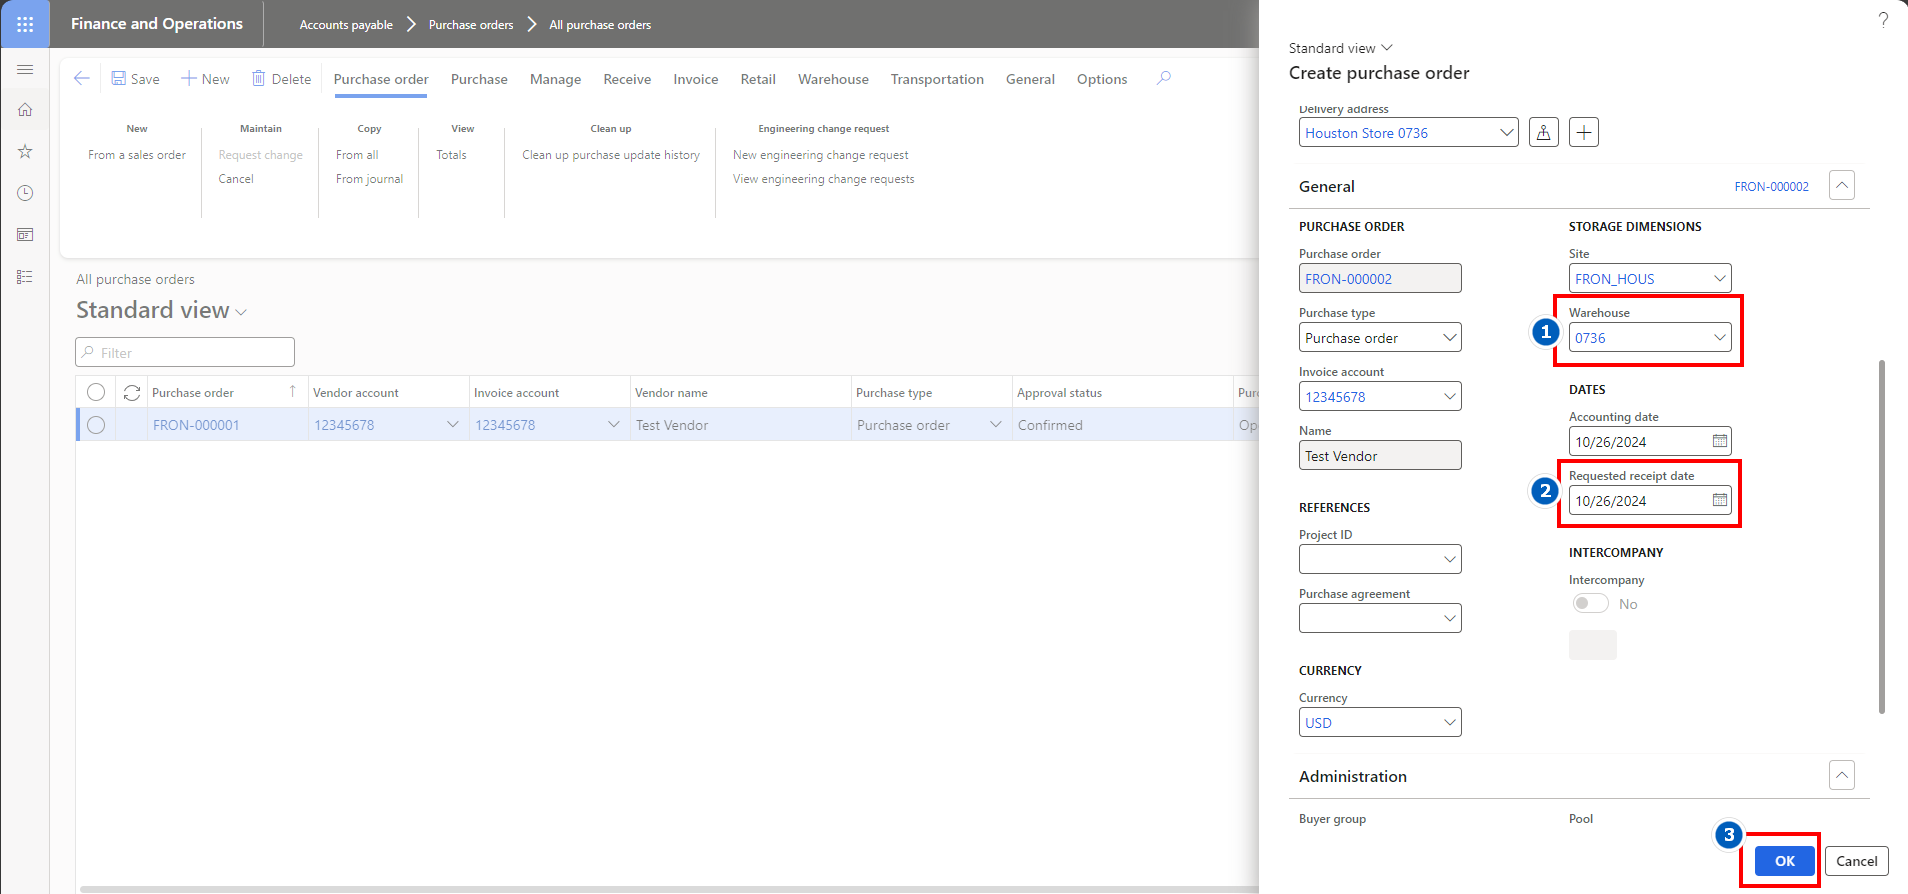
Scroll down on the right pane and select the warehouse (store) and requested receipt date. All other fields should default. Click ‘OK’ when complete, to advance to the lines area.
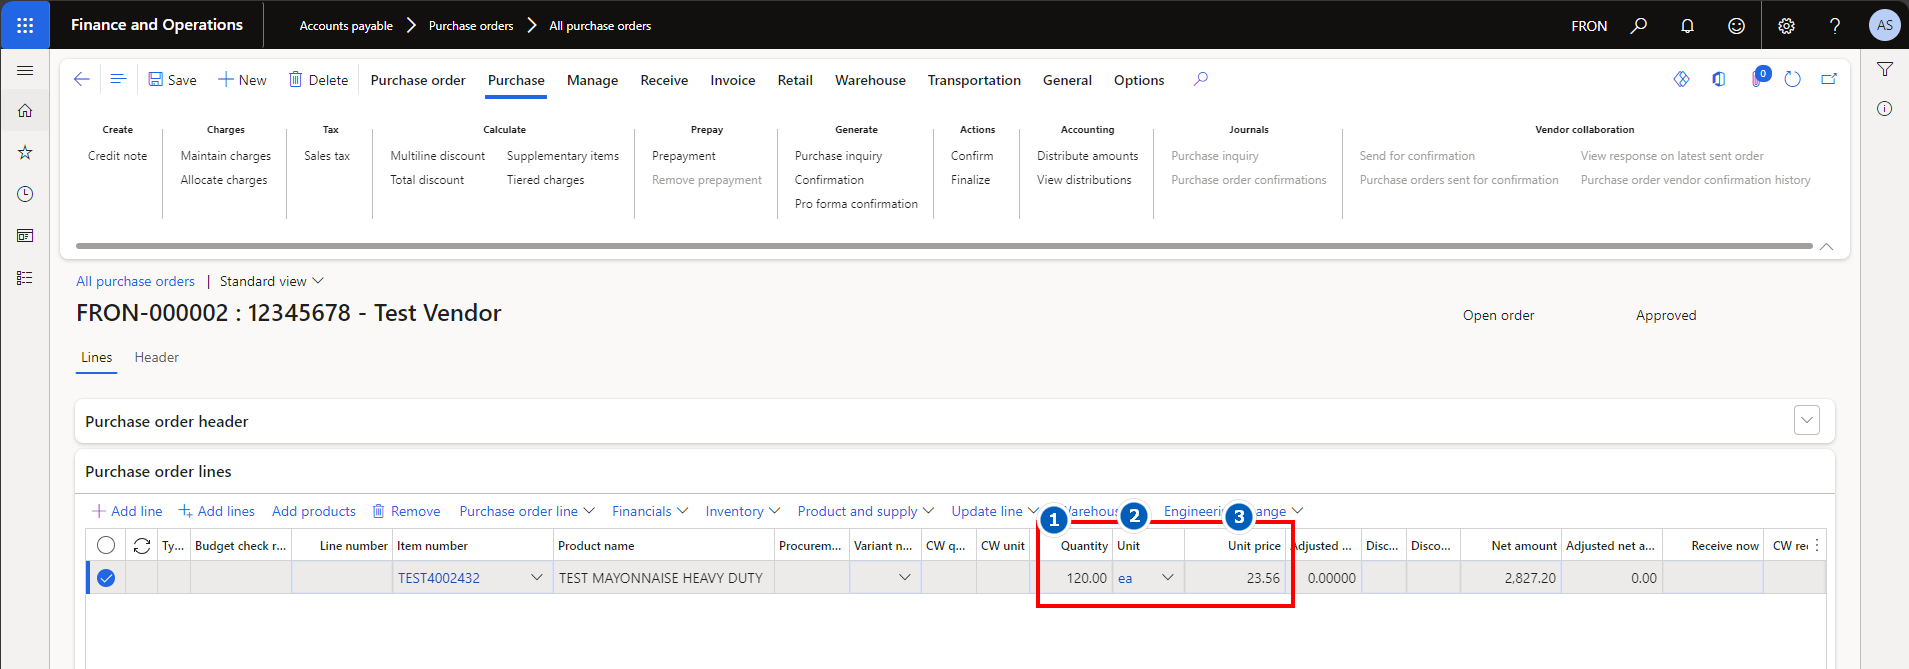
Detail purchase order lines
The lines of the purchase order tell the vendor what we specifically want to order. Enter product lines, checking purchase price (which defaults from the last price paid, which is recorded in the item file).
Enter the quantity ordered, check the unit of measure (select a different one if desired) and verify the purchase price, which can be over-keyed if this purchase price is different.
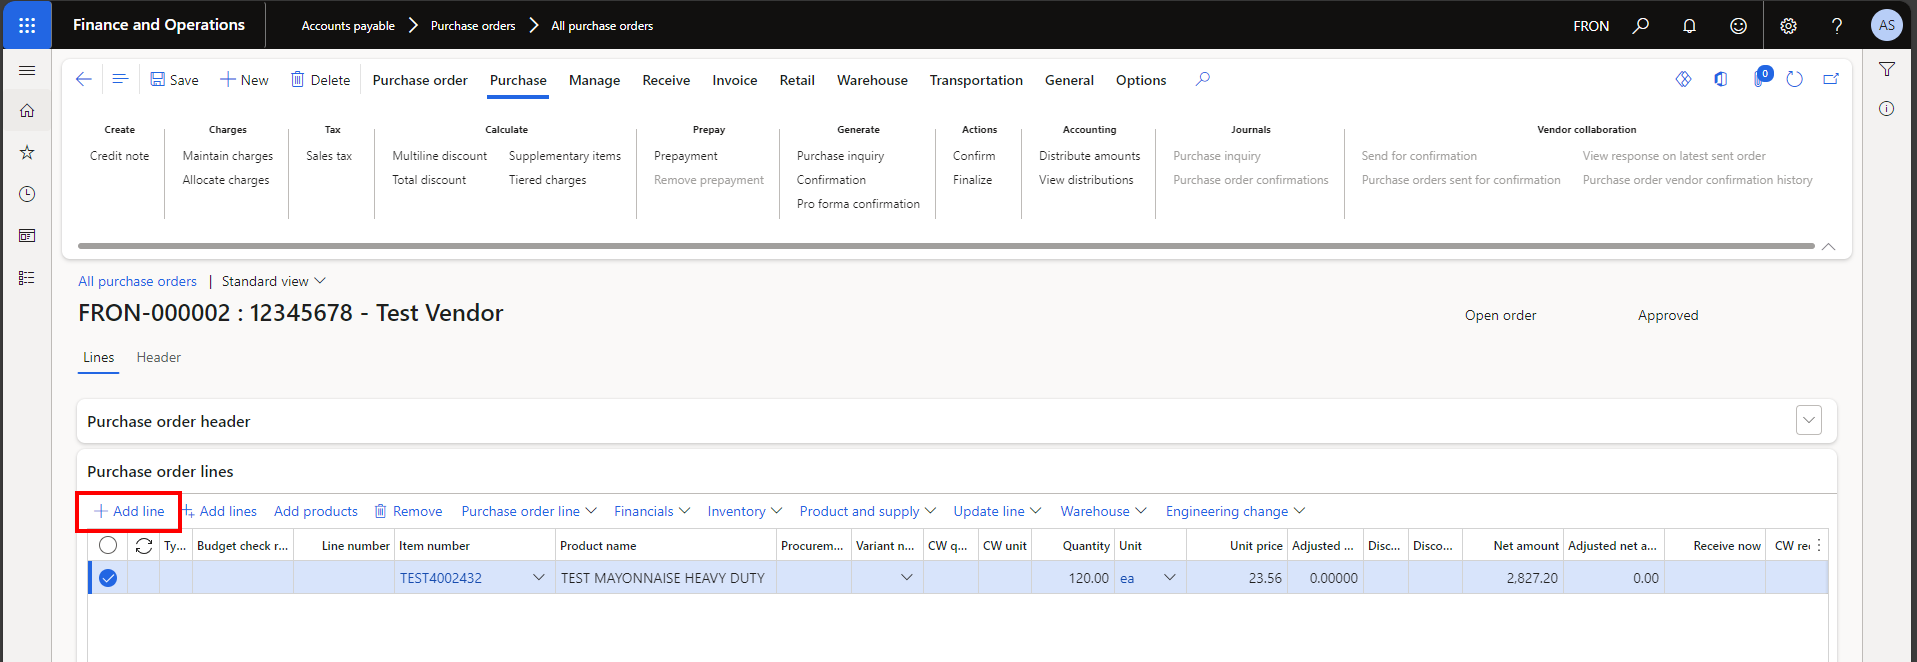
Arrow down (like Excel) or use the ‘Add line’ blue button to add more lines to the purchase order, until complete.
 Add charges and allocate:
Use these buttons to add and allocate charges.
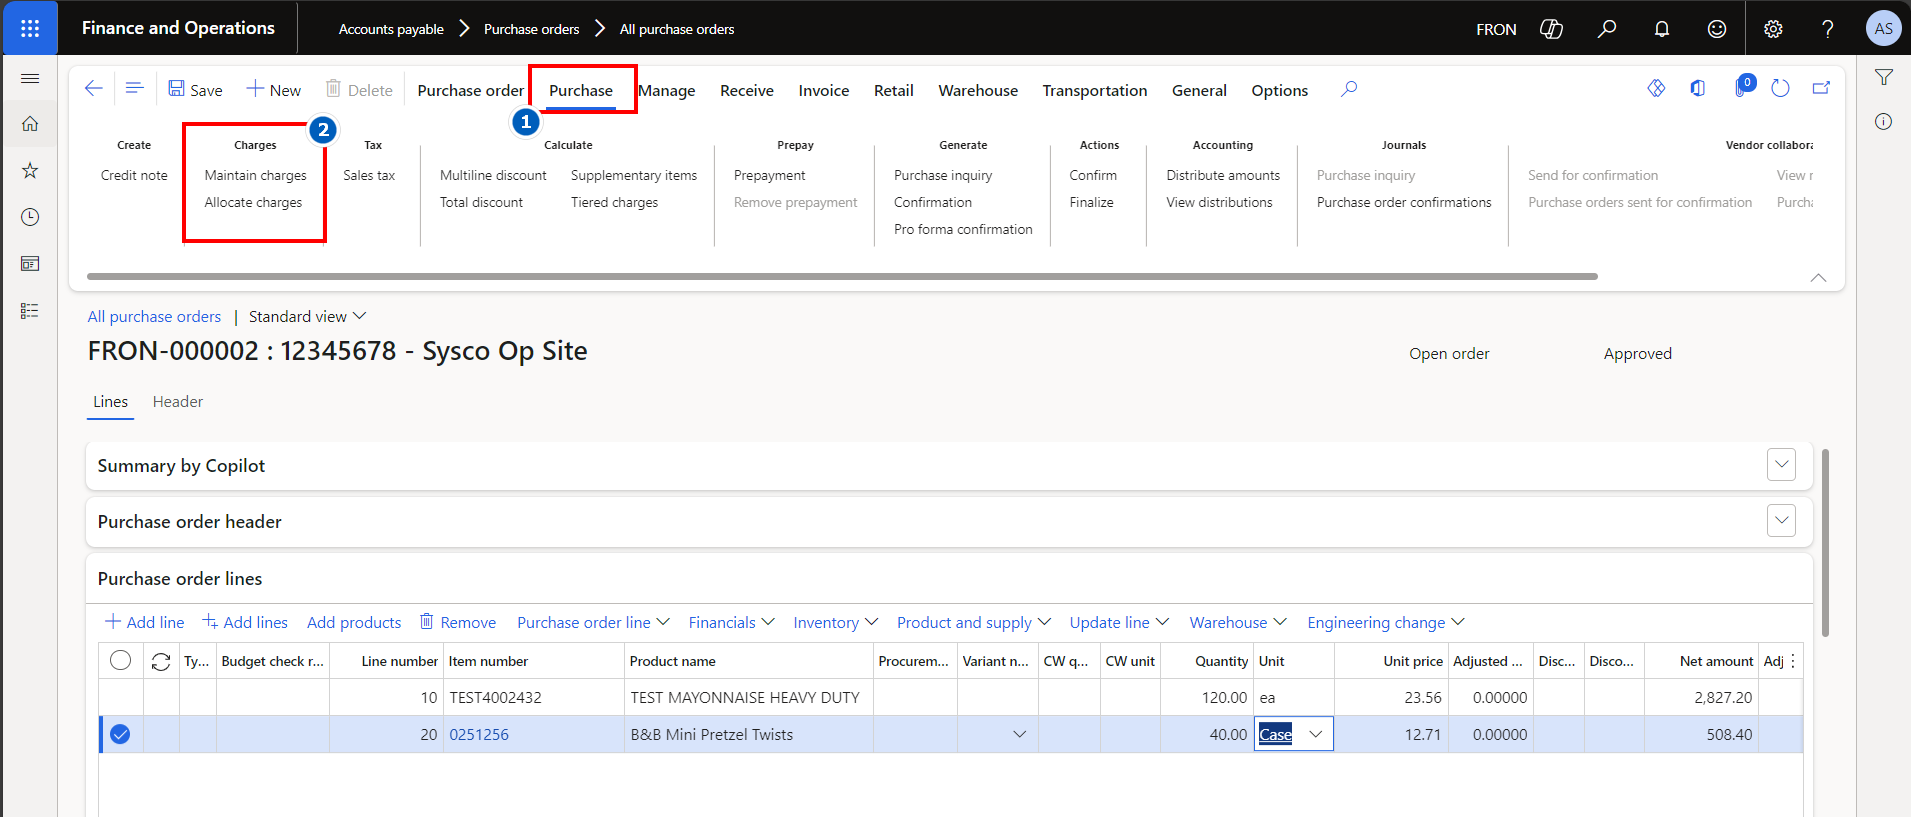
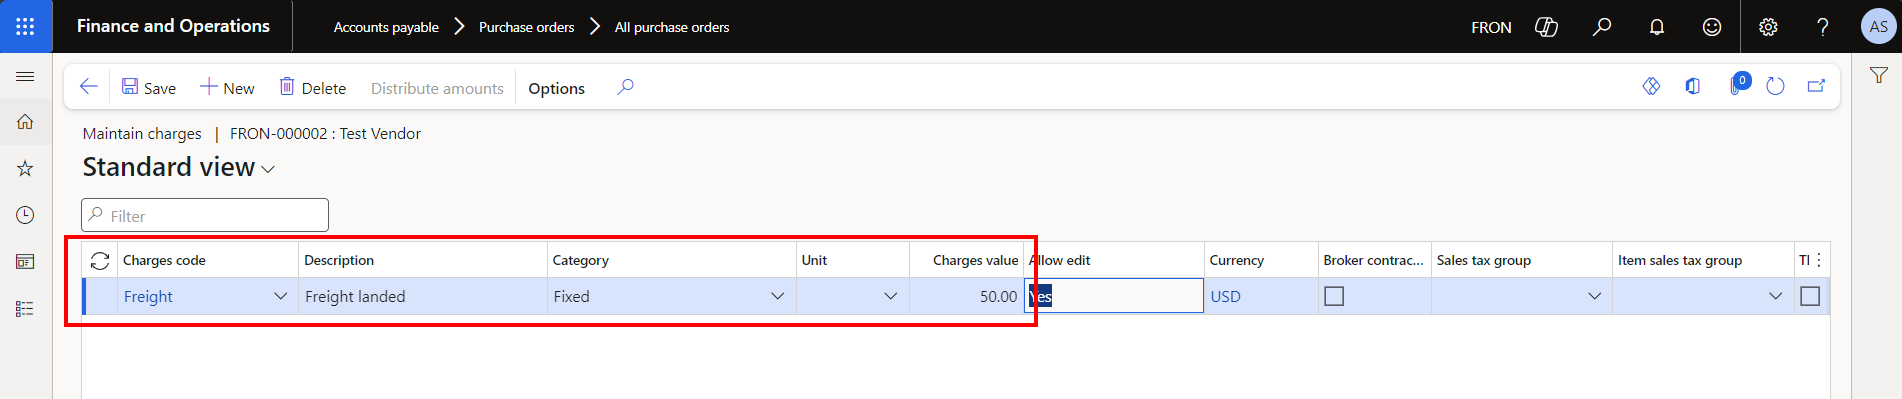
First, use the ‘Maintain charges’ button to add a charge.
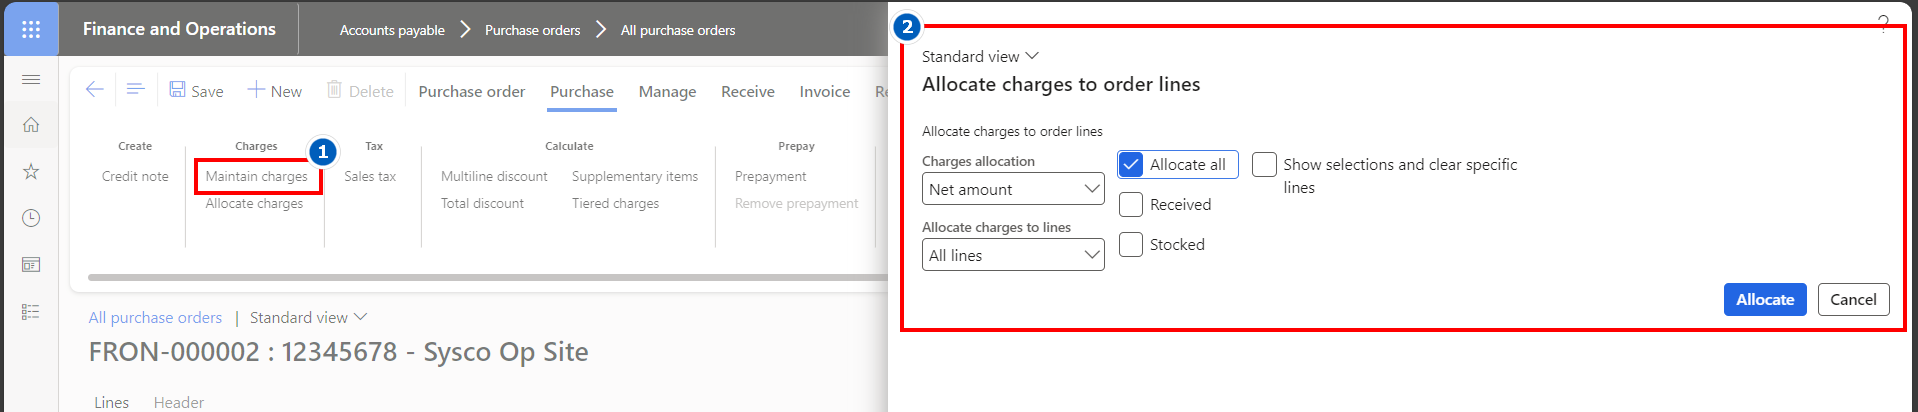
Next, use the ‘Allocate charges’ button to spread the charge to the purchase order lines. Charges can be allocated based upon the amount or quantities per line.
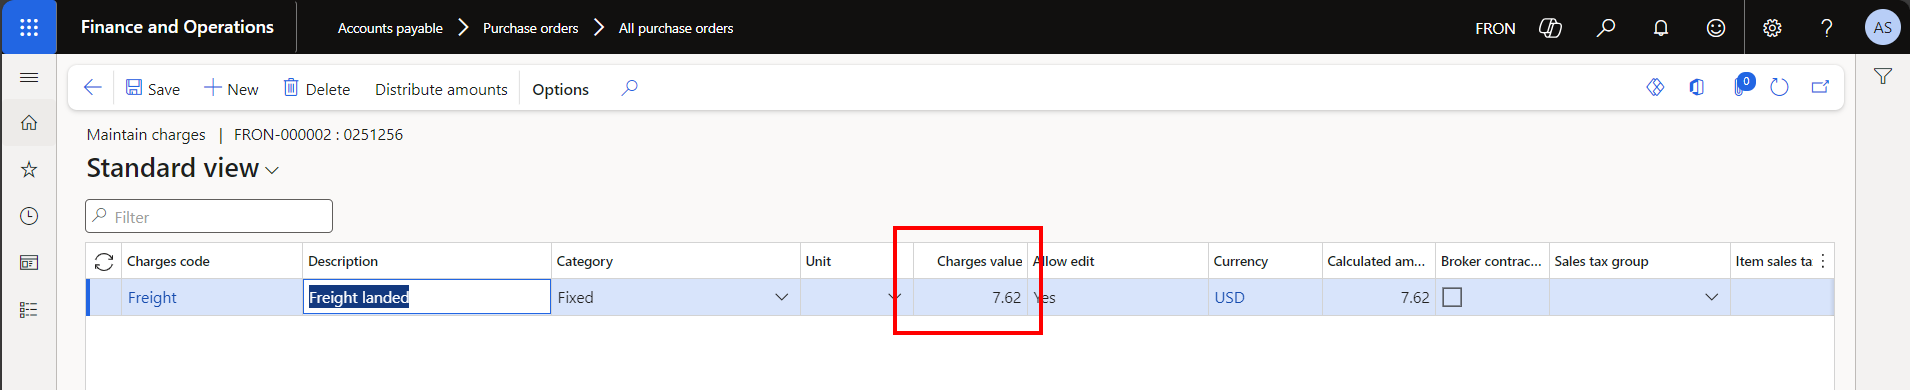
Once allocated, charges are visible on each line:
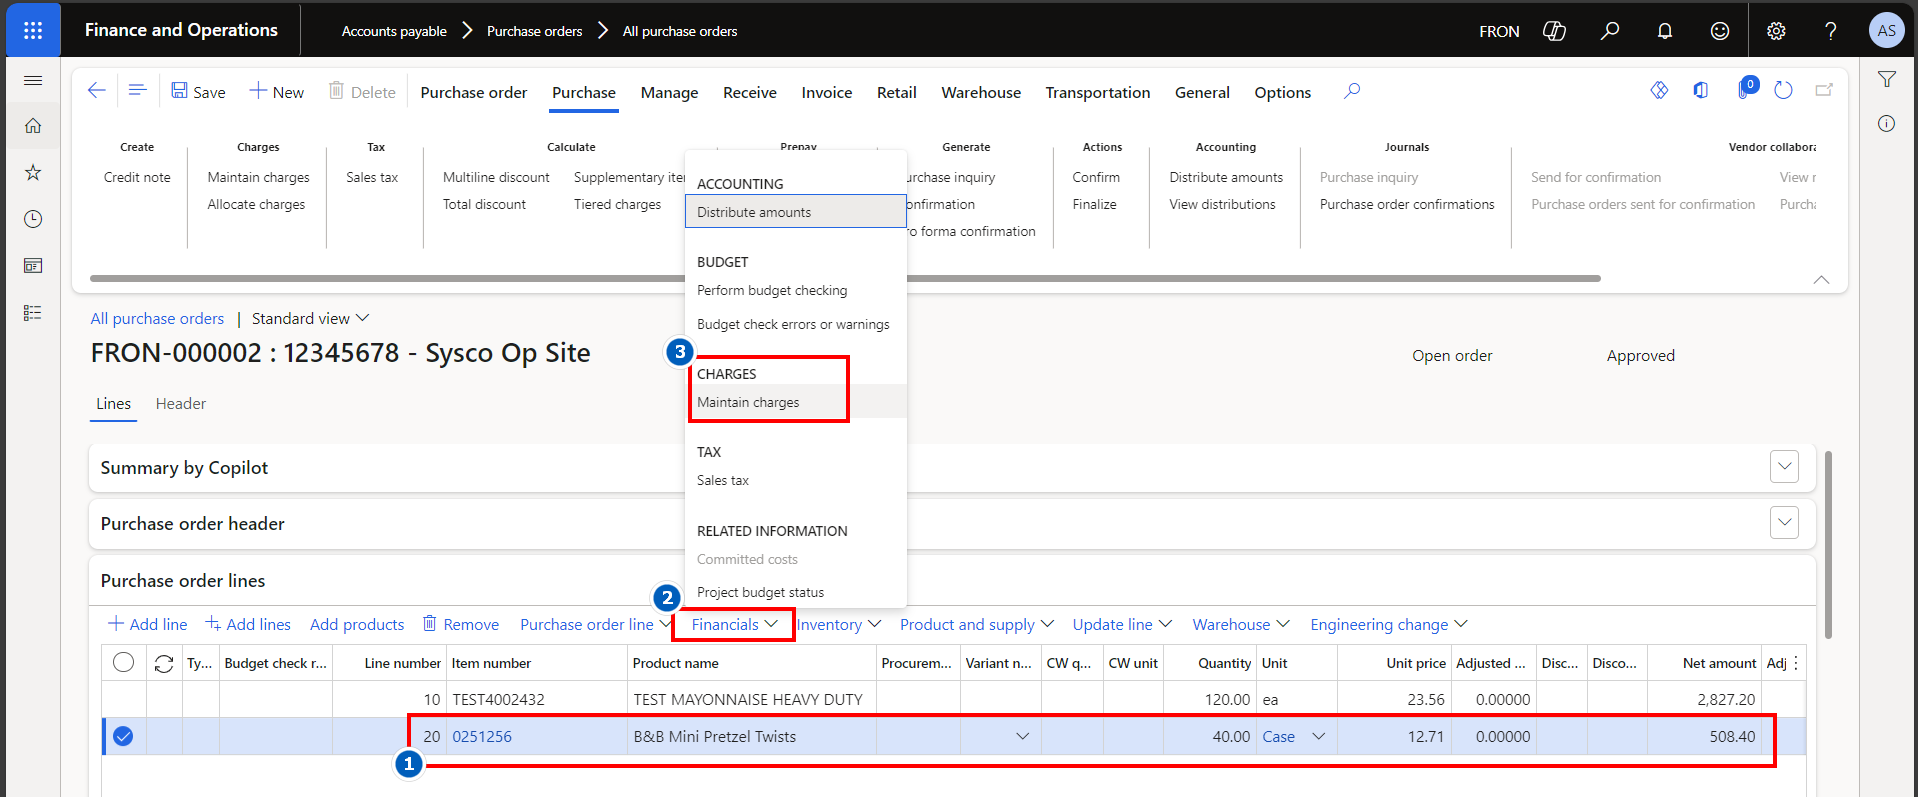
The pretzels received $7.62 of the $50.00 (and the mayonnaise received the rest).
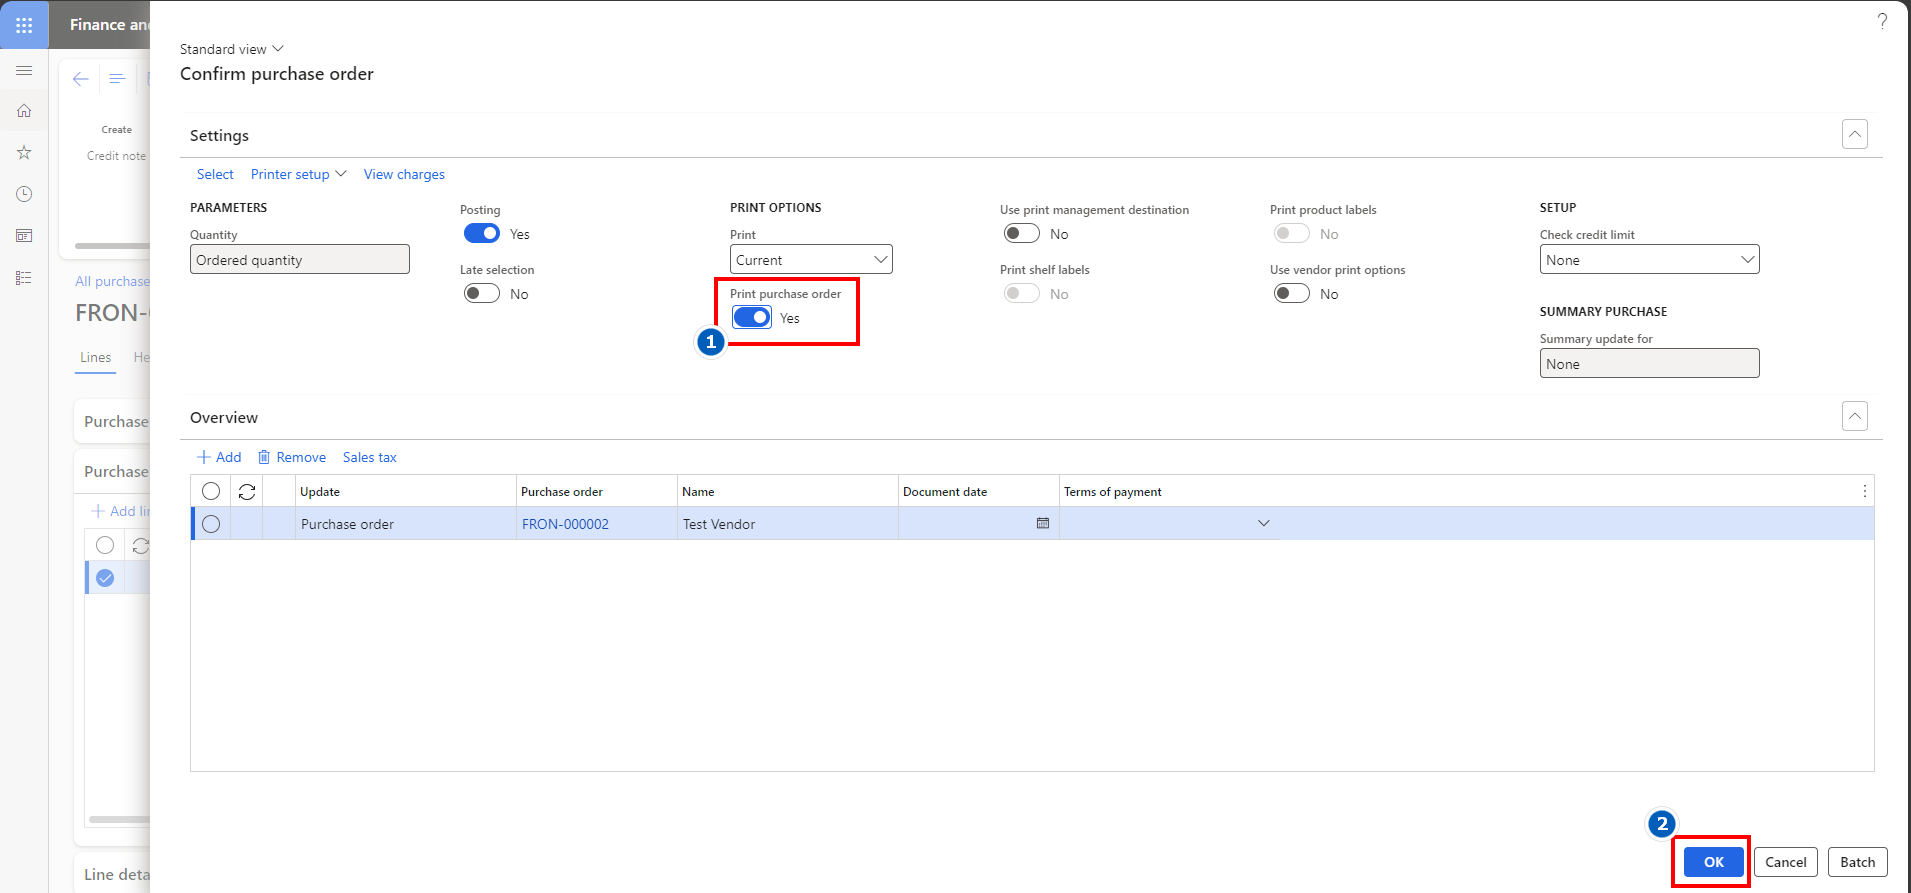
 Confirm purchase order:
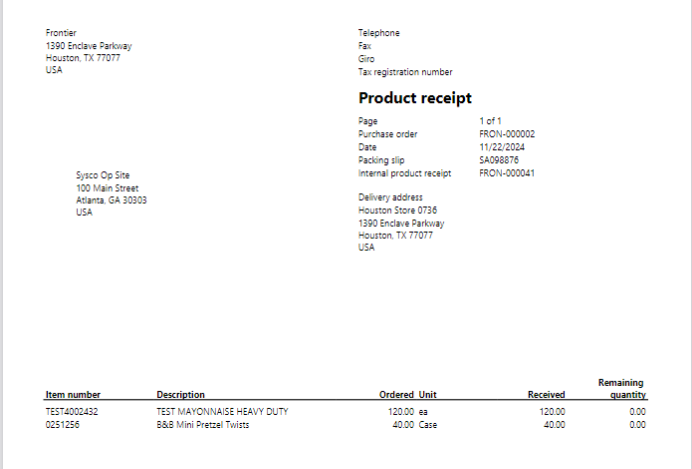
Purchase order confirmation tells the vendor to ship us the product. The system can print a purchase order confirmation or email the confirmation automatically to the vendor, via Outlook. A printed form is shown below.


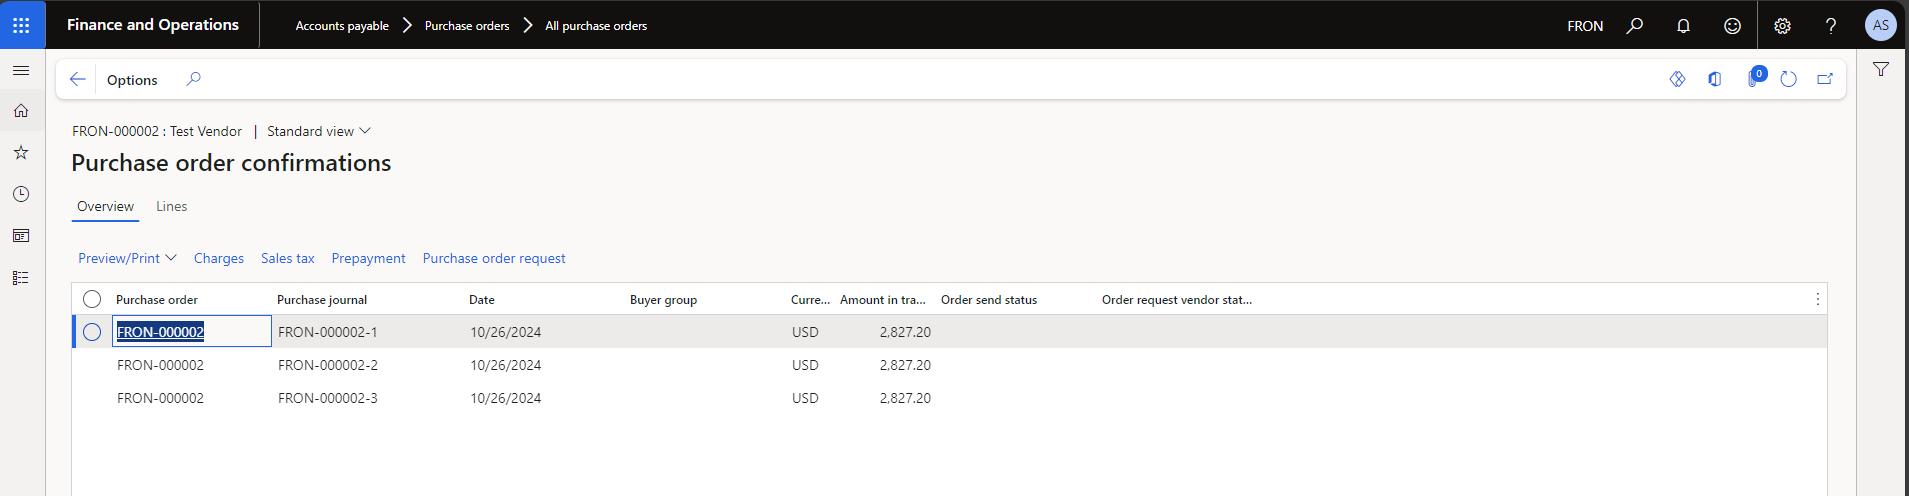
If a purchase order is changed after confirmation, it will need to be confirmed again. Purchase order confirmation history (with details of what was sent on each confirmation) is retained here.

Purchase order receipt via back office D365 FSCM
Note: this process is provided, but will be superseded by advanced warehousing steps, once configured in Sysco’s test environment.
- Enter goods received
- Post receipt
The amount of goods received can be entered from the ‘Receive’ tab.

Enter the product receipt number (this is the packing slip number).
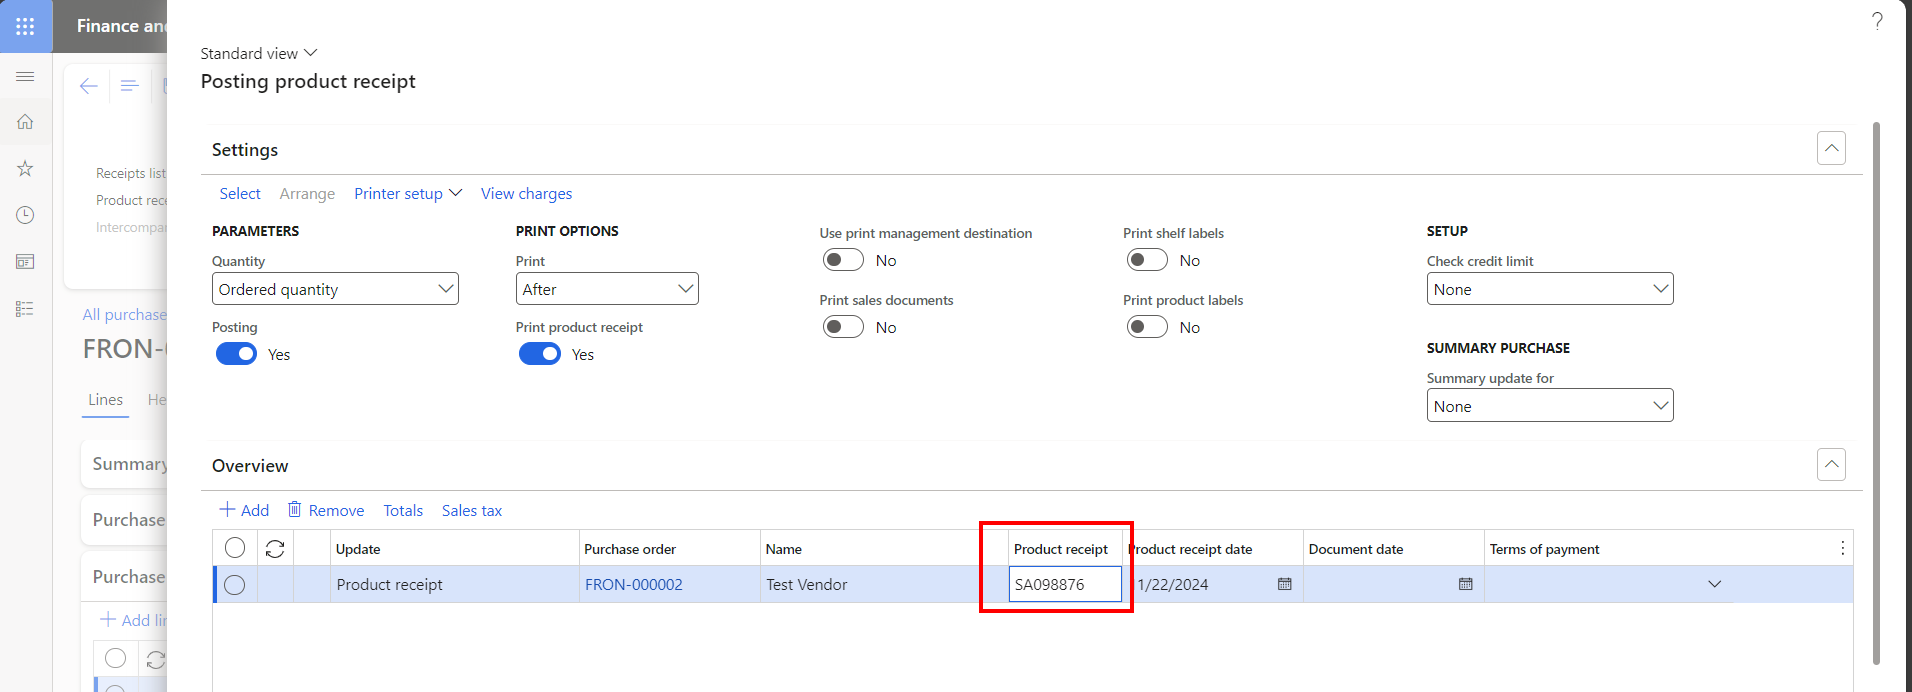
Change the quantity received (or leave the default that the full amount was received) and click ‘OK’.

Purchase order invoice
Generate invoice with 3-way match
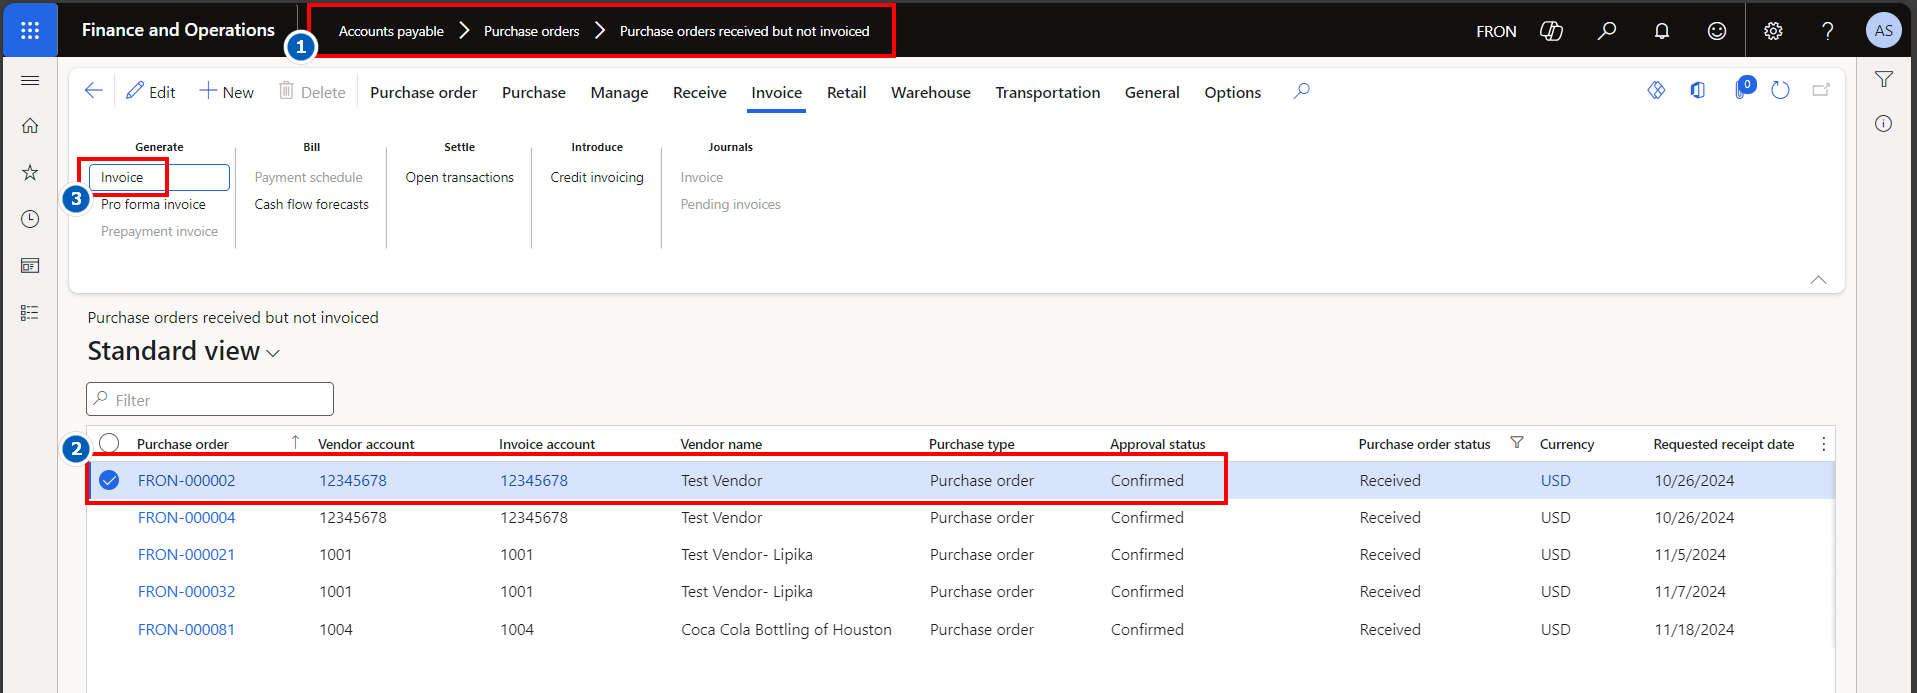
Navigate to the queue for purchase orders received, but not invoiced. Select the proper purchase order and generate the invoice.
Verify totals:
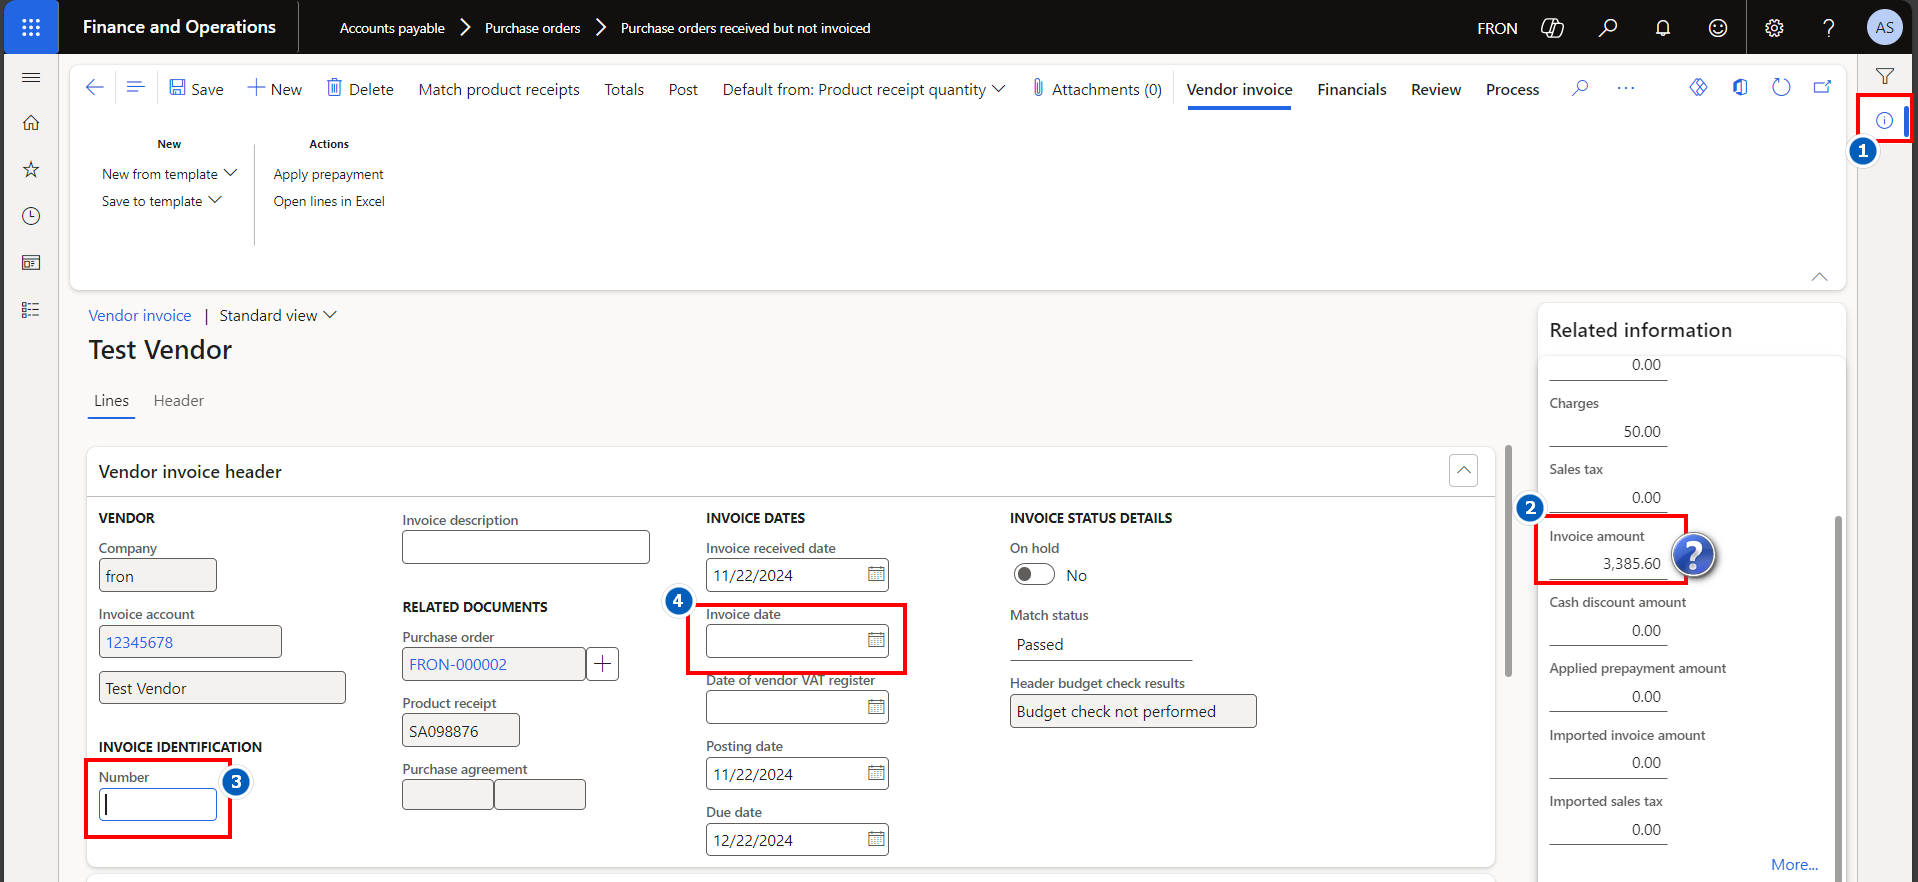
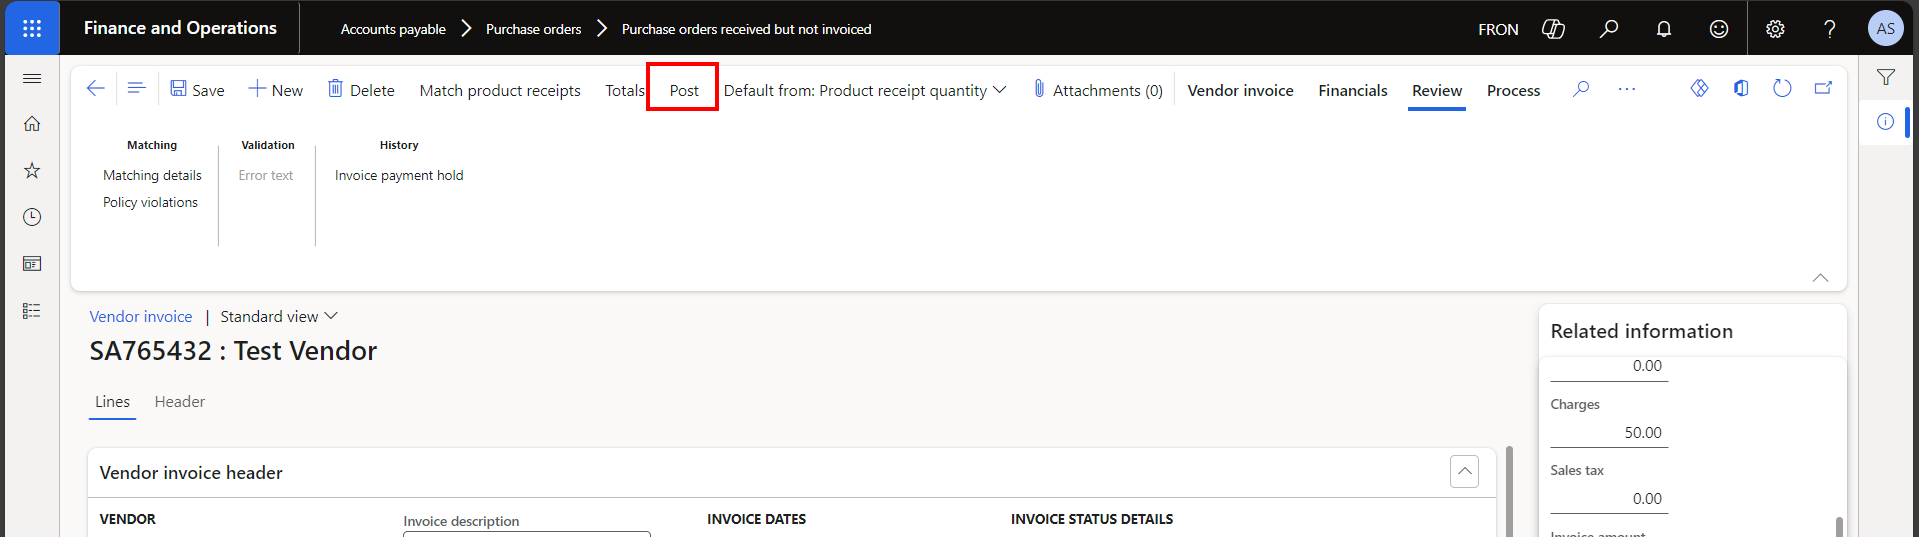
On the invoice that opens, verify that the invoice total = vendor invoice. If so, enter the invoice number and date.
(Optional) override amounts:
If the total (#2) does not match, the line amounts will need to be adjusted.

This can get complex, so we should discuss what differences we will accept.
Test cases
| 1 | Add a new purchase order header |
| 2 | Add purchase order lines and charges amounts. Spread the charges to the lines. |
| 3 | Confirm the purchase order, ensuring the purchase order confirmation document matches what is expected from tests 1 and 2 |
| 4 | Receive the purchase order |
| 5 | Generate the invoice, review the total and post |


Leave a Reply
You must be logged in to post a comment.

