
Microsoft Dynamics 365 Vendor Collaboration- Part Two
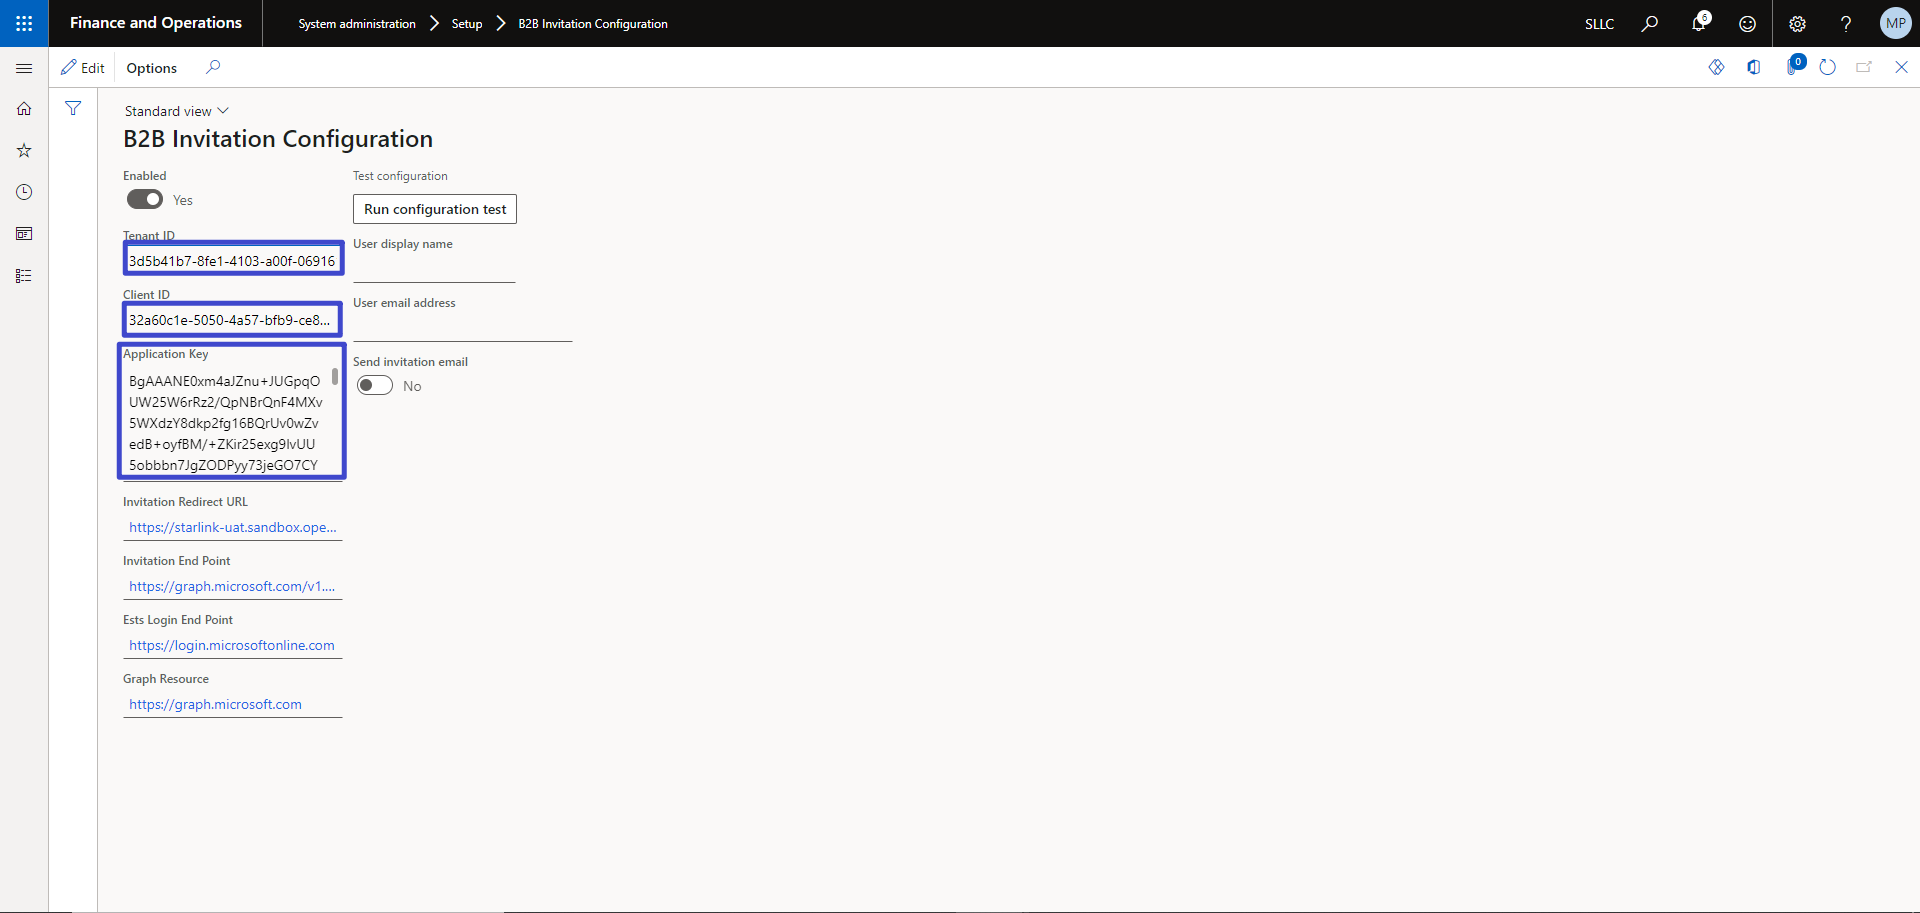
B2B Azure Directory Configuration:
You can automatically export business-to-business (B2B) users to Azure Active Directory (Azure AD).
In the past, B2B users were exported manually to a .csv file. Then the Azure AD tenant administrator had to use this file to manually add the users to Azure AD using the Azure portal.
To enable the automatic export feature, a one-time setup and configuration process must be completed. When the process is completed, you can use the Provision Azure AD B2B user workflow task to automatically export B2B users to Azure AD. The one-time set up and configuration means that you’ll need to:
1. Set up a B2B invitation service application in Azure AD.
2. Configure the B2B invitation service settings in finance and operations.
Navigation: System administration → Setup → B2B Invitation Configuration
Click URL: https://learn.microsoft.com/en-us/dynamics365/fin-ops-core/dev-itpro/sysadmin/implement-b2b#set-up-a-b2b-invitation-service-application-in-azure-ad
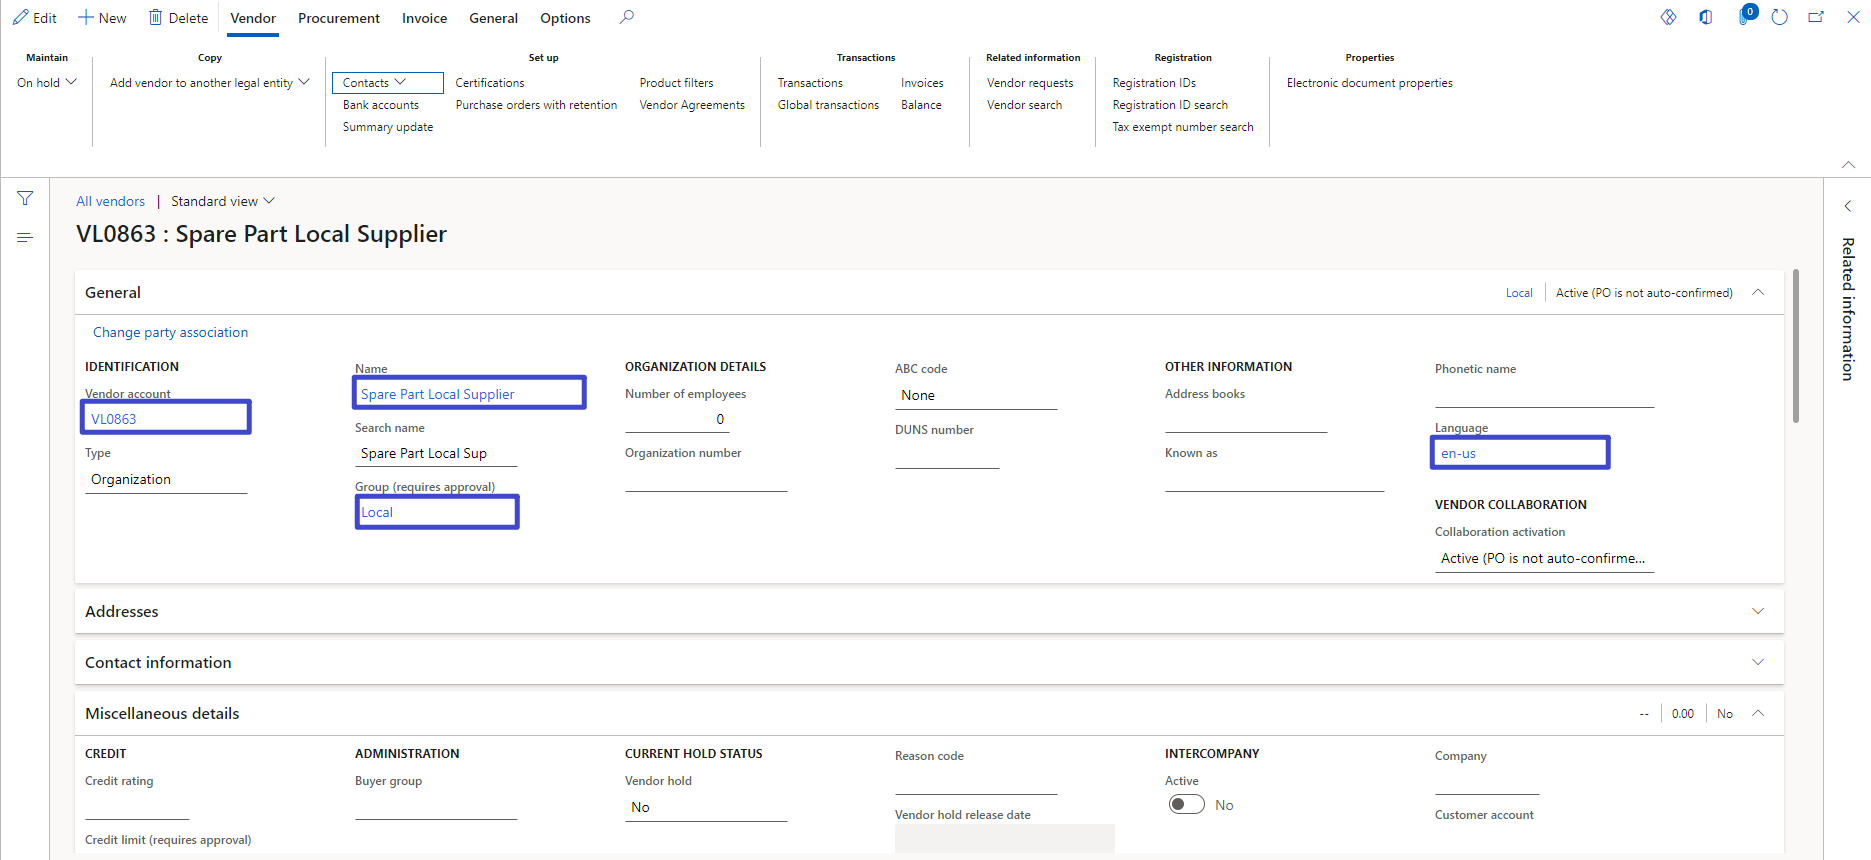
Create a Vendor
Navigation: Account payables → Vendors → All vendors
1. Vendor account, VL0863
2. Enter, vendor name, VL0863
3. Select, group, Local
4. Select Language,
8.1.
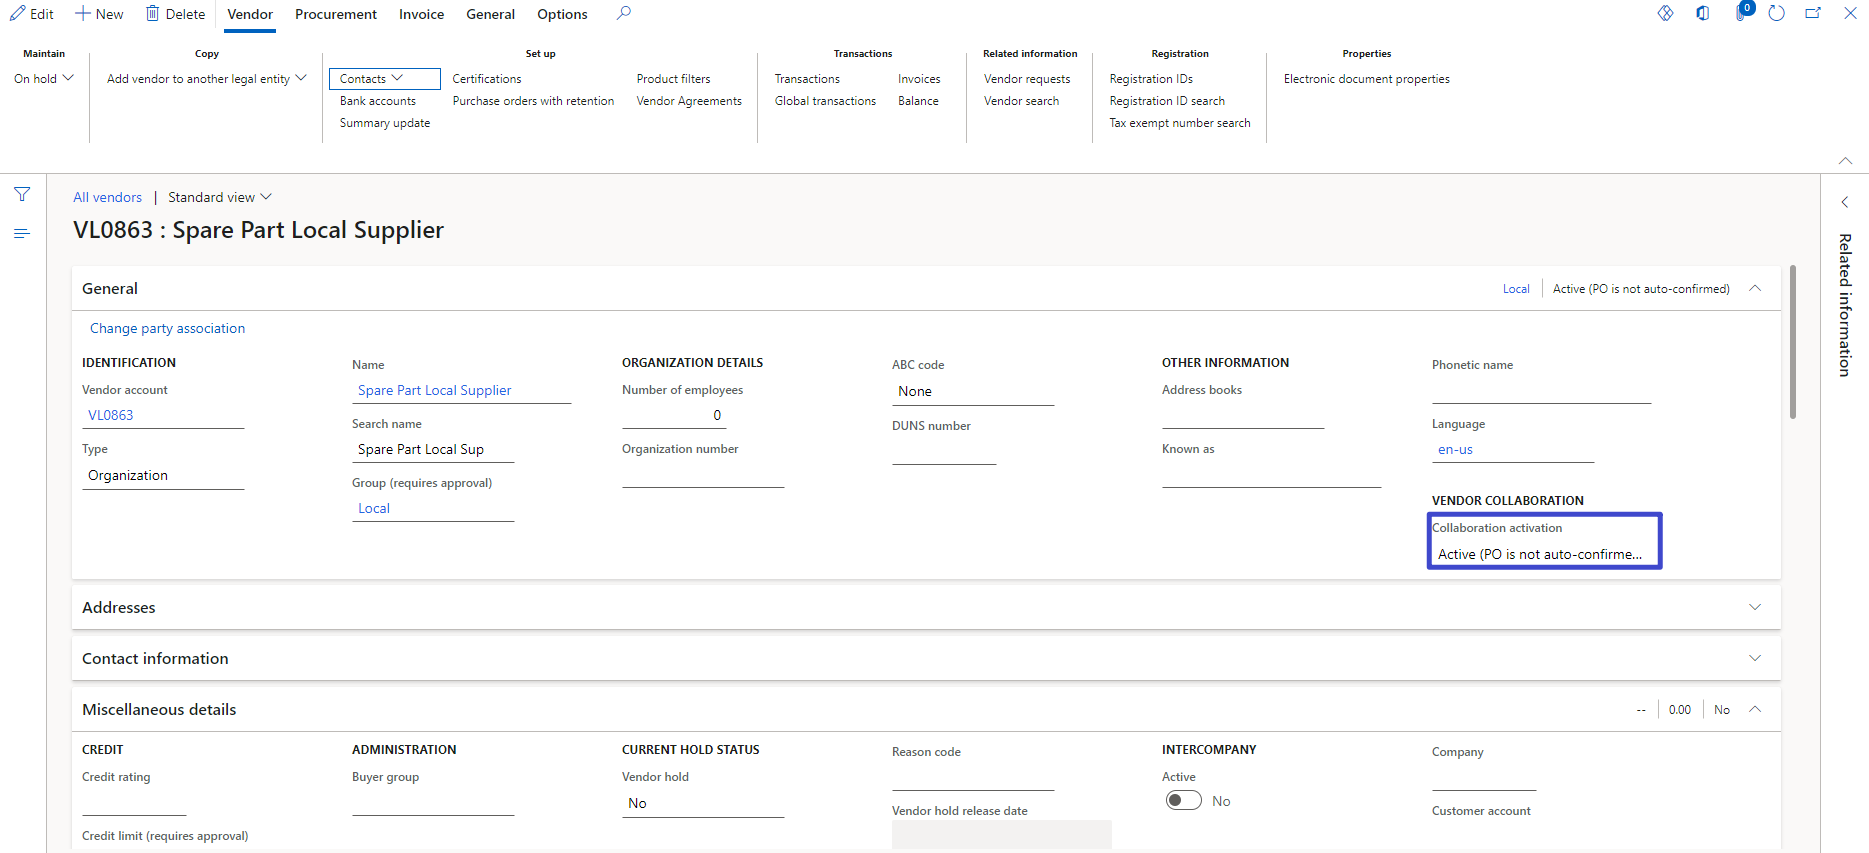
Activate Vendor Collaboration Functionality
1. Enable vendor collaboration activation, Active (PO is not auto-confirmed)
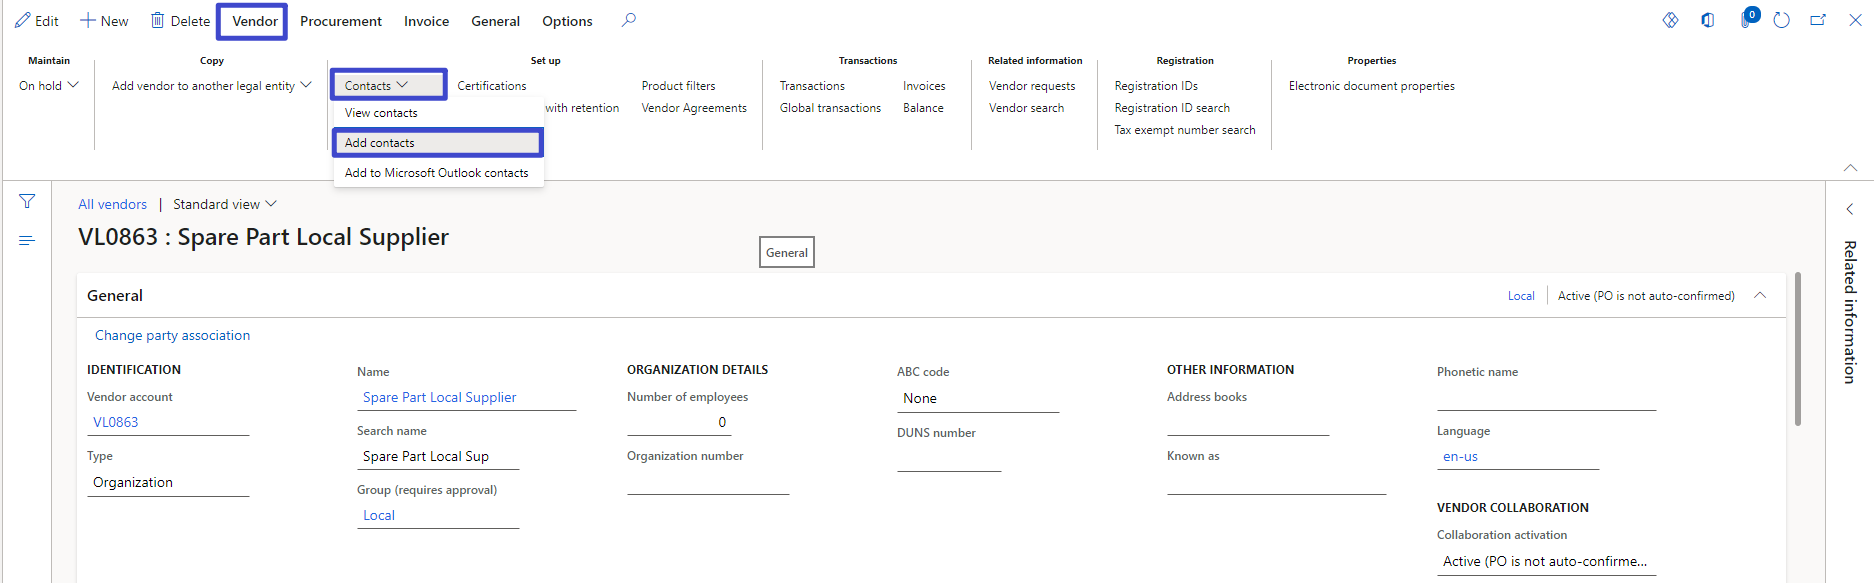
Define Vendor Contact
1. Click, contacts
2. Click, add contact
3. On action pane, click a new button
4. Contact ID, System generated
5. Contact for, Spare Part Local Supplier
6. First time Mike miller
7. Last Name, Miller
8. Language, en-us
9. Enabled, yes Vendor collaboration access allowed
10. In contact information, fast tab
11. Type, Email address 12. Contact number/address, mikemiller09855@outlook.com

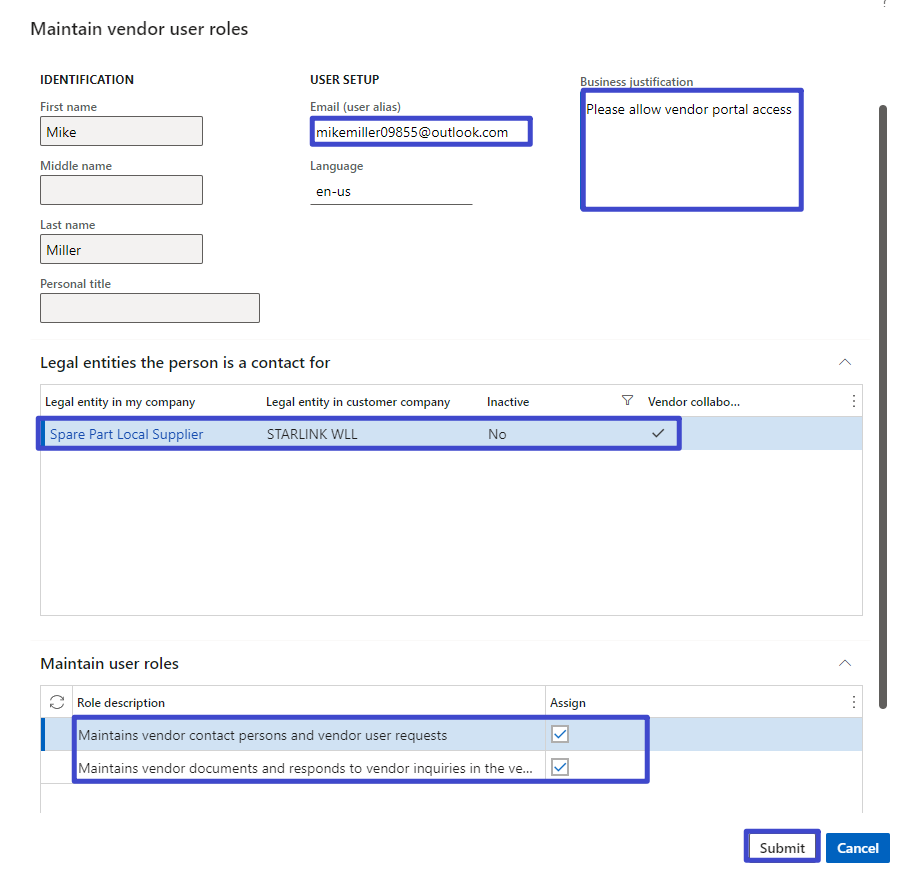
Define Provision Vendor User
1. Enter, vendor email, mikemiller09855@outlook.com
2. Enter Business Justification, Please allow vendor portal access
3. Enabled, maintain user roles
4. Click, submit button
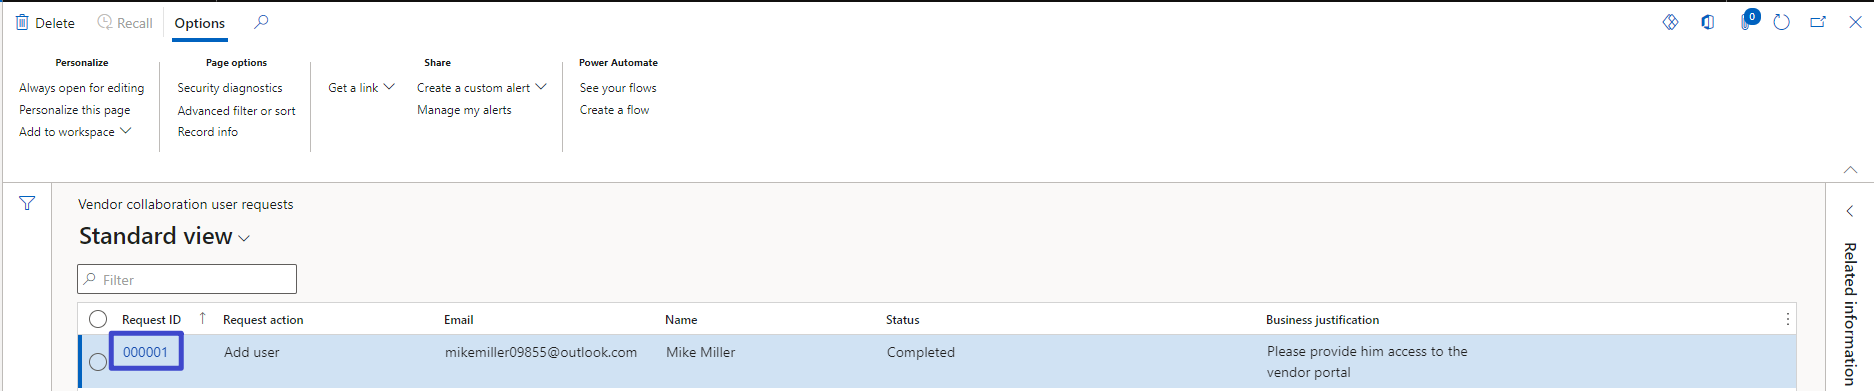
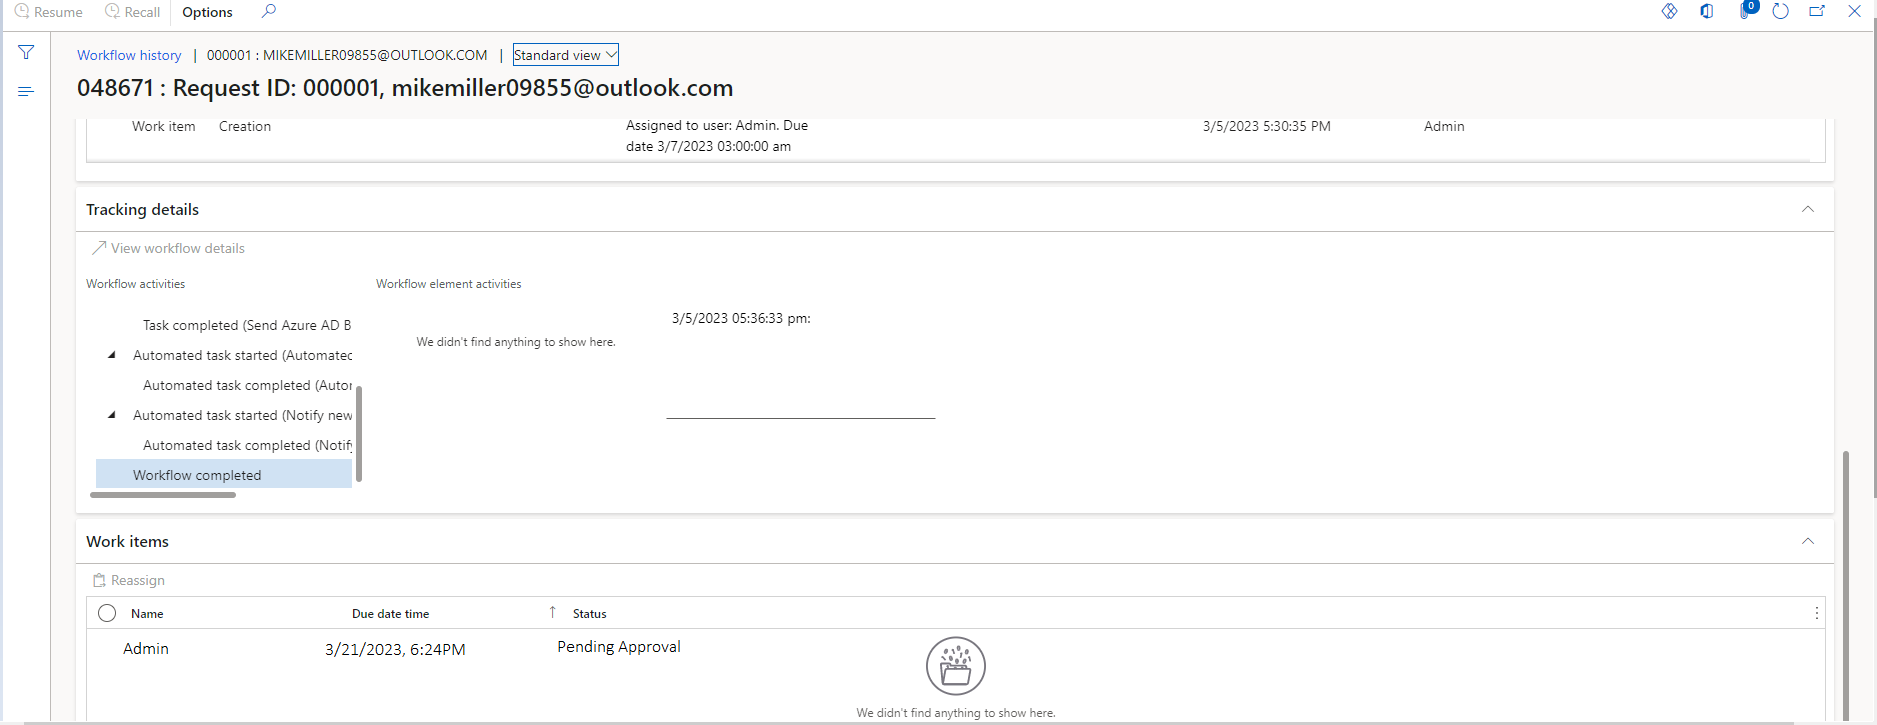
Request ID
Navigation: Procurement and sourcing → Vendors → Vendor collaboration requests → Vendor collaboration user requests
1. Click, request ID
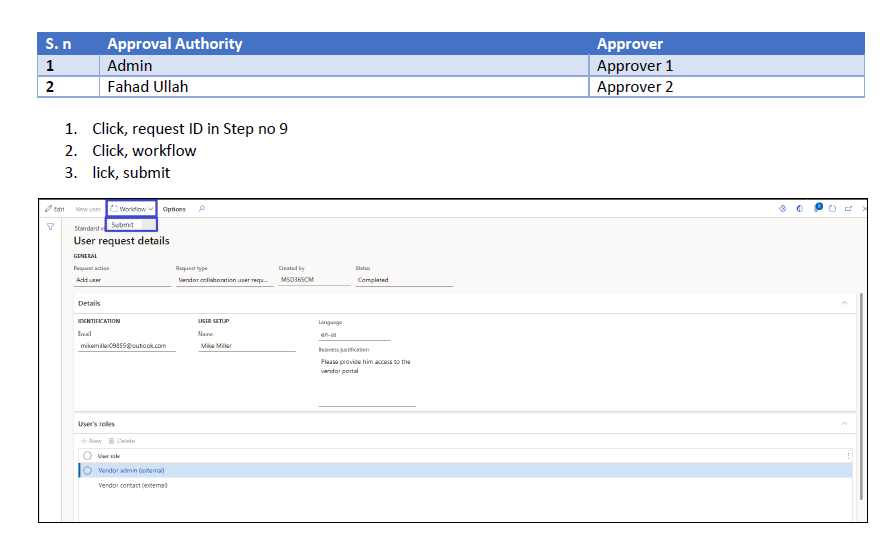
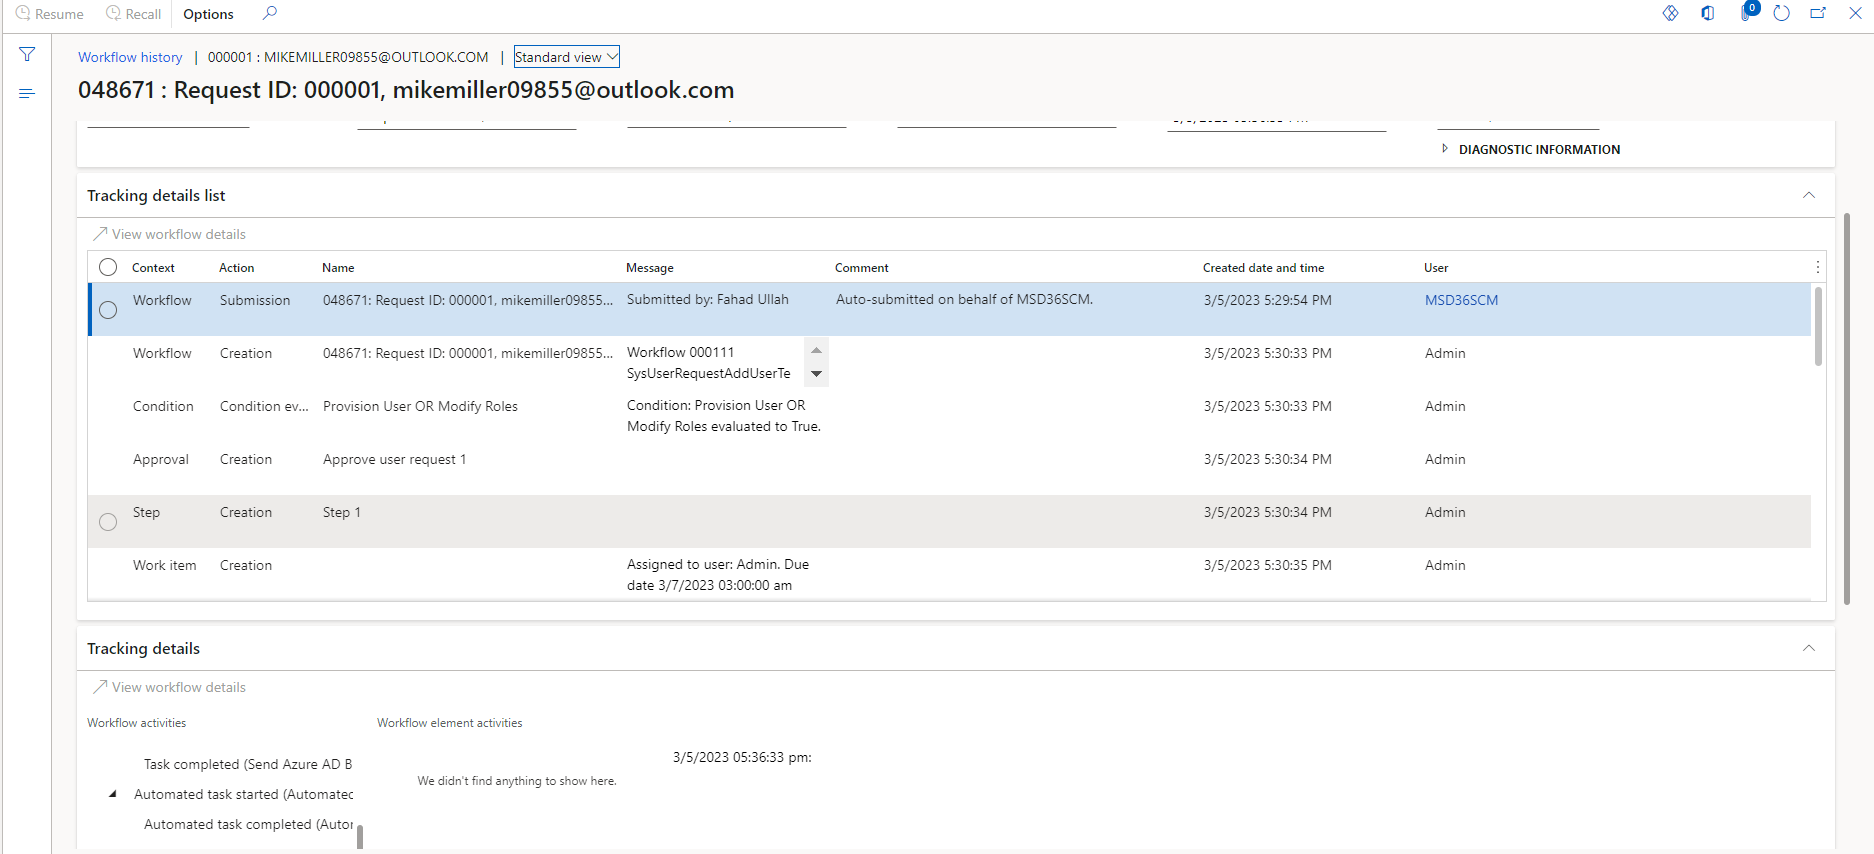
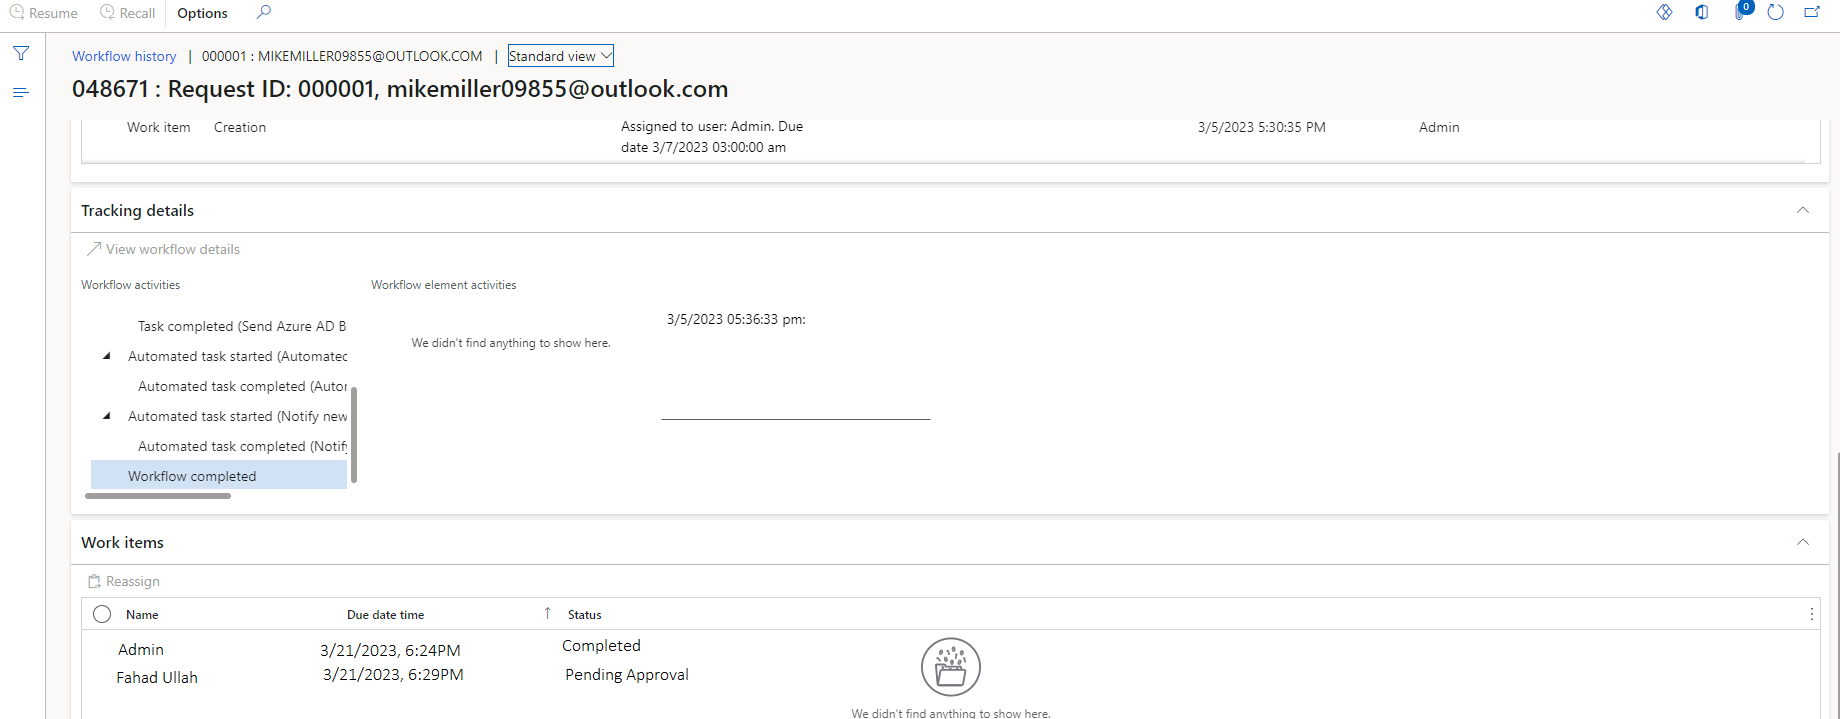
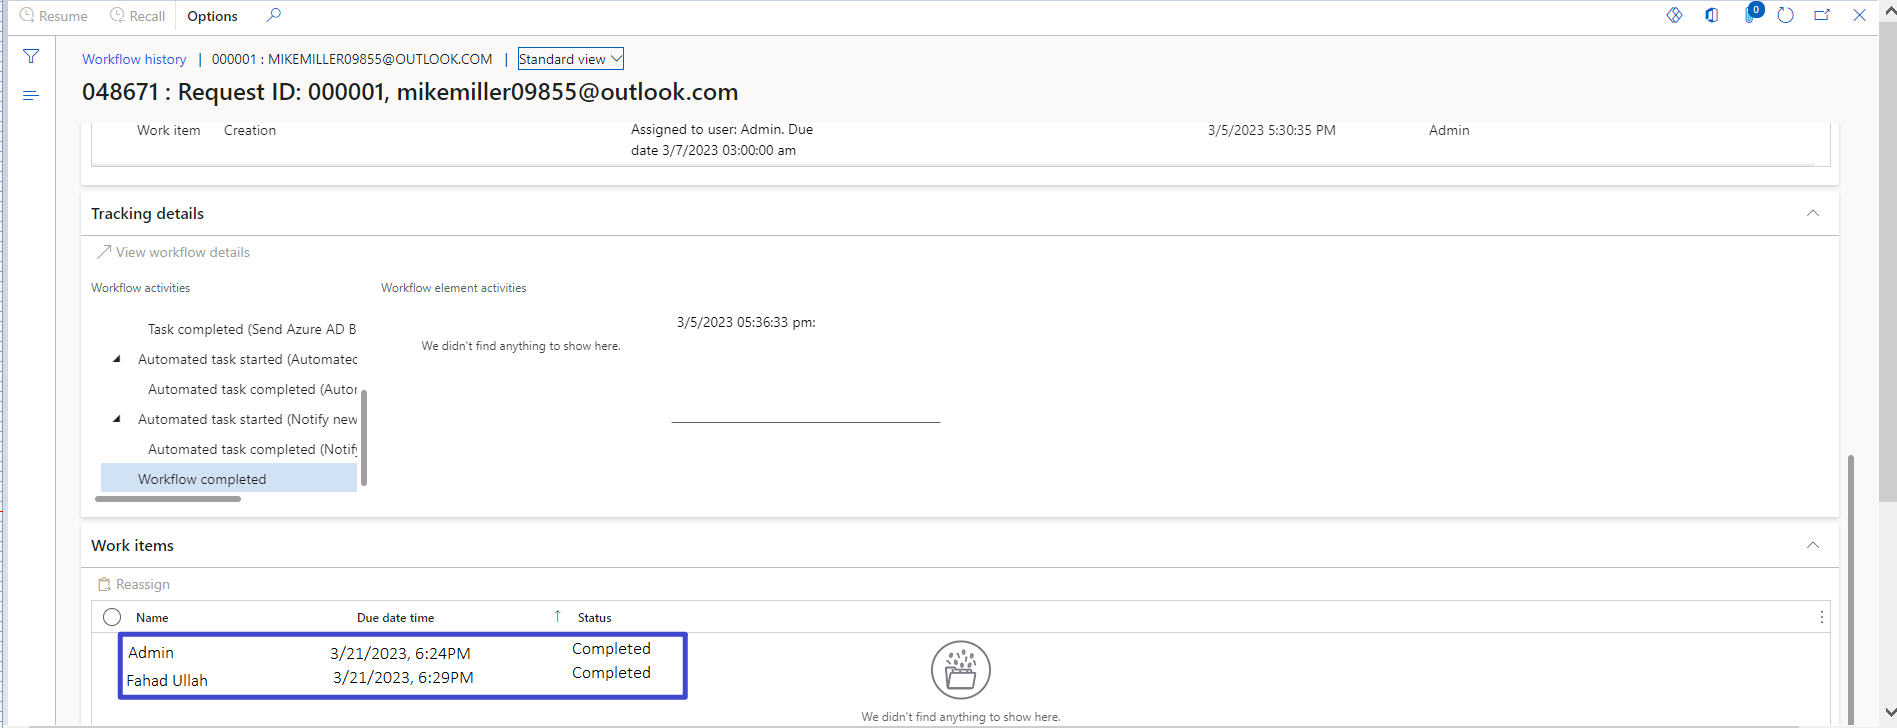
Workflow Approval:
Vendor Received Invitation
1. Vendor will receive Invitation on official vendor email.
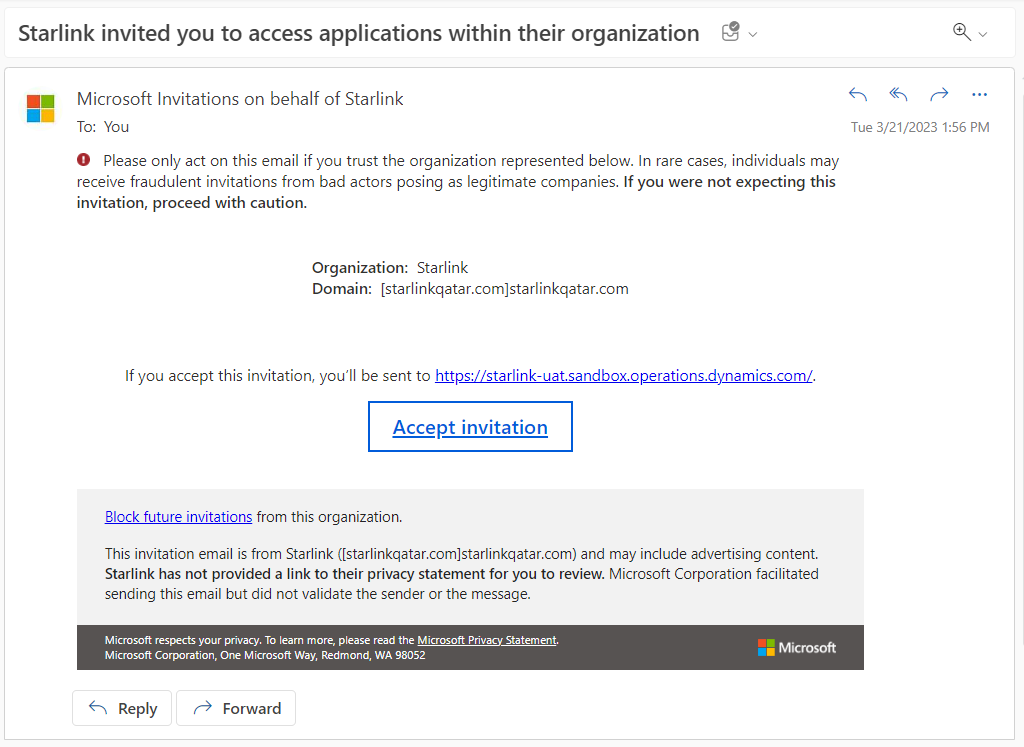
Click Accept Invitation
1. Click, accept invitation

Access Vendor Portal
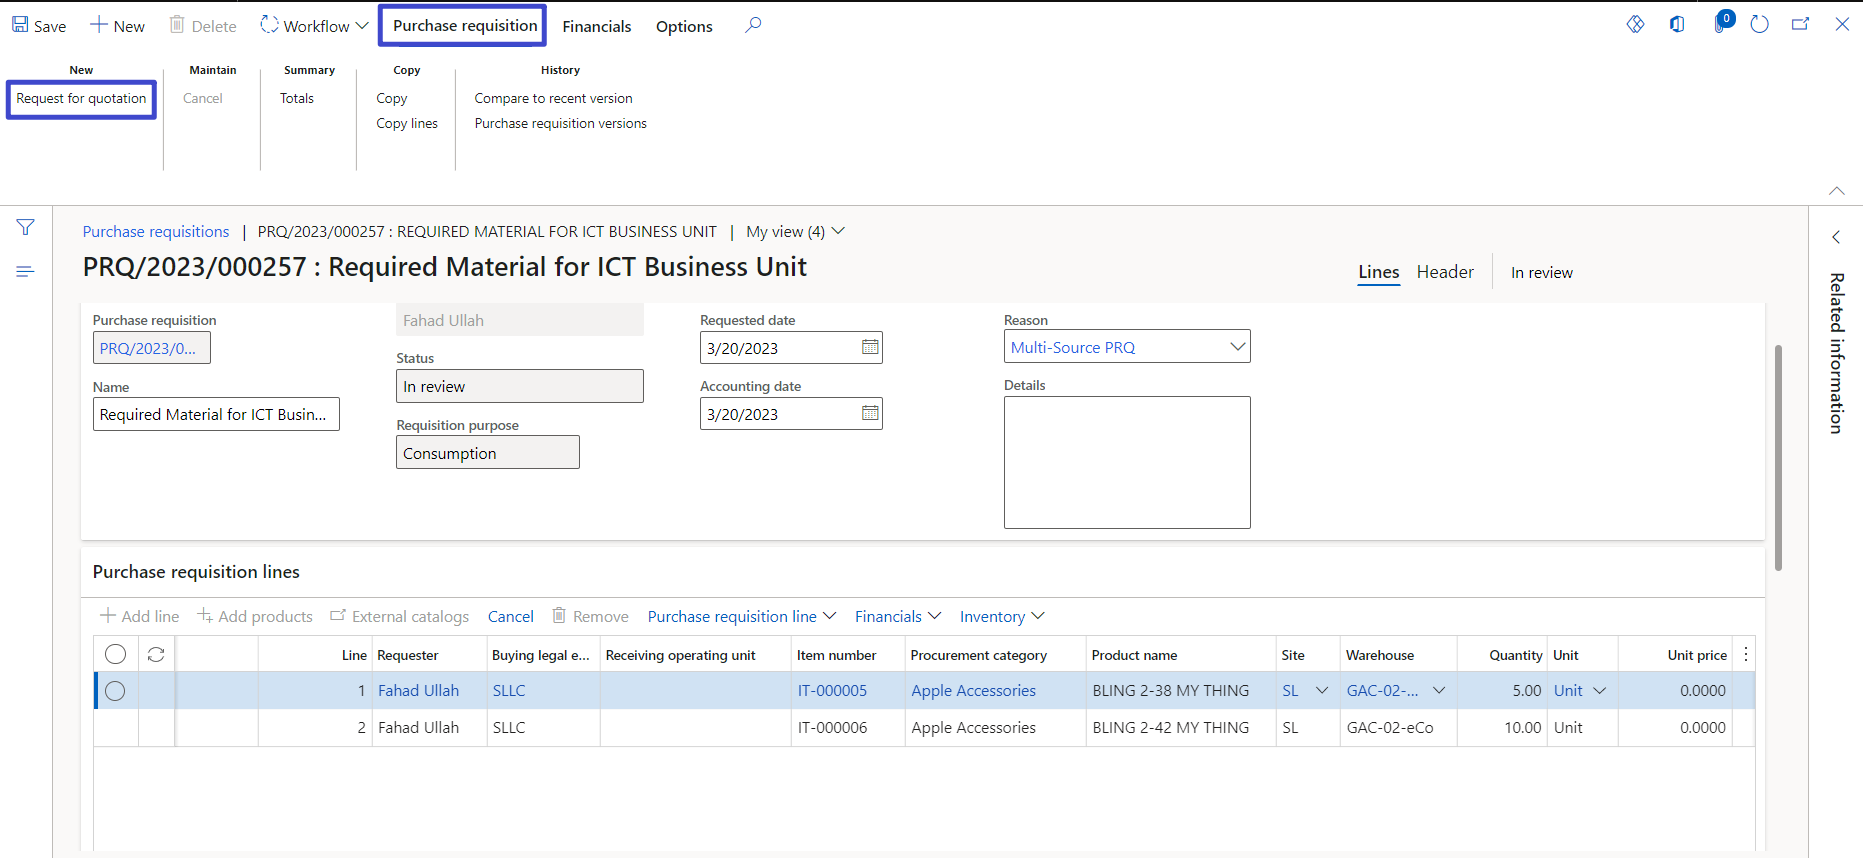
Create Request for Quotation
Navigation: Procurement and sourcing → Purchase Requisitions → All Purchase Requistion
1. PRQ received by procurement admin
2. On action pane, click Purchase requisition
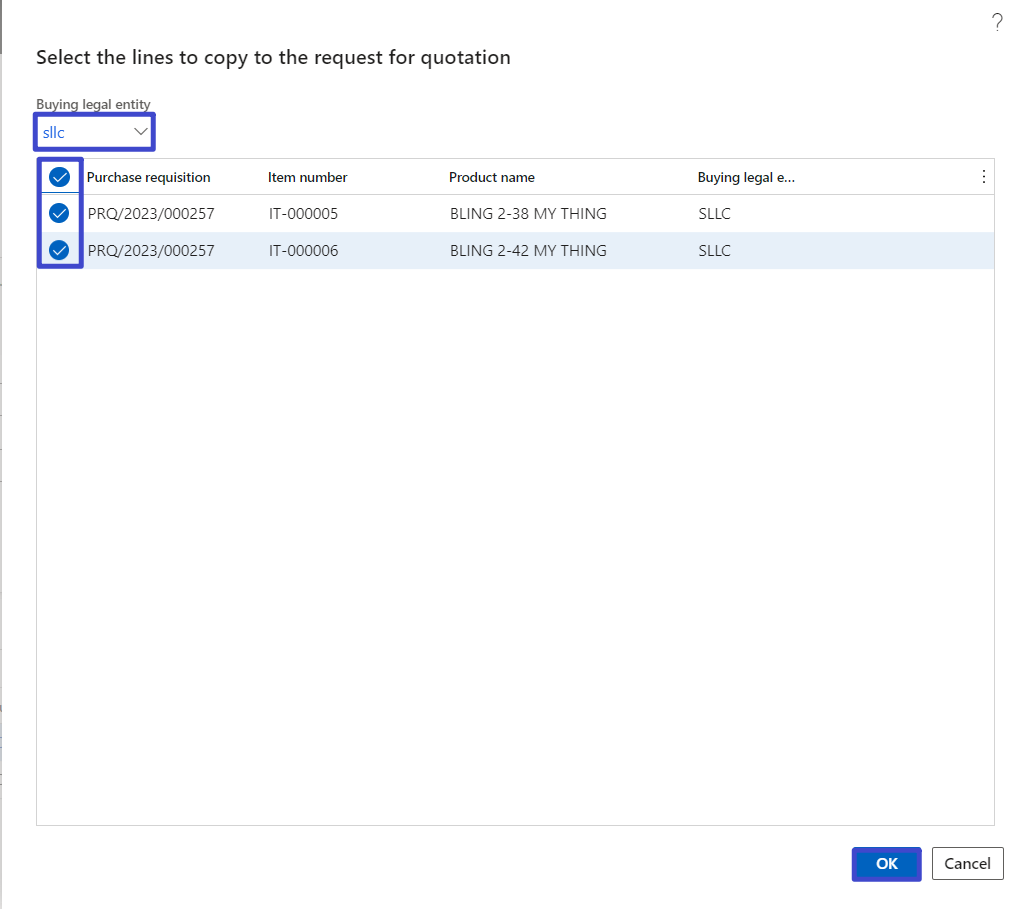
3. On action pane, click Request for quotation
4. Select buying unit legal
5. Enabled, purchase requisition lines
6. Click, ok button
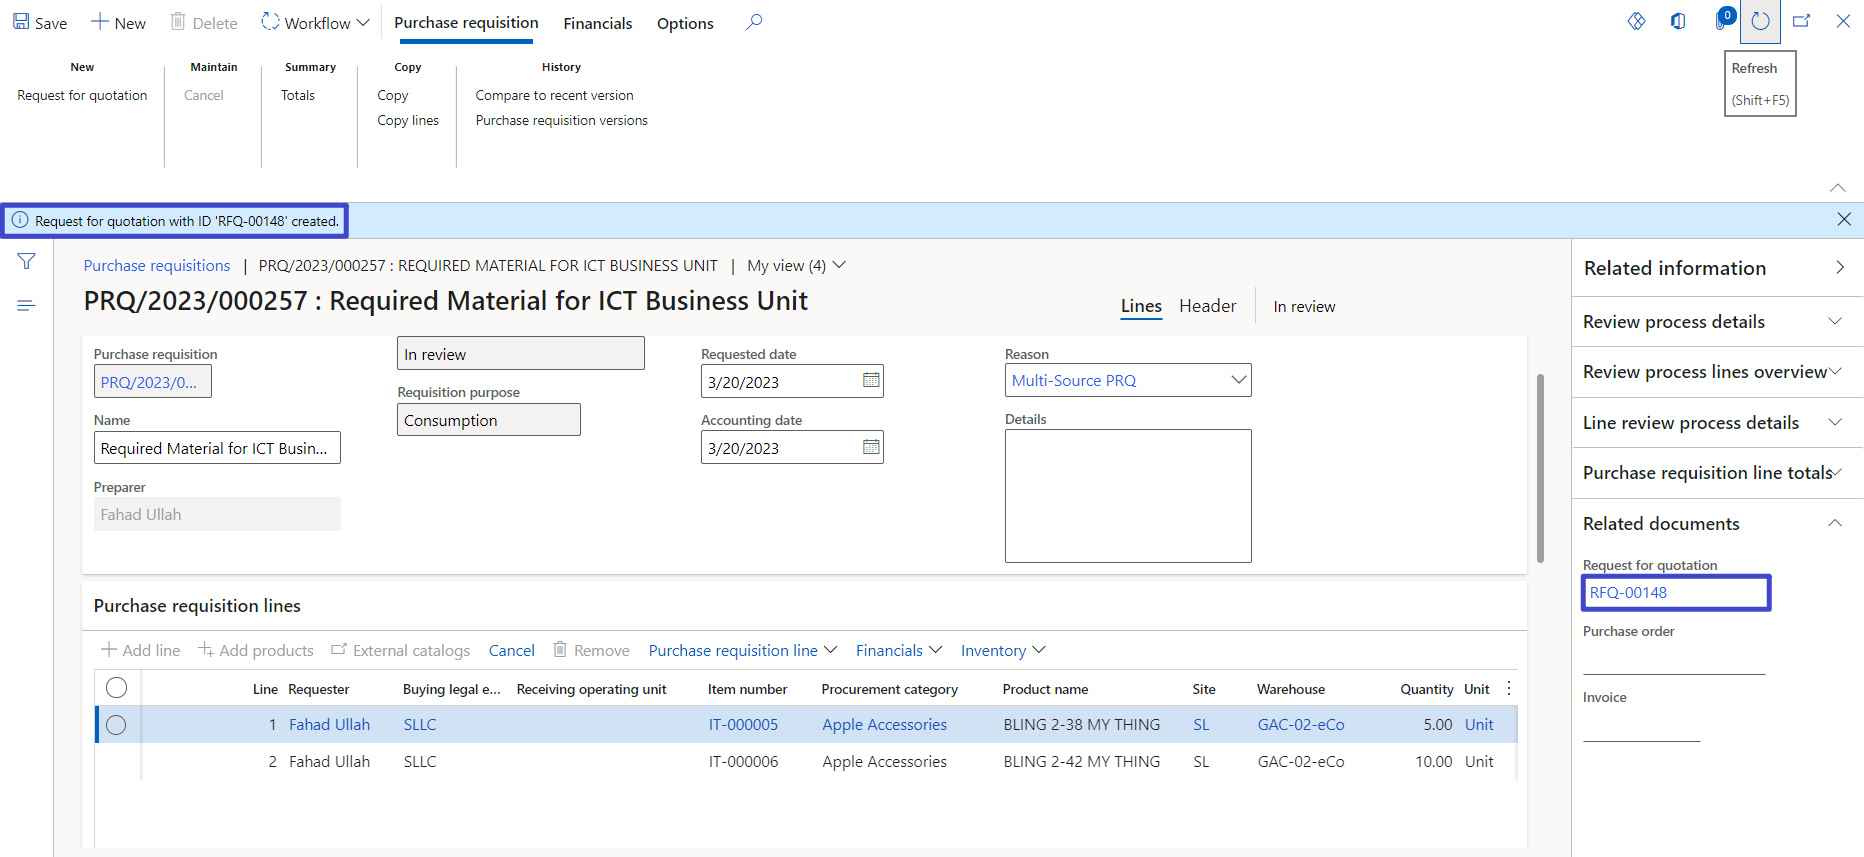
In related information, click RFQ-00148
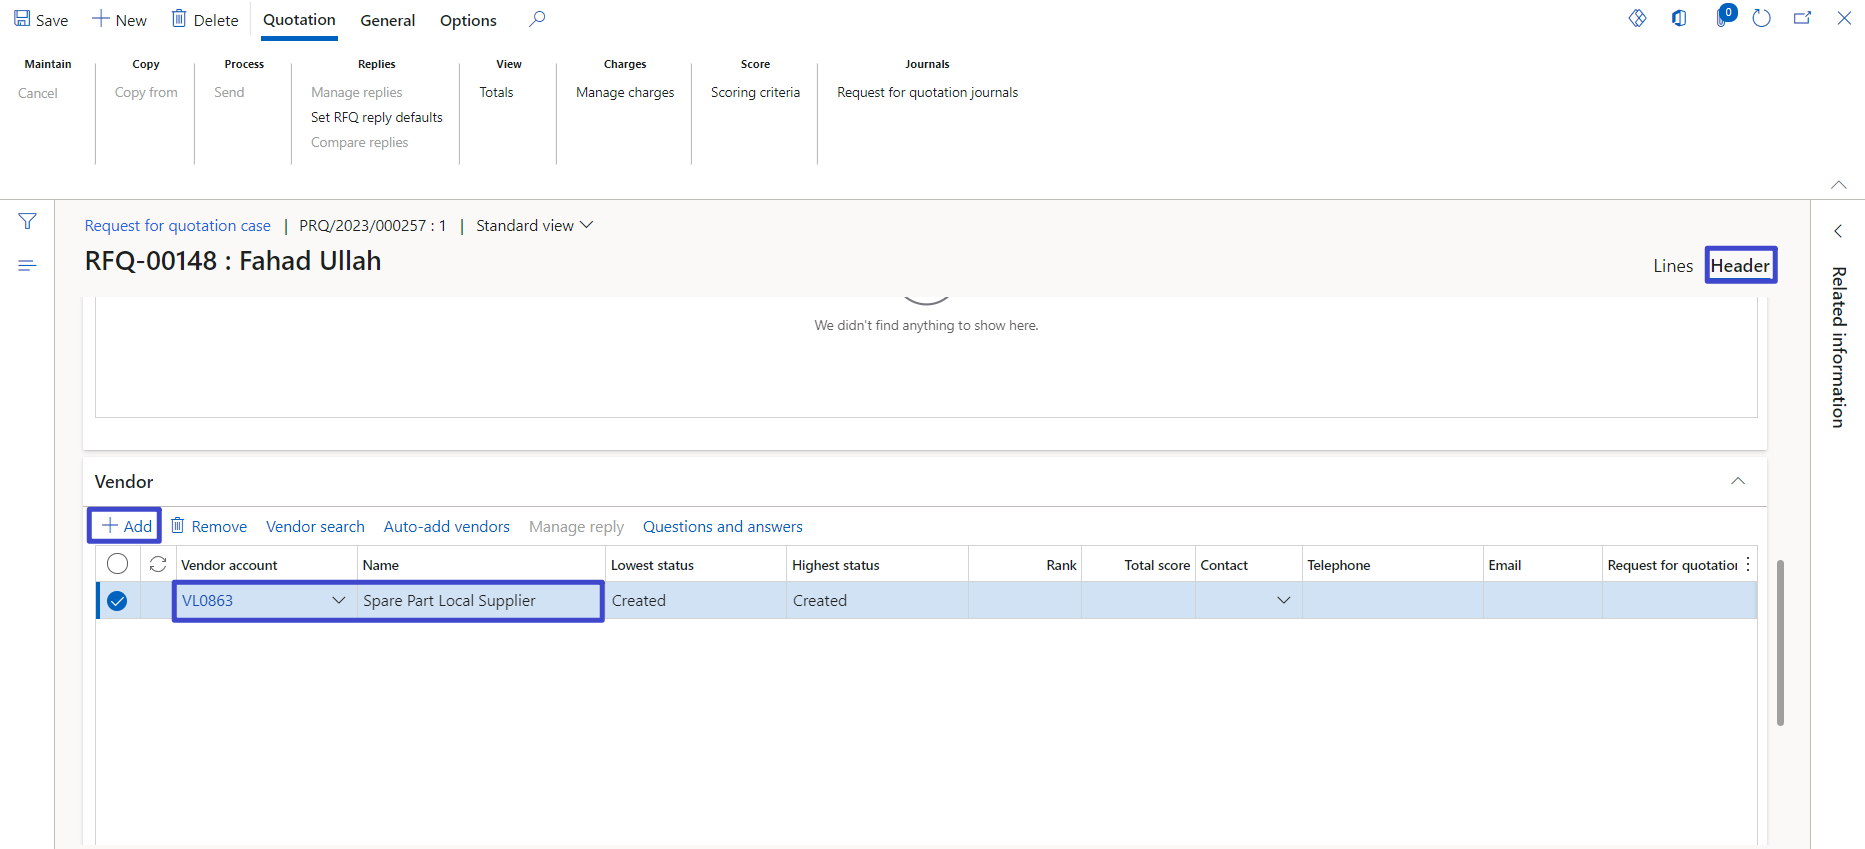
Vendor Selection
1. Click, header
2. In vendor, fast tab, click add button
3. Search vendor account and select, VL0863
Vendor Question and Answer
1. Enable, allow vendor correspondence functionality, Yes
2. Select buyer group, ICT
3. Enter, expiration date and time, 3/30/2023 12:00:00 AM
4. Enter, delivery date, 3/29/2023
5. Select, mode of delivery, Del to HOD
6. Select, delivery terms, COR
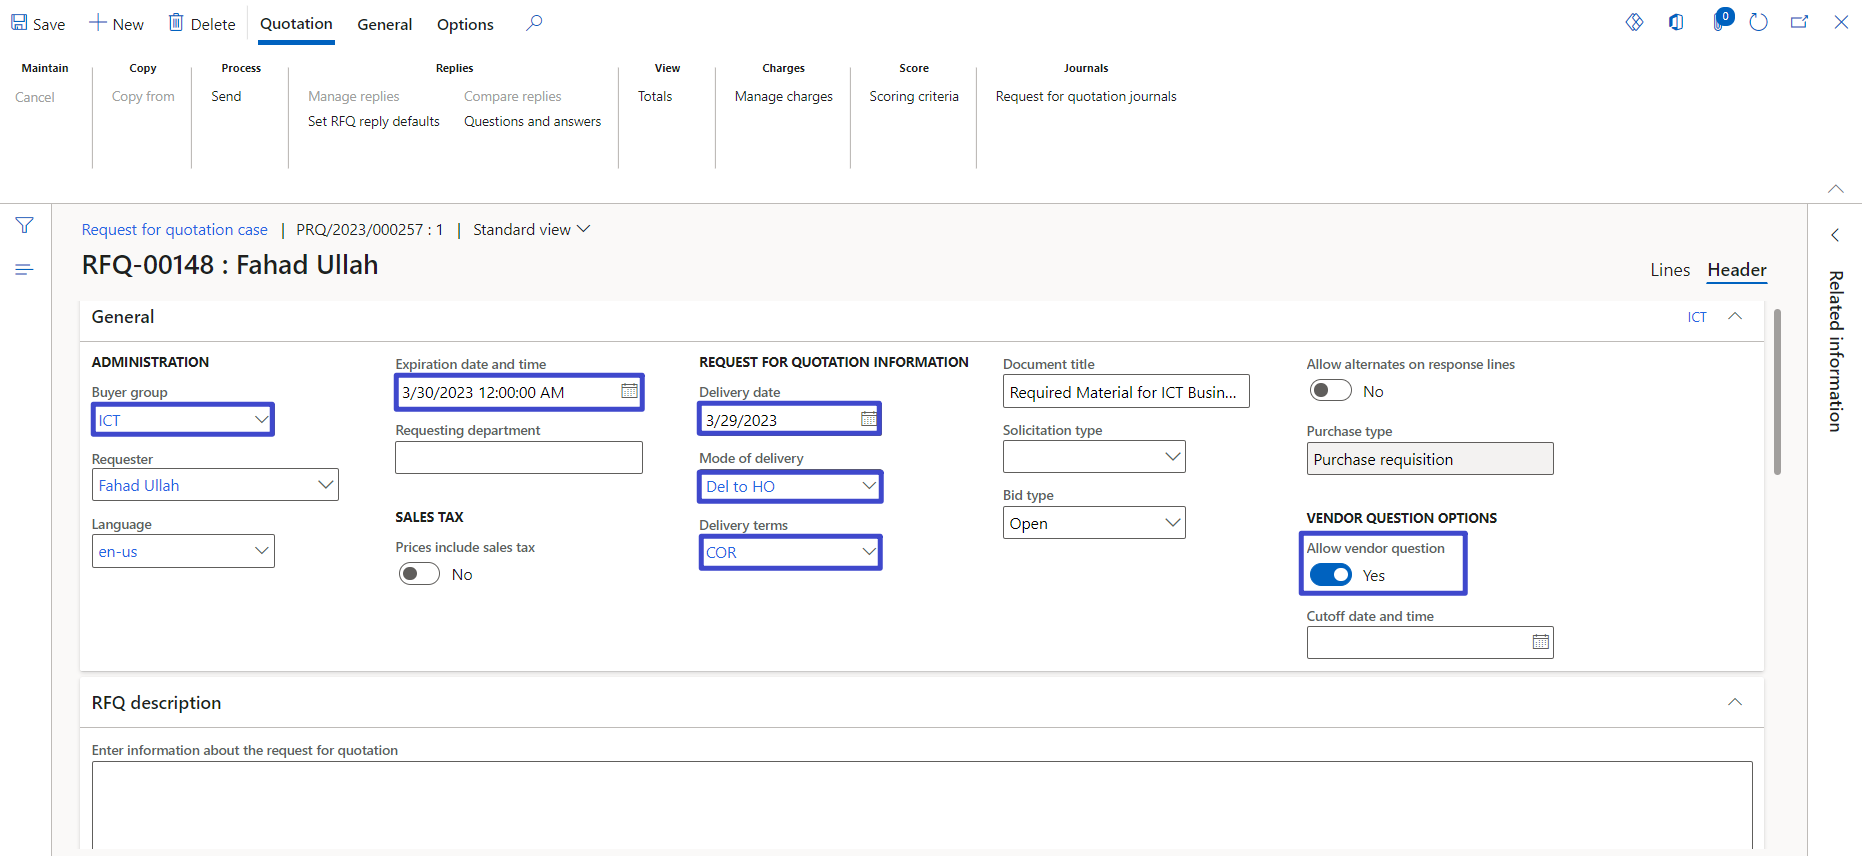
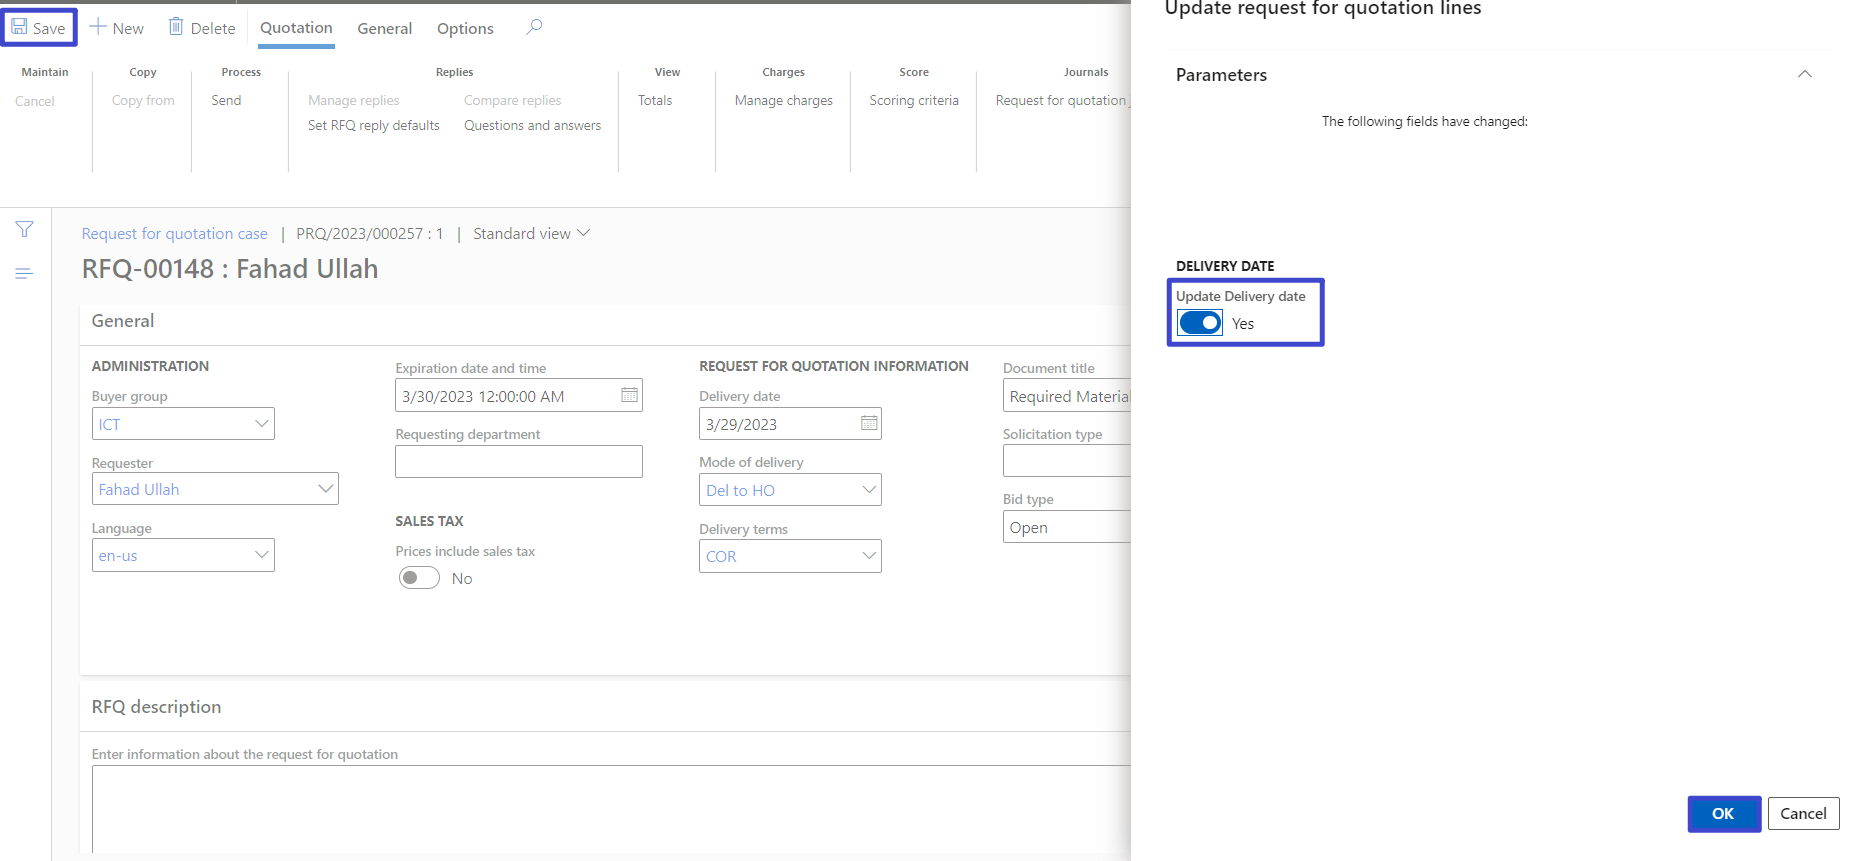
7. Click, save button
8. Enabled, update delivery date, Yes
9. Click, ok button
Click, attachment icon
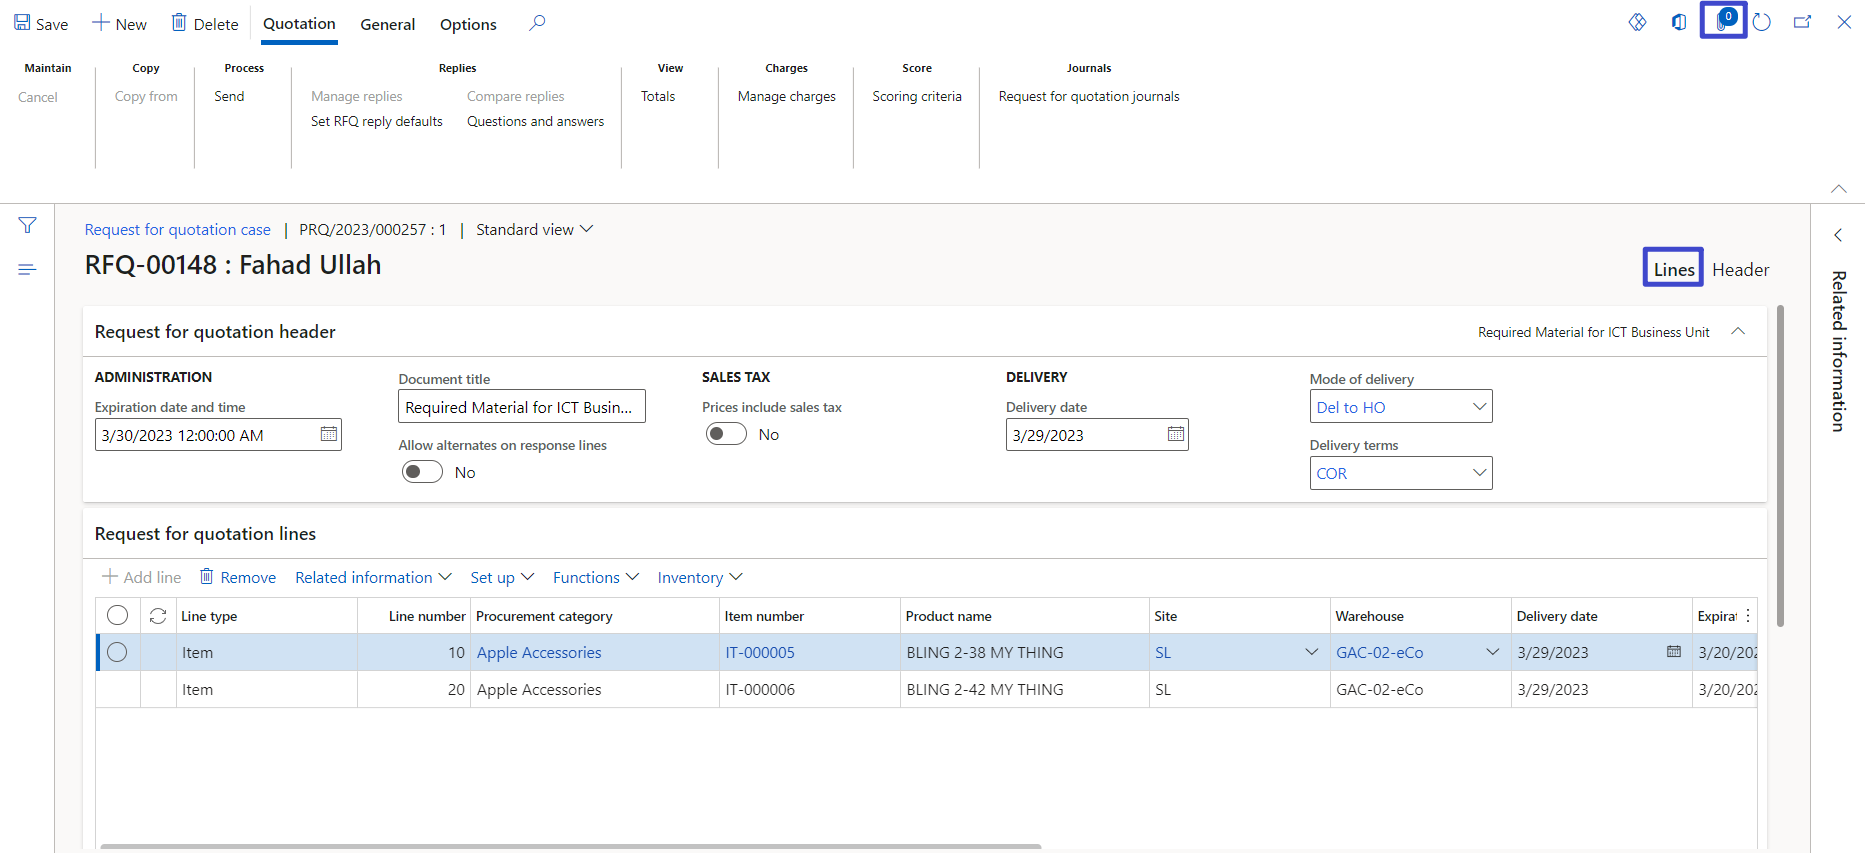
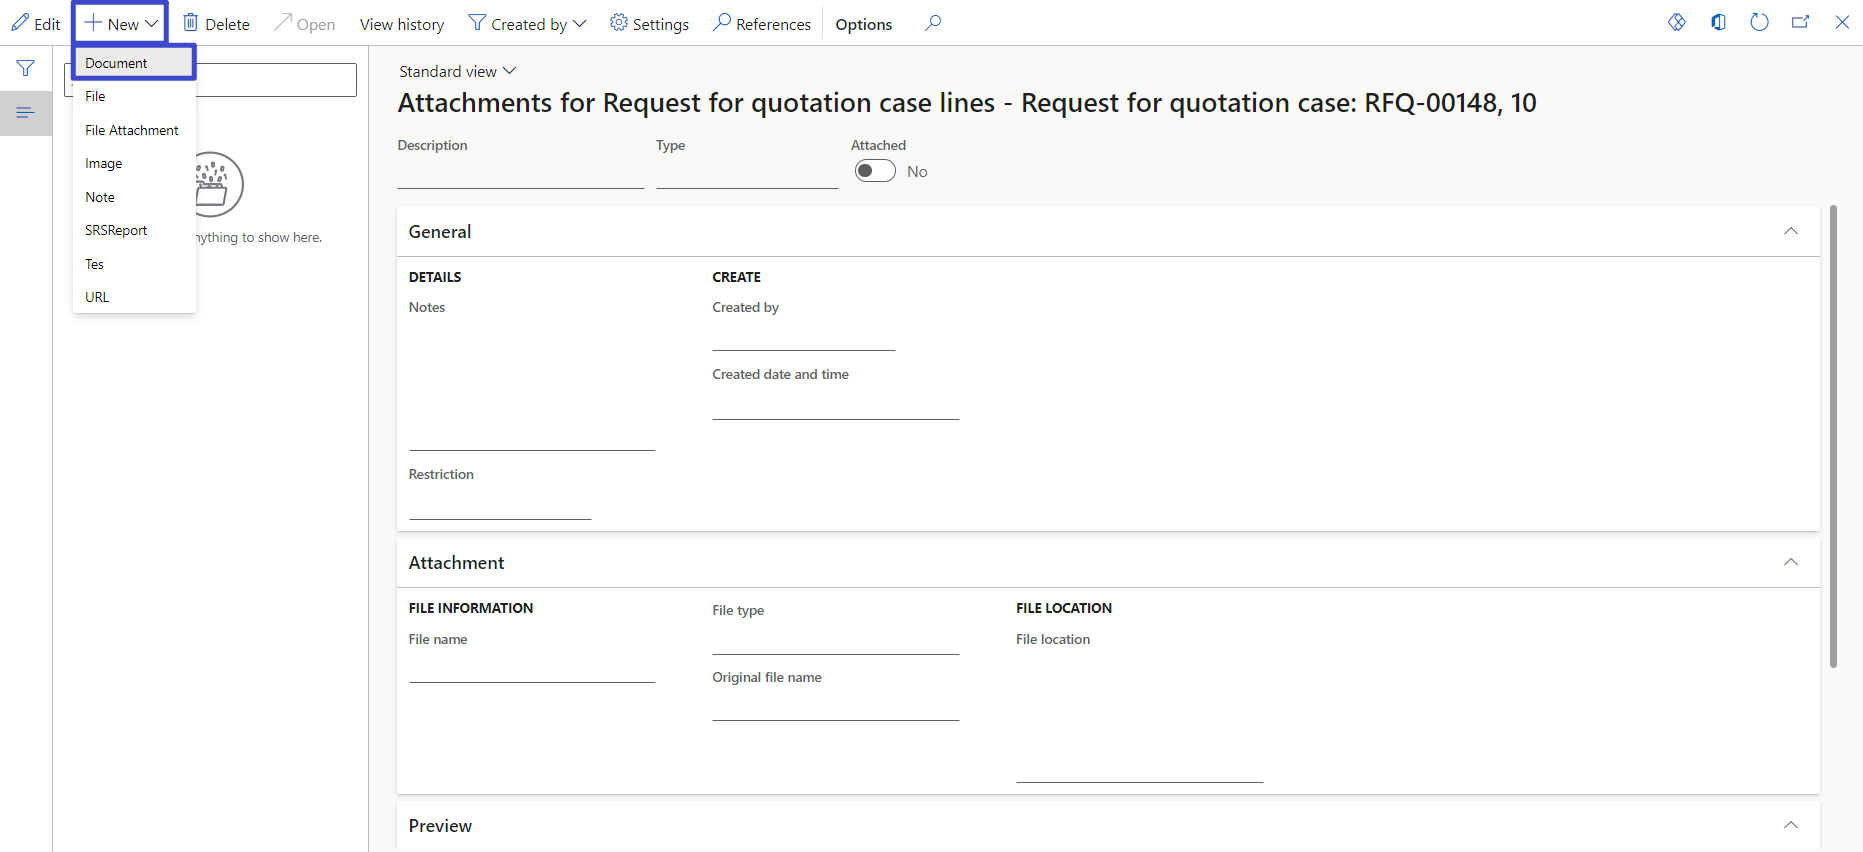
Documents Attachment on Line Wise
1. Click, new button
2. Click, documents
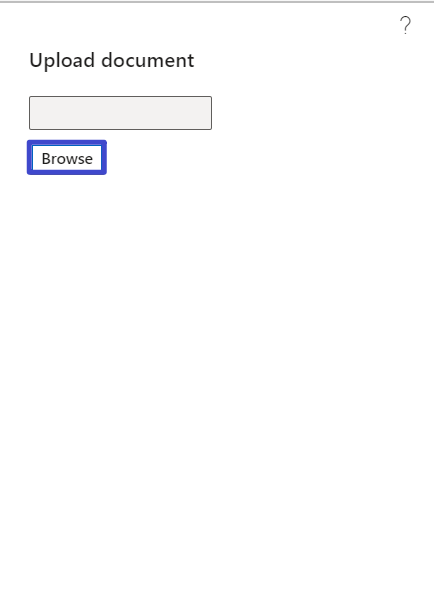
12. Select, file from drive
13. Click, open button
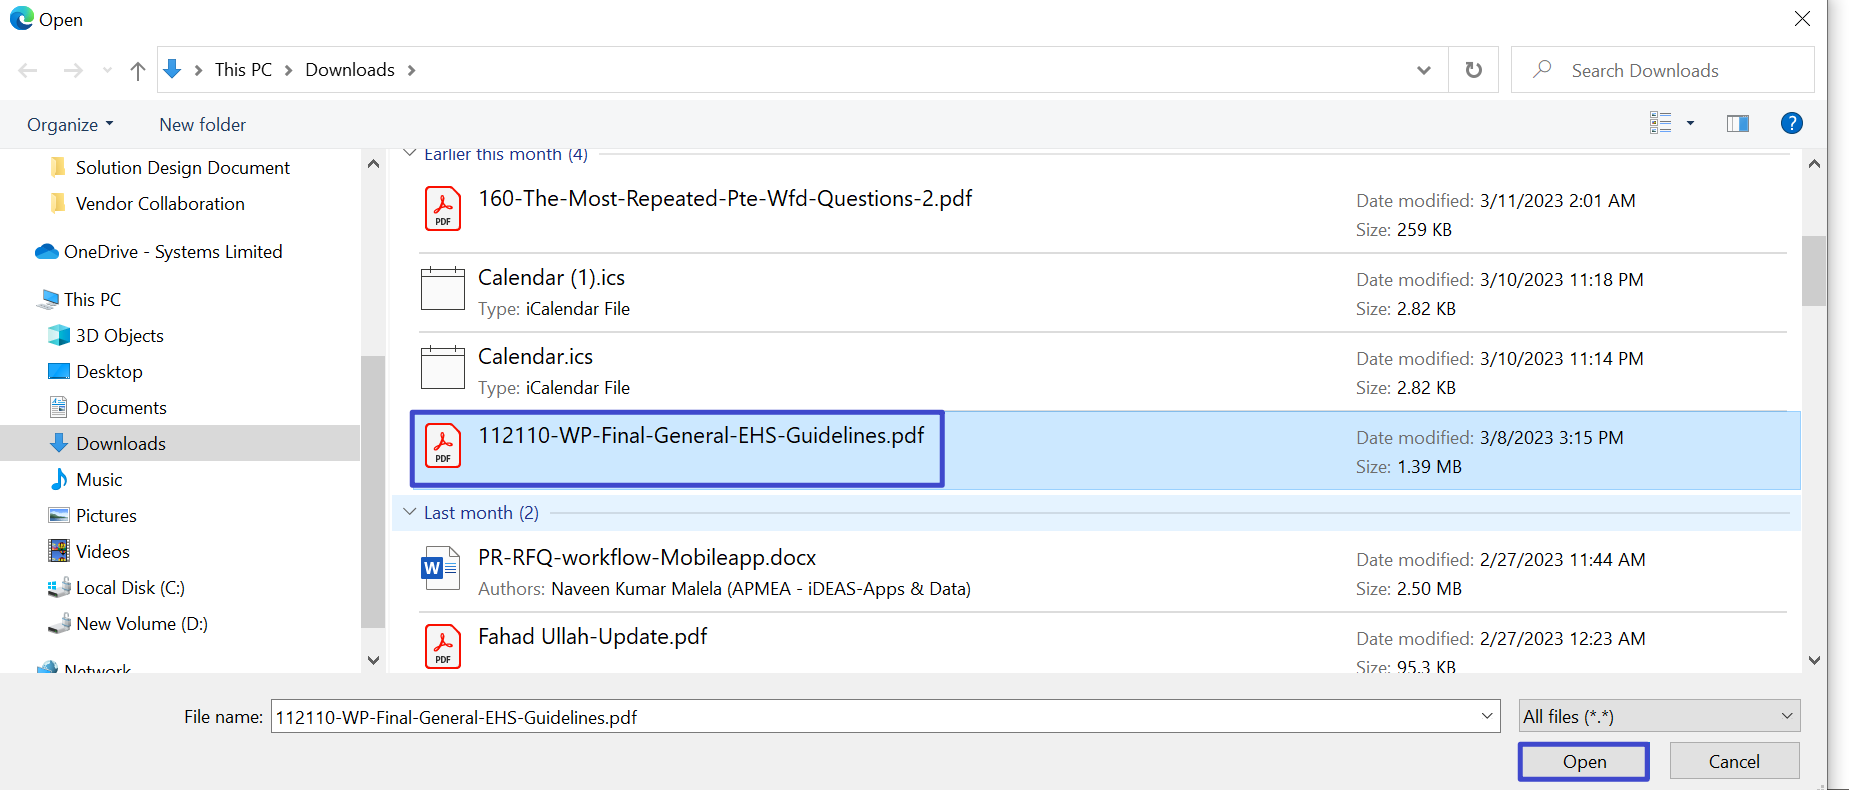
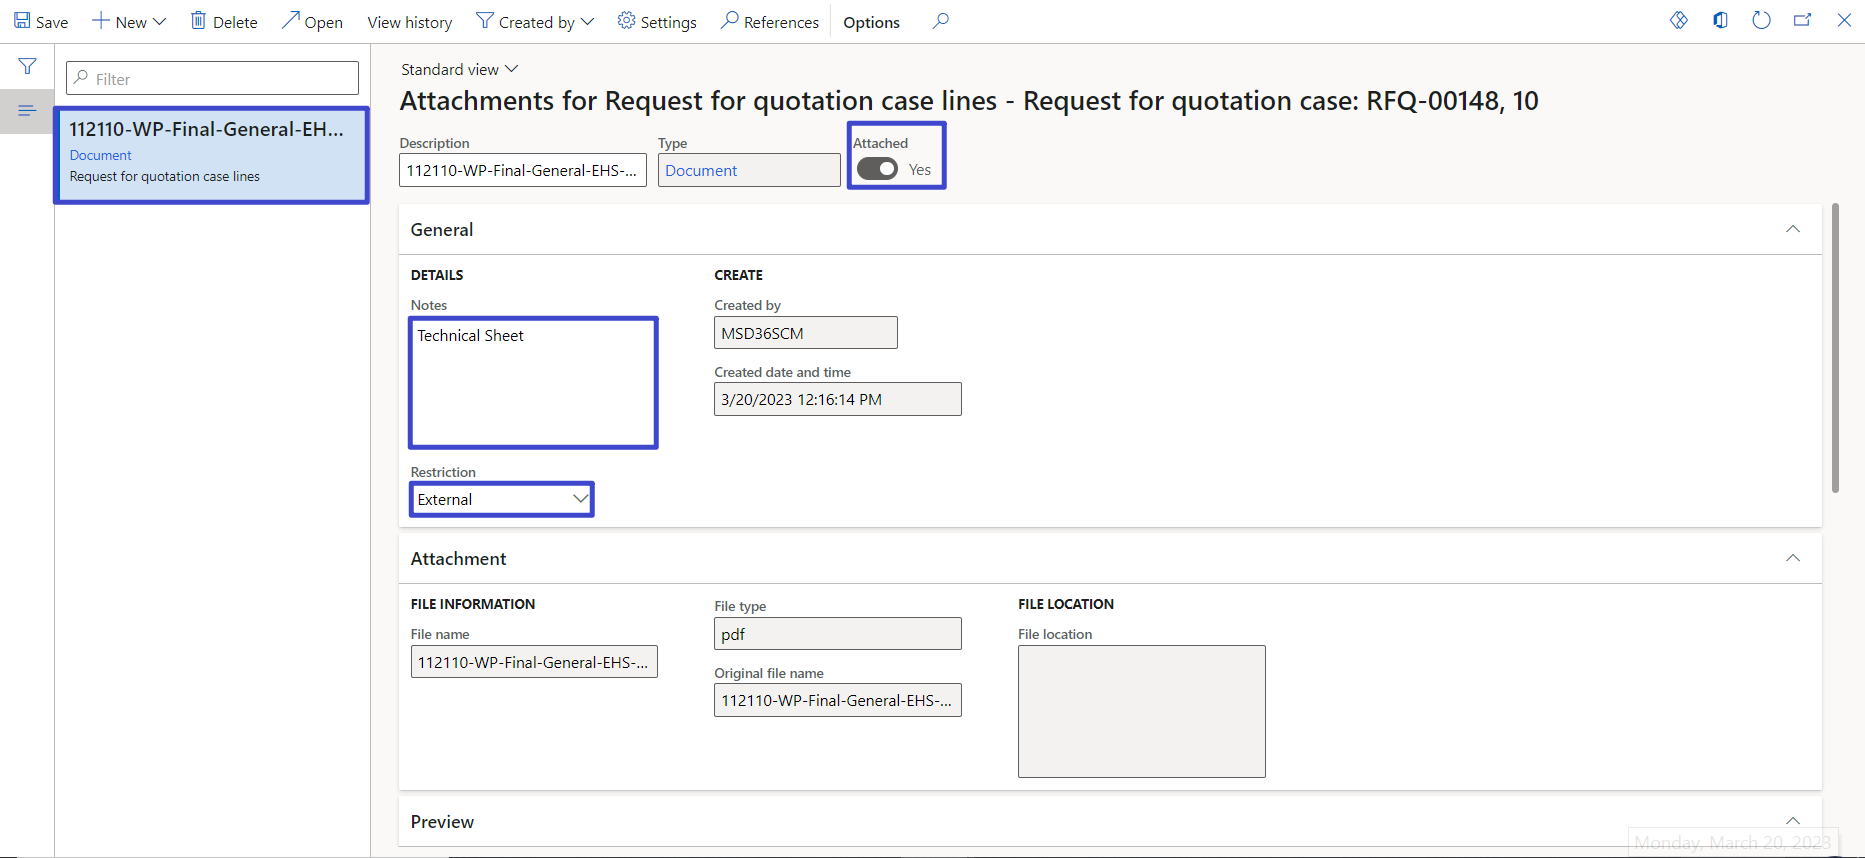
14. File uploaded
15. Enter notes
16. Select restriction, external
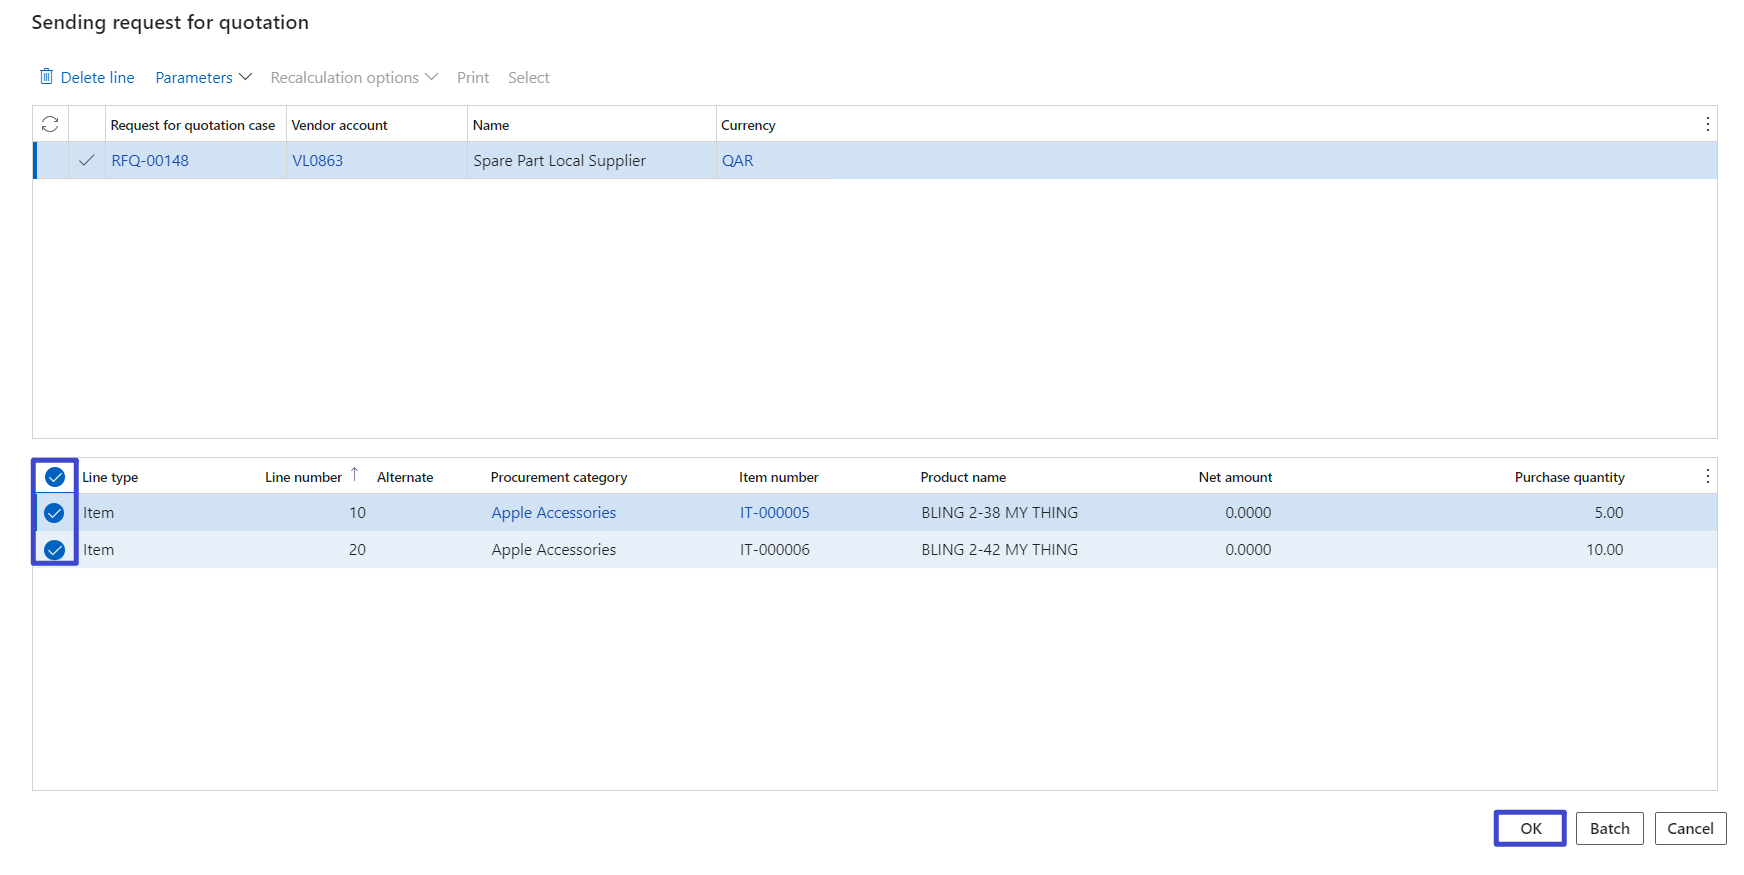
RFQ Sent to Vendor
1. On action pane, click send button
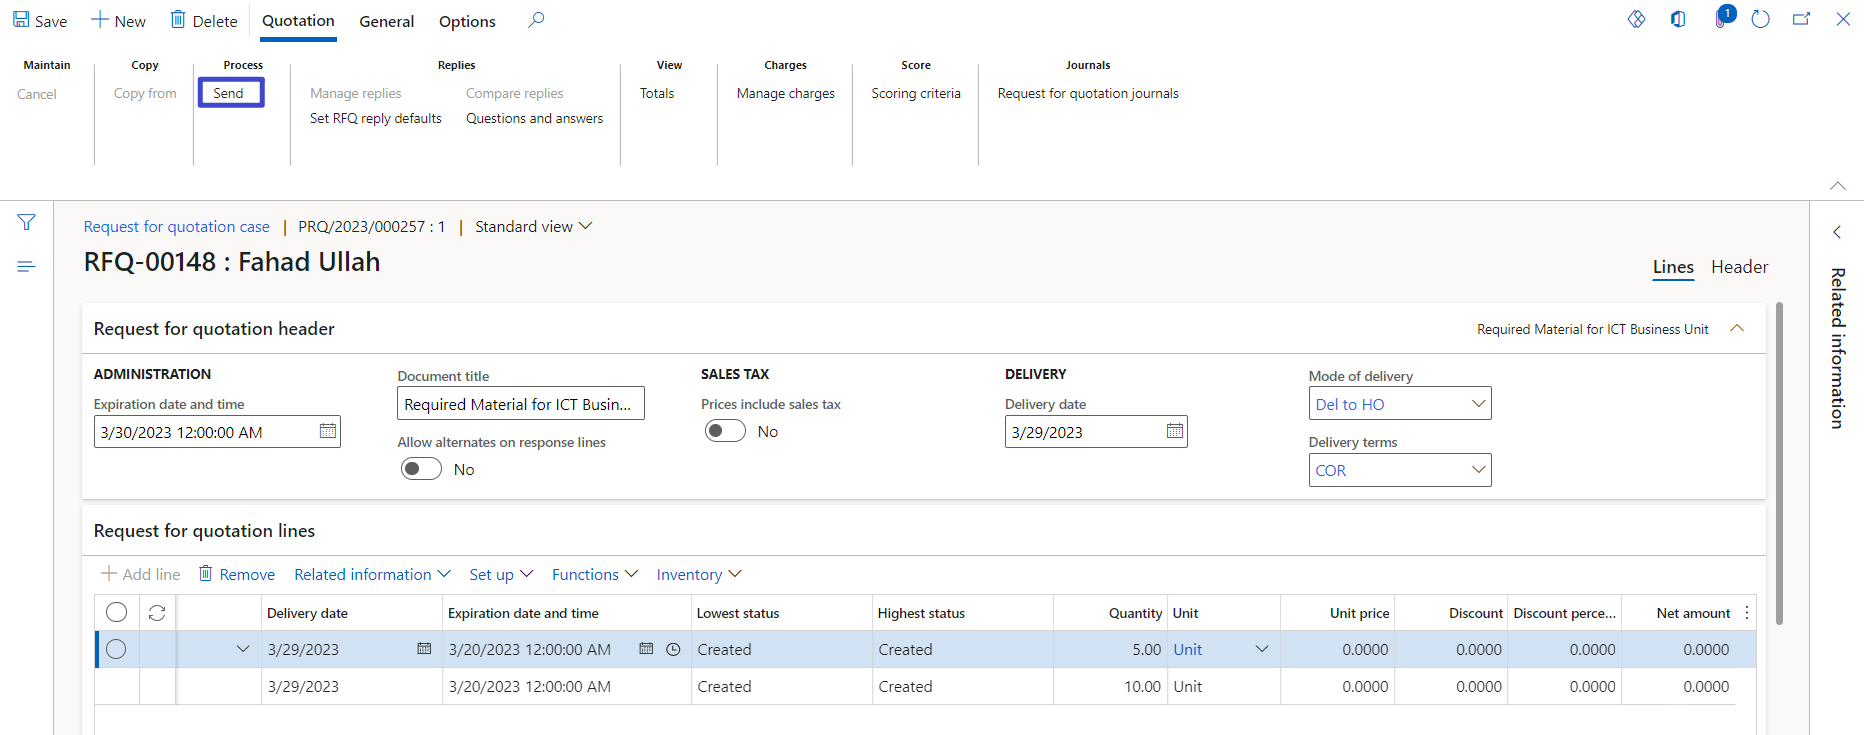
2. Enabled mark, RFQ lines
3. Click, ok button

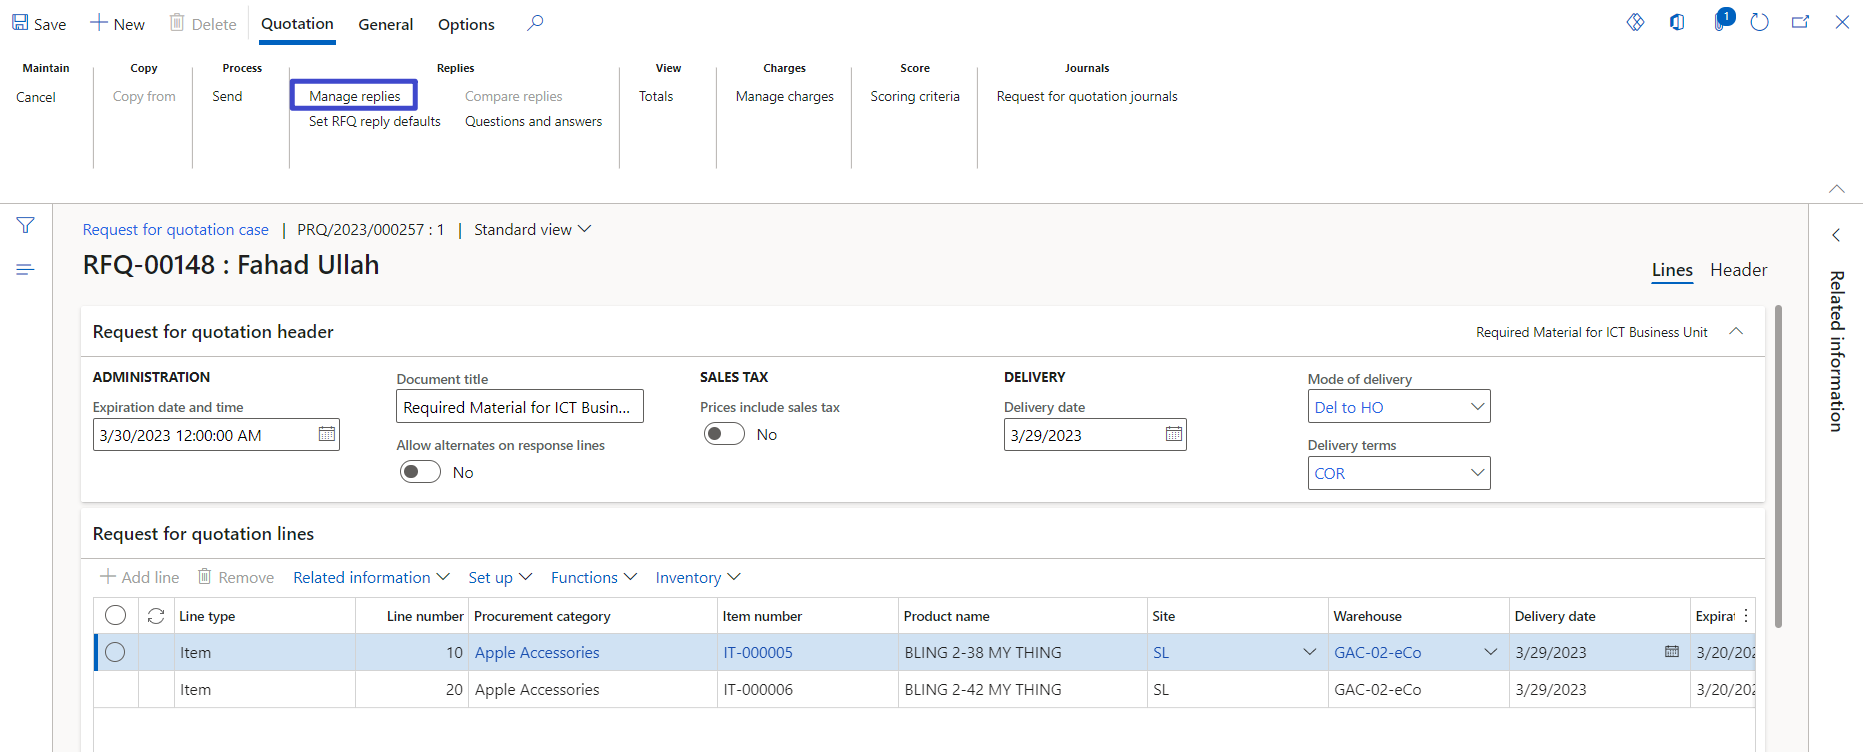
4. On action pane, click manage replies for verify status


Leave a Reply
You must be logged in to post a comment.

