How to Transfer a Product in D365 (Transfer Order)
Process Flow Mapping:

Steps for Creating Transfer Order in Microsoft Dynamics D365:
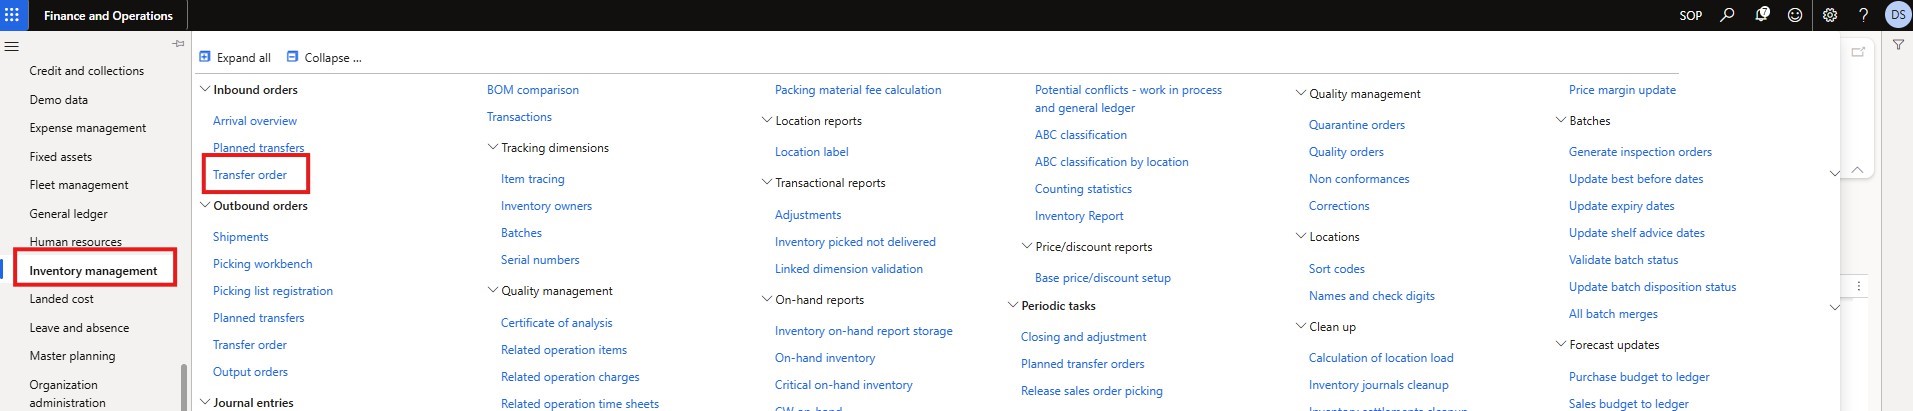
Step-1. Navigate to Module then to “Inventory Management > Inbound Order> Transfer Orders”.
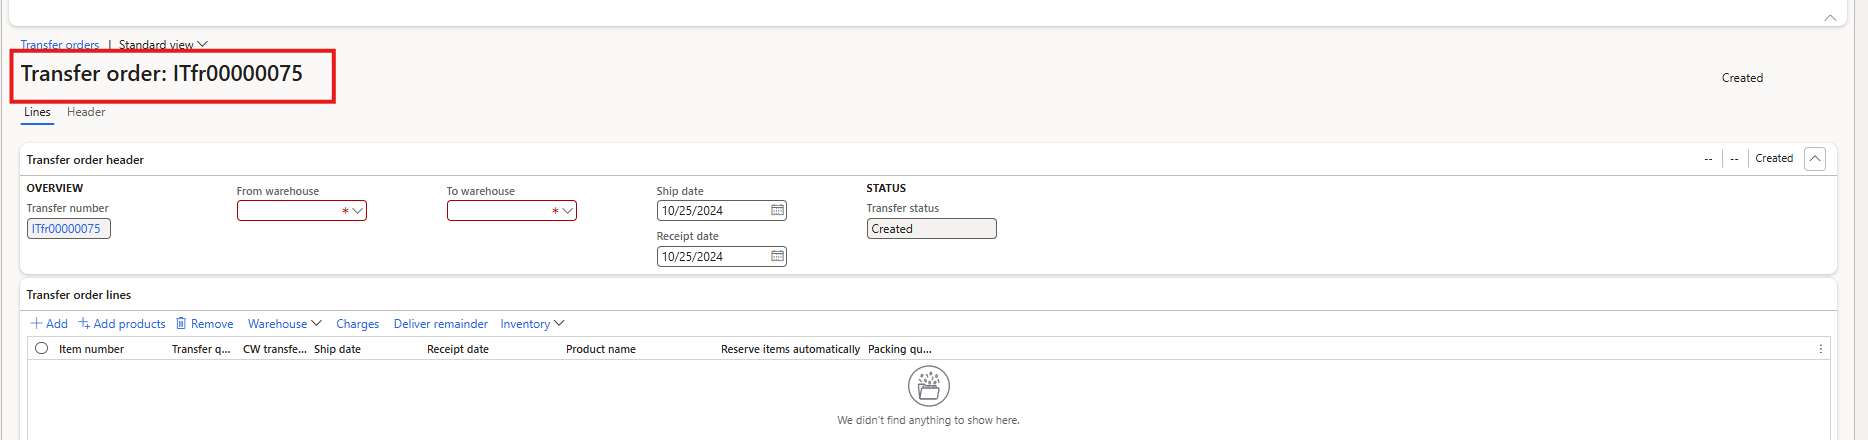
Step-2. Click on “+New” in the “Action Pane”, and a new transfer order with transfer order no “ITfr0000075” will be created
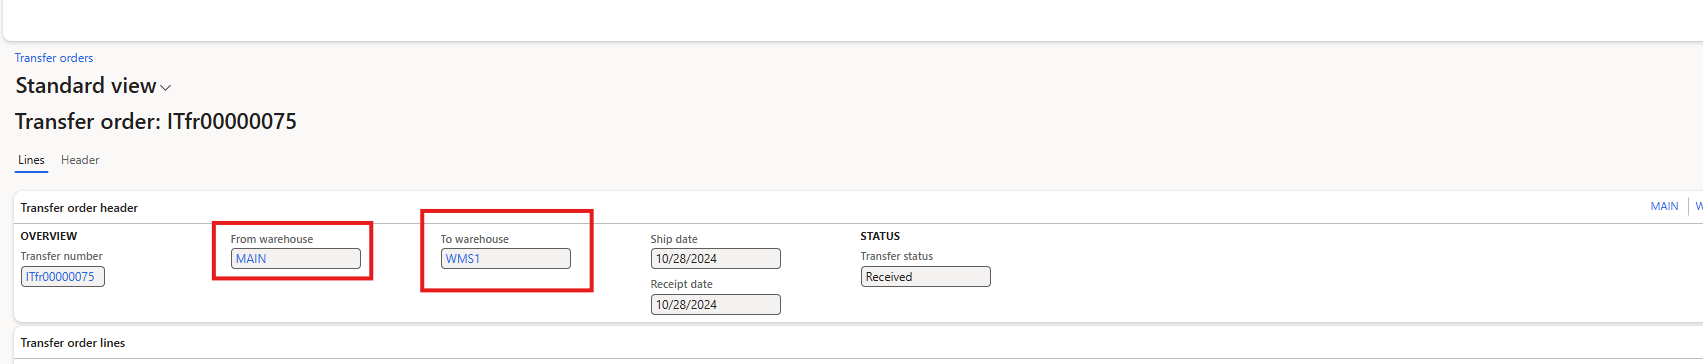
Step-3. On the transfer order form, in the Transfer order headed FasTab select the “Main” in the field From Warehouse from the drop-down menu, and “WMS1” in the field To Warehouse from the drop-down menu.
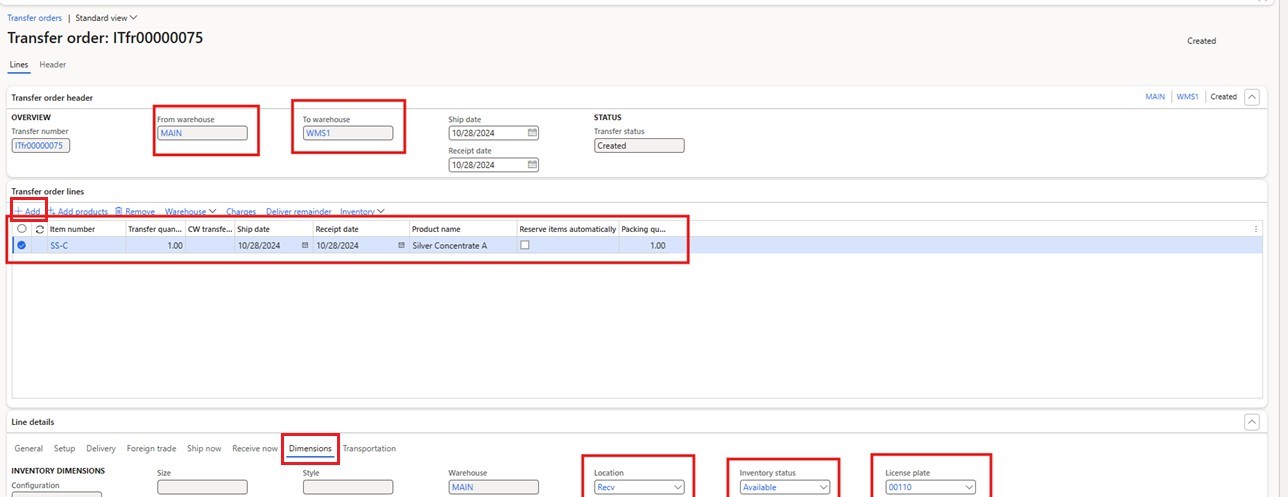
Step-4. On the Transfer order lines FasTab, click on “Add” to add the lines and then fill in the required information on the lines
- Item number = “SS-C”
- Transfer quantity = “1”
- Ship date = “10/28/2024”
- Receive date = “10/28/2024”
- Product name = “Silver Concentrate A”
Step-5. On the Line details FasTab, click on “Dimensions”
Steps for Reserving Transfer order Microsoft Dynamics D365:
Step-1. To reserve the transfer order quantity then on the transfer order form, navigate to “Inventory>Reservation” on transfer order lines FasTab.
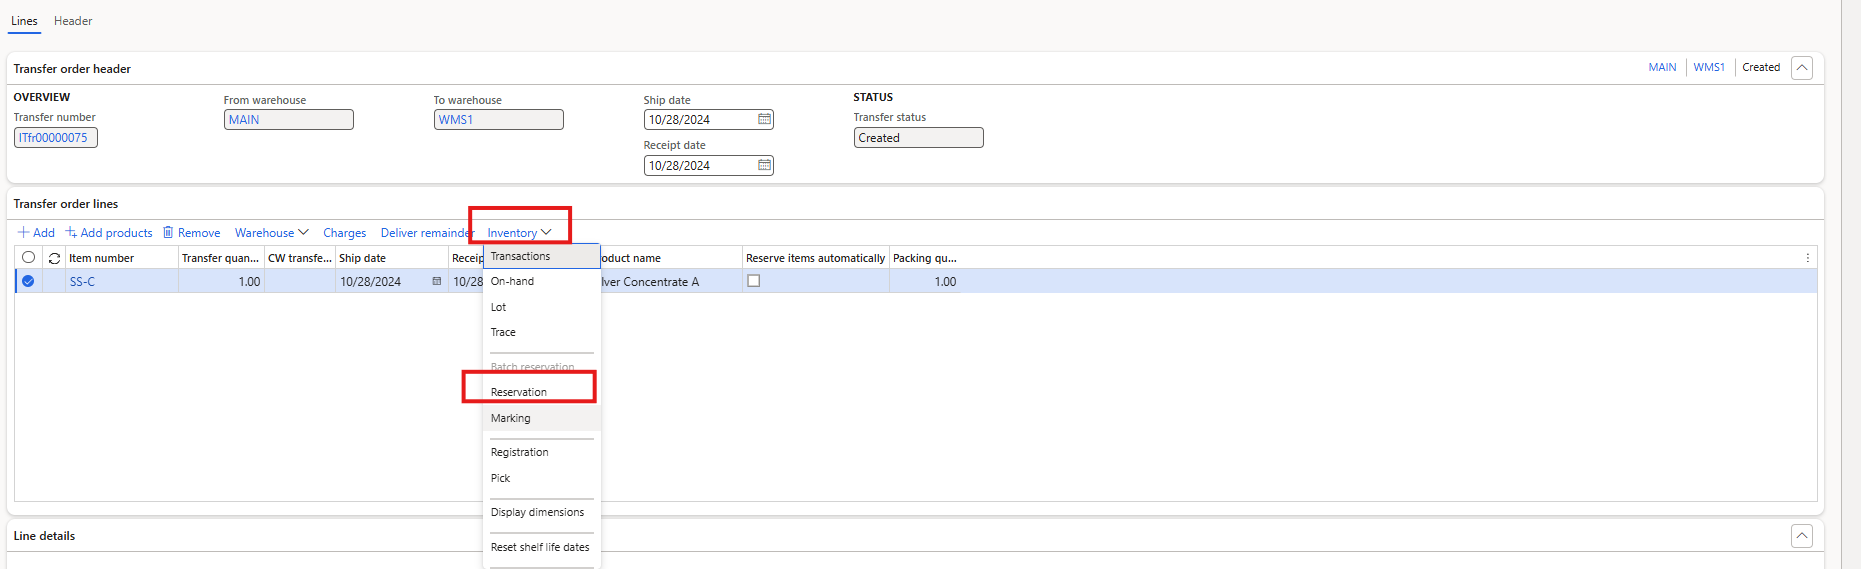
Step-2. The reservation form window will open, click on the “Reserve lot” to reserve the quantity, then click ok to close the reservation form window.


Steps for Shipping Transfer Orders in Microsoft Dynamics D365:
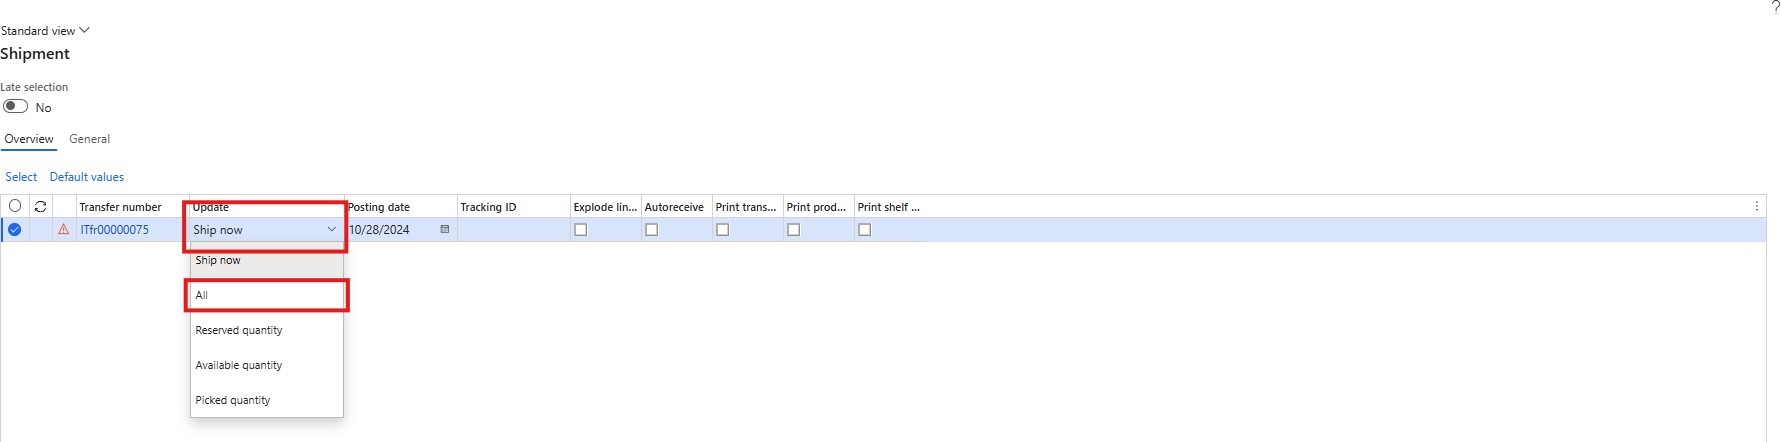
Step-1. On the Transfer order form, navigate to the “Ship>Operations>Ship transfer order” from the Action Pane, and the “shipment form” window will open.

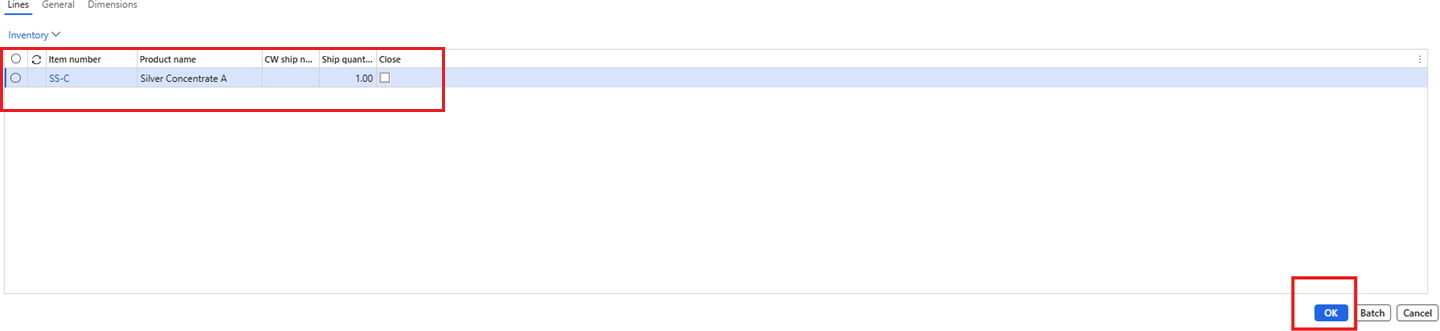
Step-2. On the shipment form window, under the table in “Overview” select “All” from the dropdown menu in the update field. Step-3. Item information will be shown in the table under the lines, click “OK” to ship the transfer order.
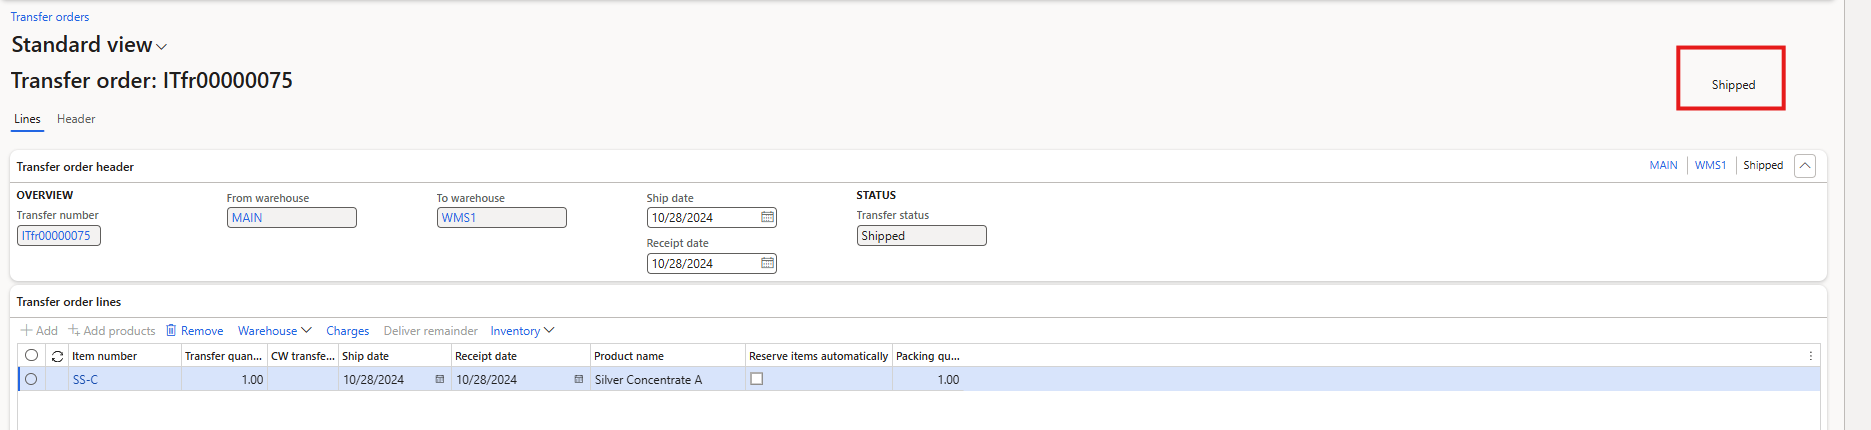
Step-4. The transfer order status will be changed to “Shipped” on the transfer order form.
Steps for Receiving Transfer Orders in Microsoft Dynamics D365:
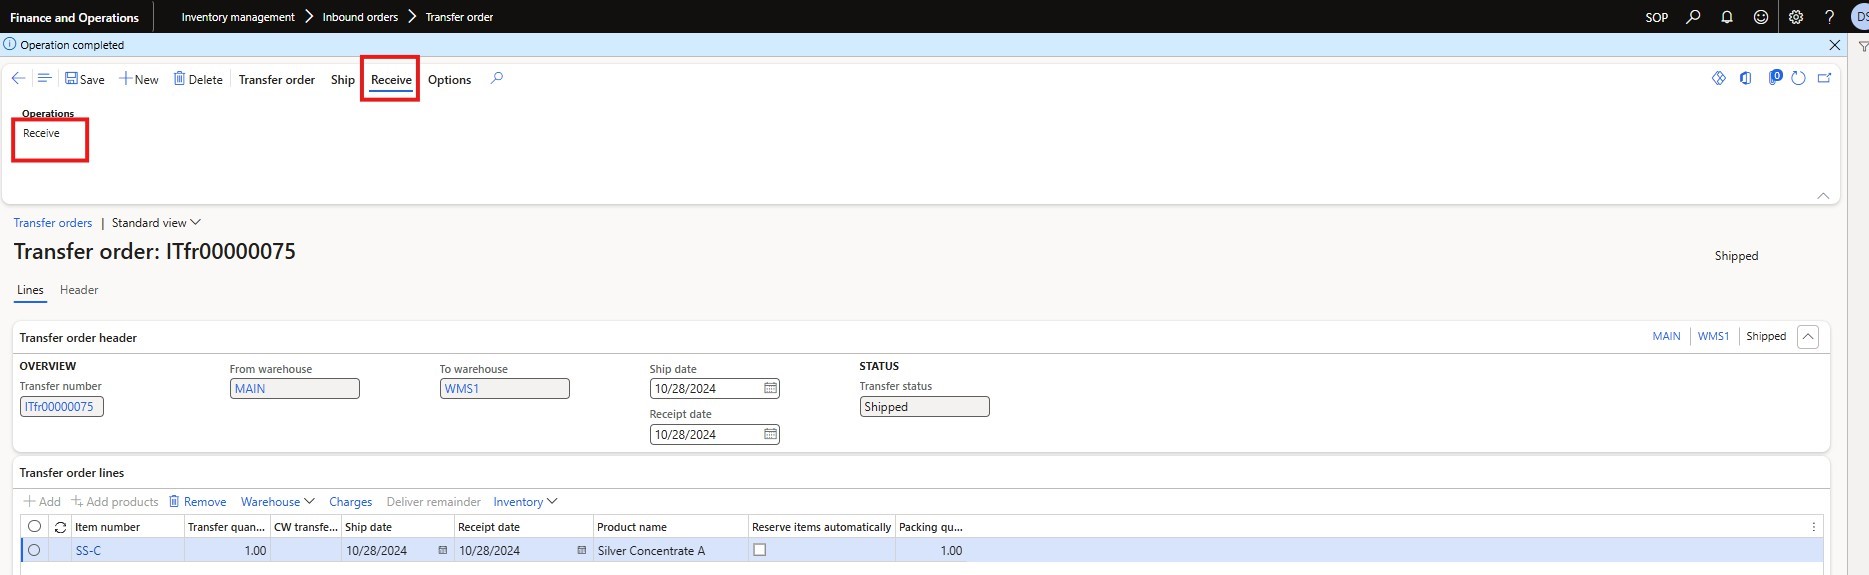
Step-1. To receive the transfer order, click on “Receive>Operations>Receive” from the Action Pane on the transfer order form window, and the receive form window will open.
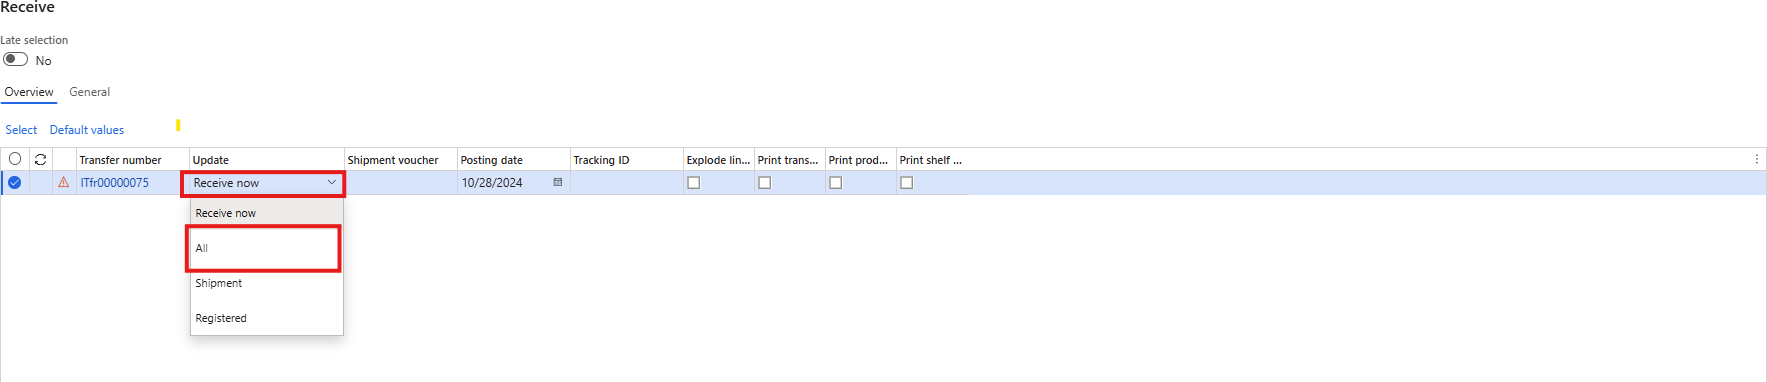
Step-2. On the receive form window, under the table in “Overview” select “All” from the dropdown menu in the update field.
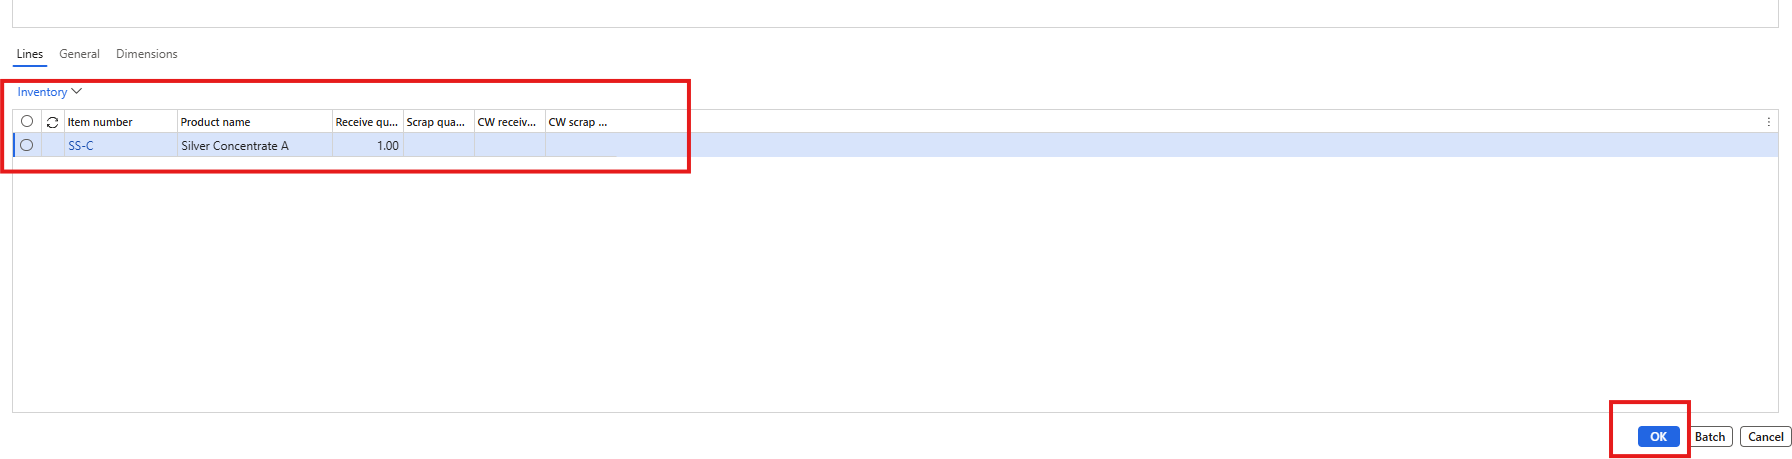
Step-3. Item information will be shown in the table under the lines, click “OK” to receive the transfer order and close the window.
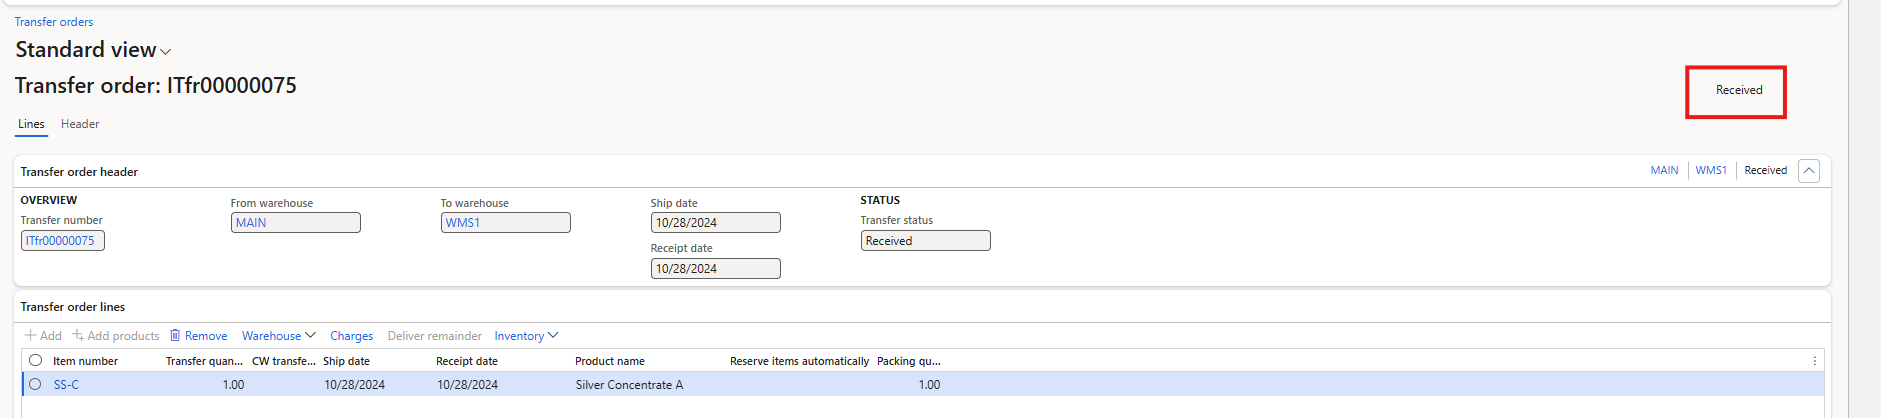
Step-4. The transfer order status will be changed to “Received” on the transfer order form.
Steps for Review the Inventory Transactions of Transfer Order in Microsoft Dynamics D365:
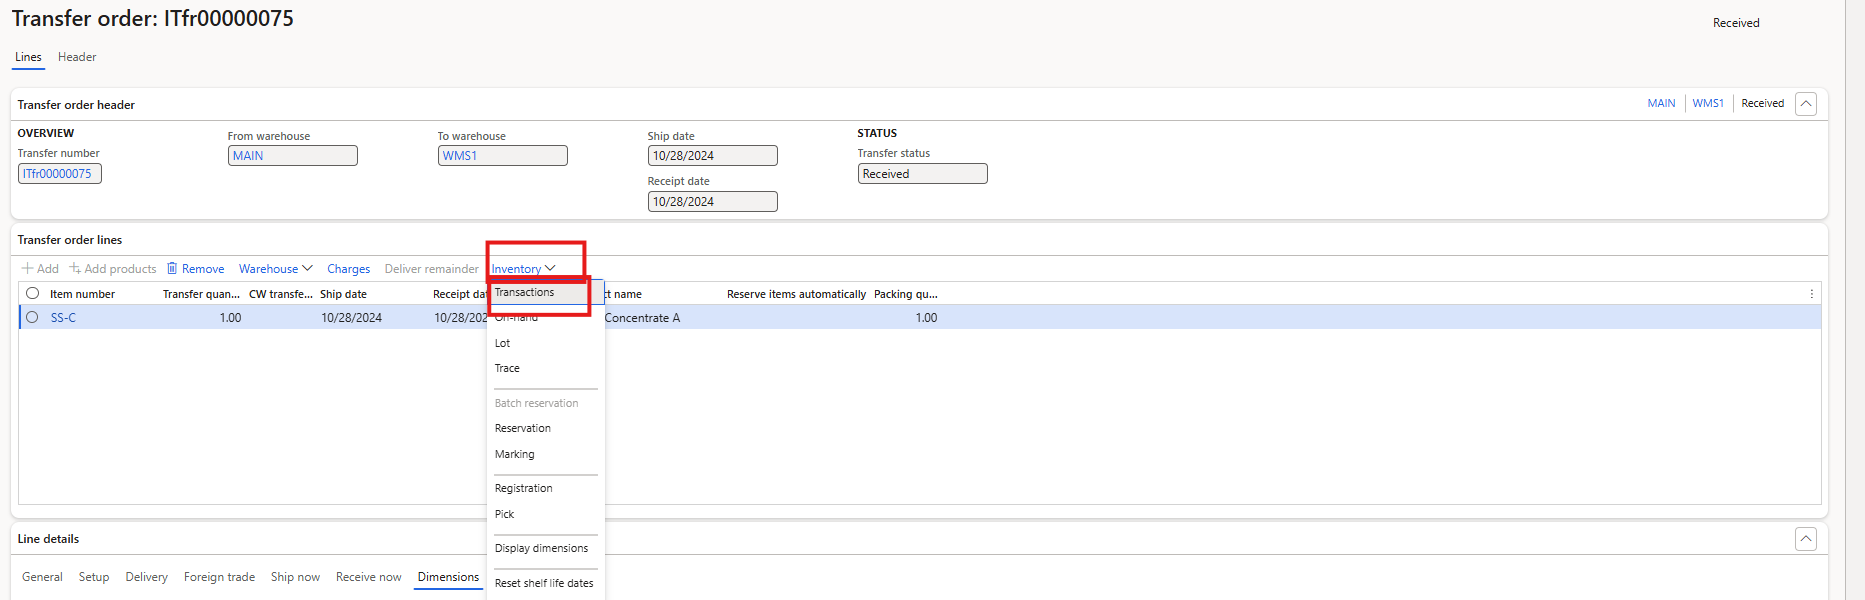
Step 1. In the transfer order form, under transfer order lines FasTab, select the line and click on “Inventory>Transactions”. The “inventory transaction form” window will open.
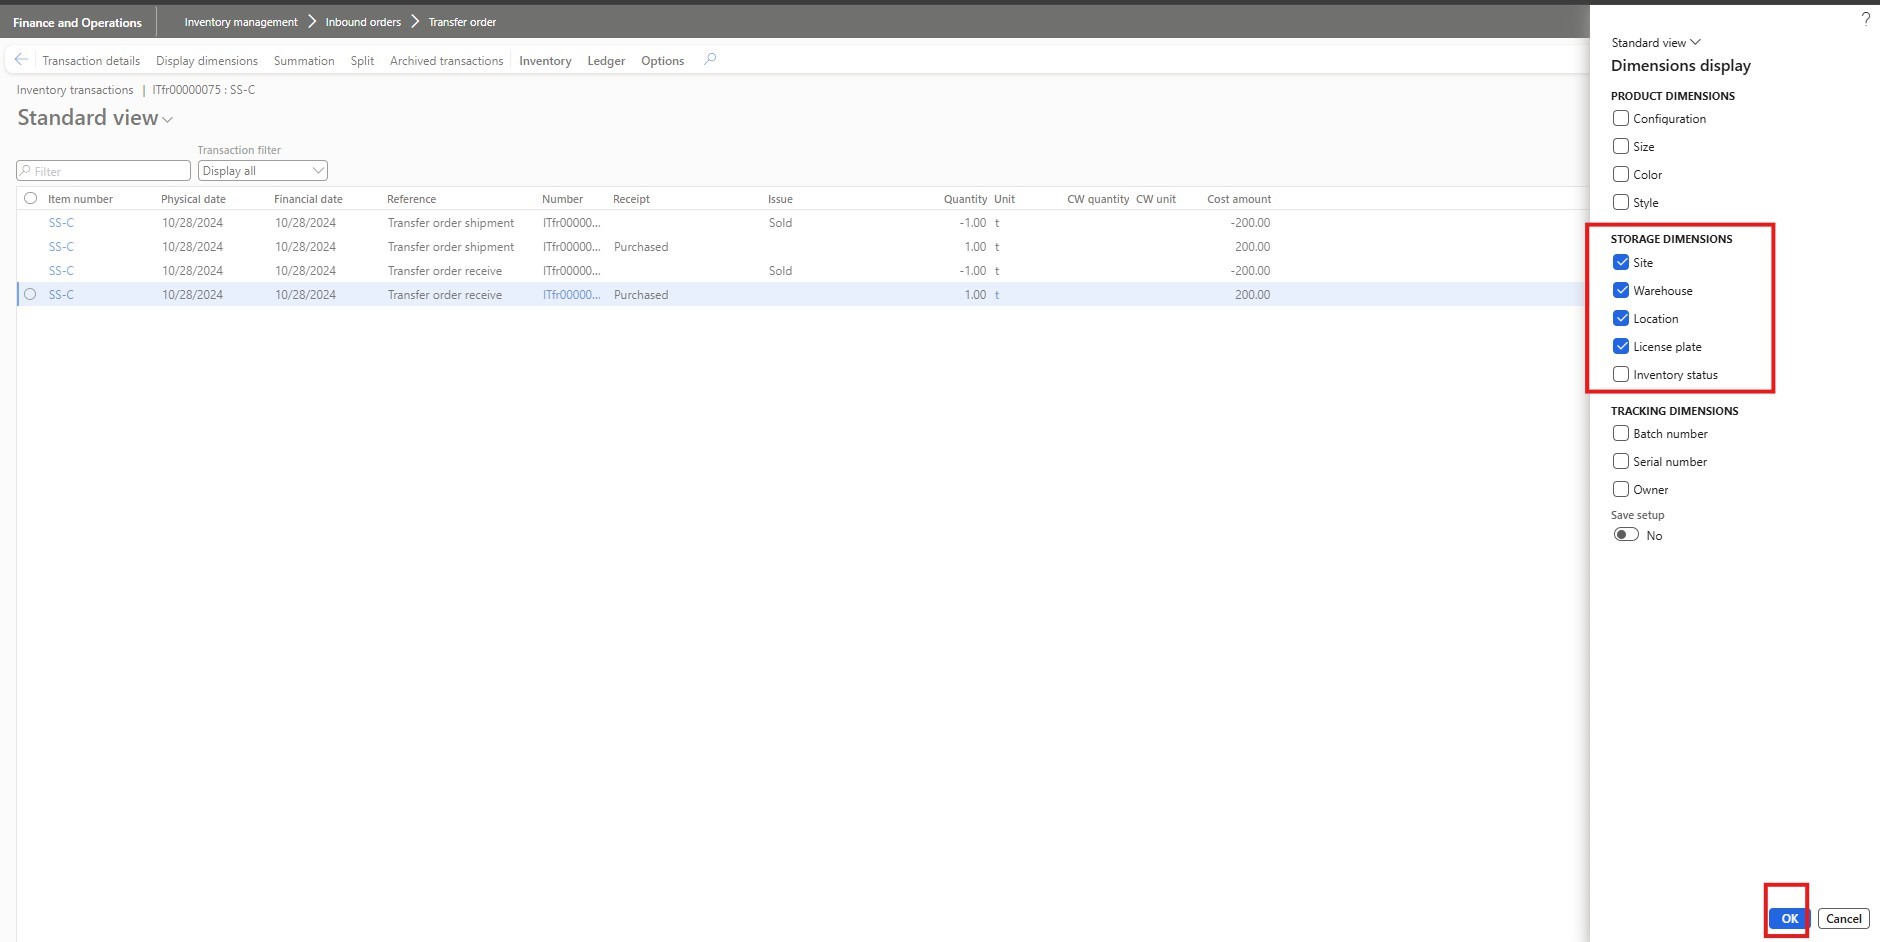
Step 2. In the Inventory transaction form, click on “Display dimensions” from the Action Pane, and select the checkbox for “Site”, “Warehouse”, “Location”, and “License plate” in the dialog window.

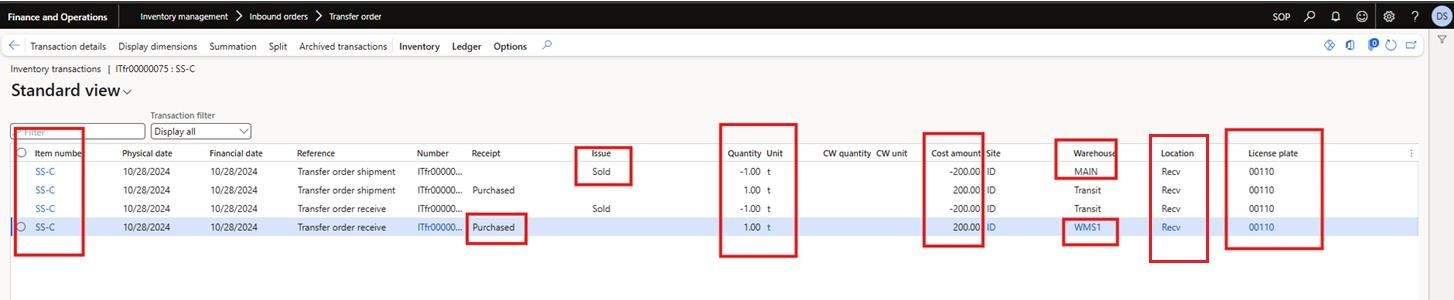
Step 3. Inventory transactions will be displayed, and we can see from which warehouse the item is sold/transferred and in which warehouse the item was purchased/received. Additional information like “Item number”, “Quantity”, “Unit”, “License plate”, and “Location” is also displayed as well.


Leave a Reply
You must be logged in to post a comment.

