
Microsoft Dynamics 365 Landed Cost – Part 3
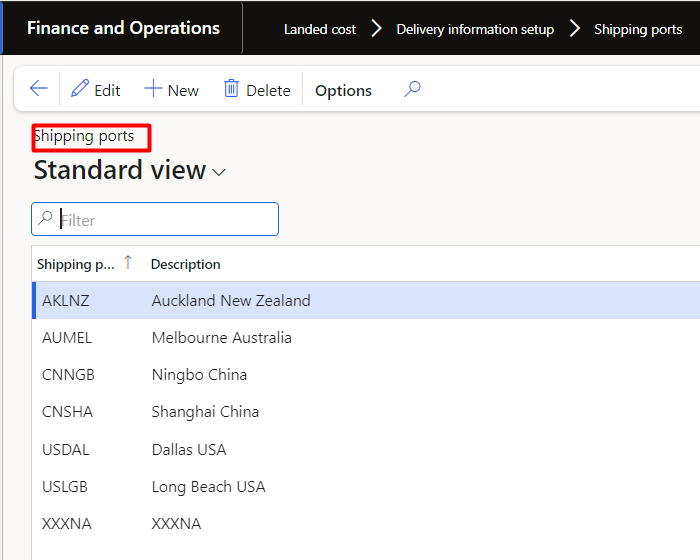
Shipping ports:
Shipping ports identify the origin and destination of the goods that are shipped. A To port and a From port are defined:
Navigation: Landed cost > Delivery information setup > Shipping ports
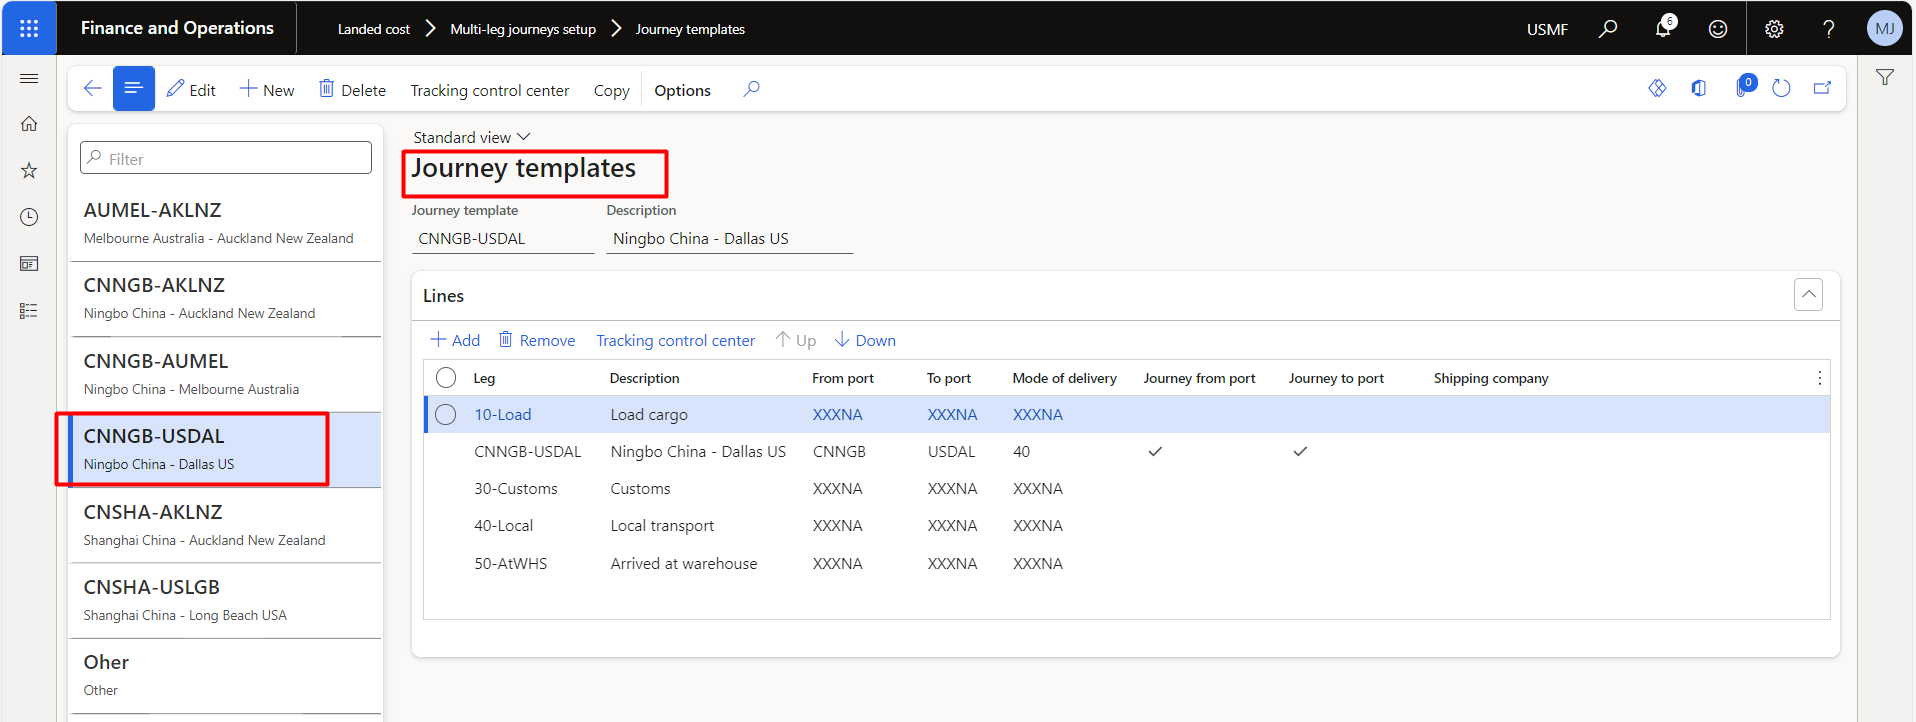
Journey templates:
Create journey templates that will be used in creation of voyage document in D365:
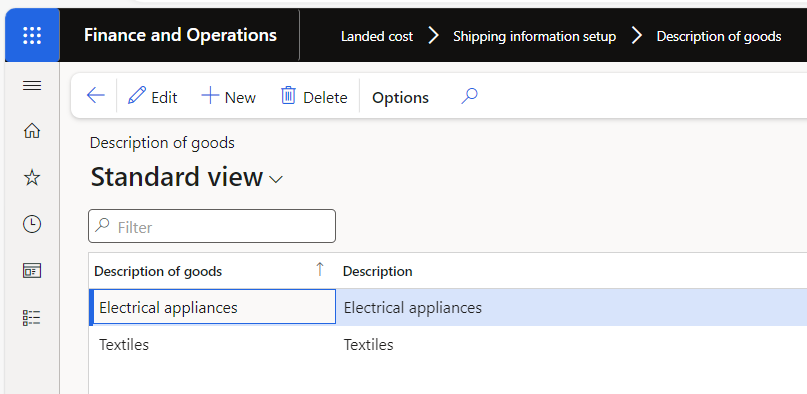
Description of goods:
It will help you to understand what types of products included withing the voyage or shipping containers etc.:
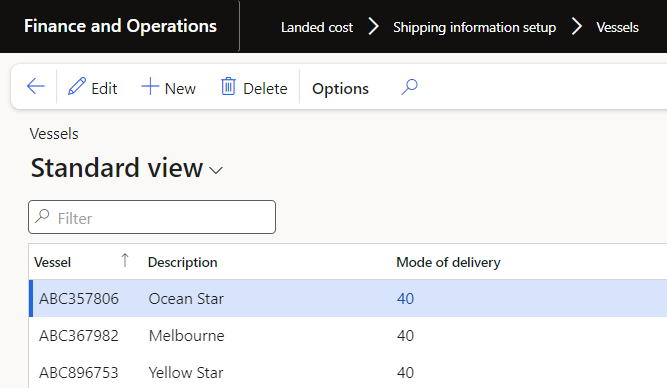
Vessels:
A vessel is the unique name that’s given to a ship or boat that a shipping company or agency uses. Whenever you create a new voyage, you must always enter a vessel.
Navigation: Landed cost > Shipping information setup > Vessels
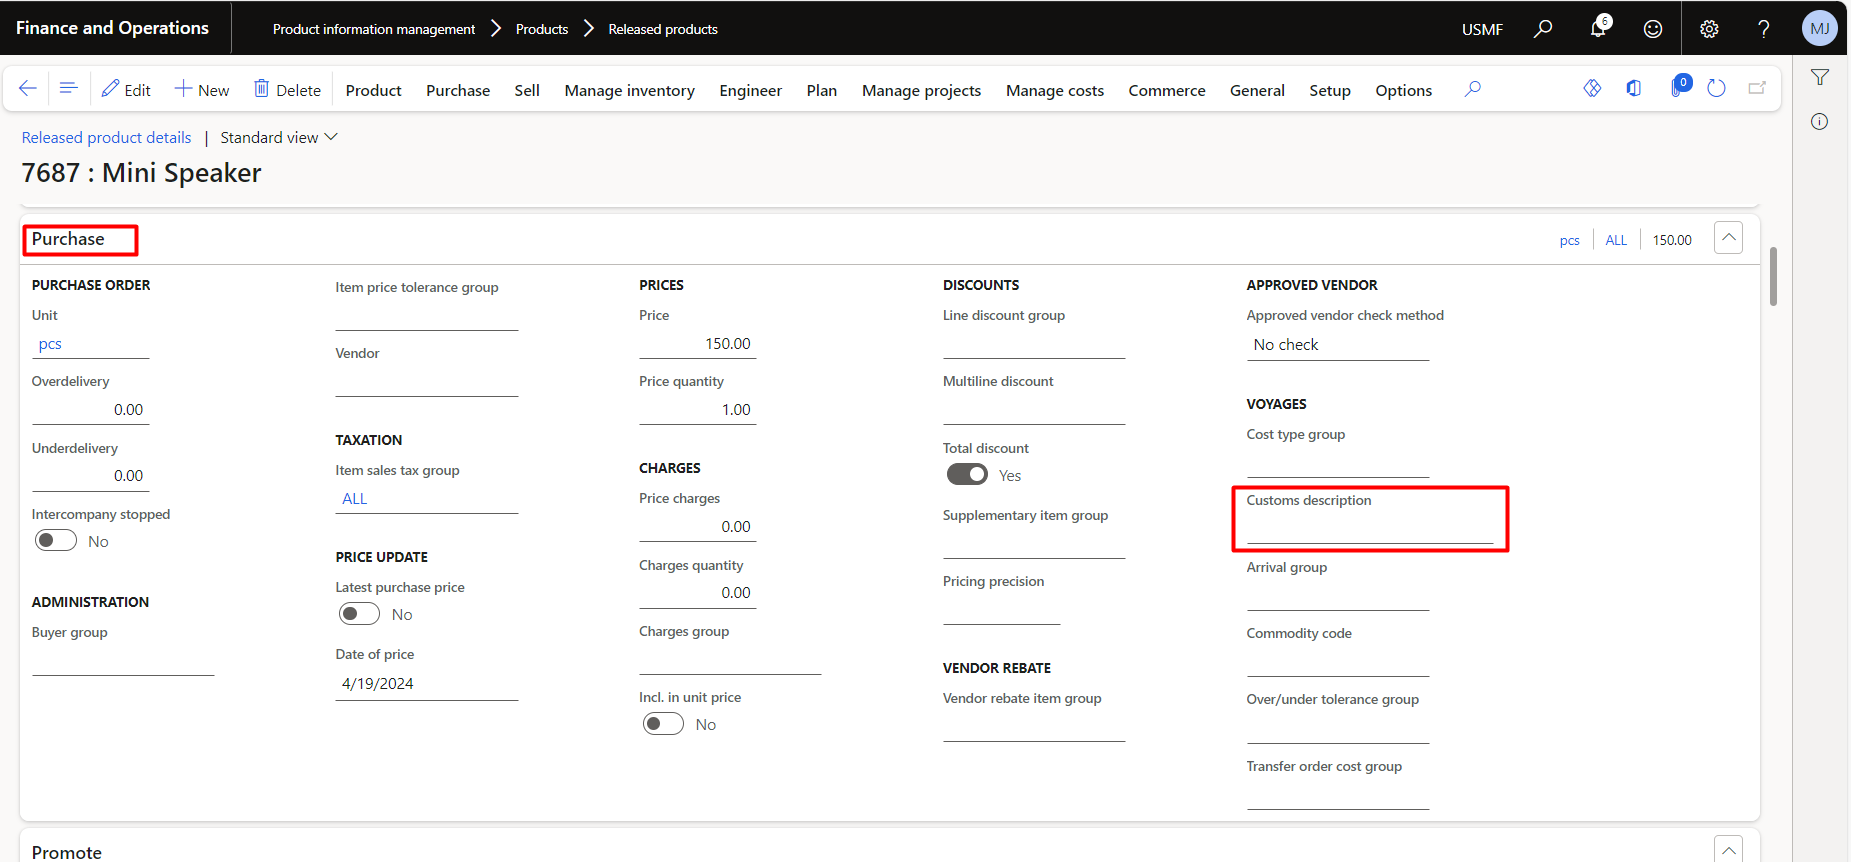
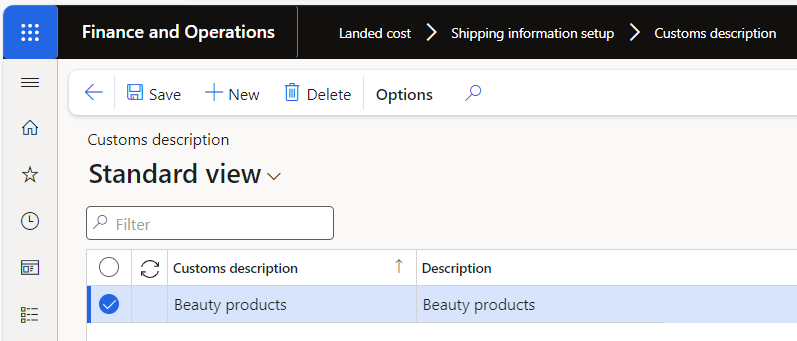
Customs description:
This is a description that can be used by custom authorities. We can select customs descriptions on purchase order lines or on the Released products under the purchase fast tab:
Below screenshot is from Released products:
Below is the form in landed cost module where we can set the customs description:
Set up cost type codes:
Cost type codes define the type of cost that’s incurred when products are delivered to the warehouse or with the landed costs of a voyage.
Here we will also assign the main accounts with each cost type codes.
Navigation: Landed cost > Costing setup > Cost type codes
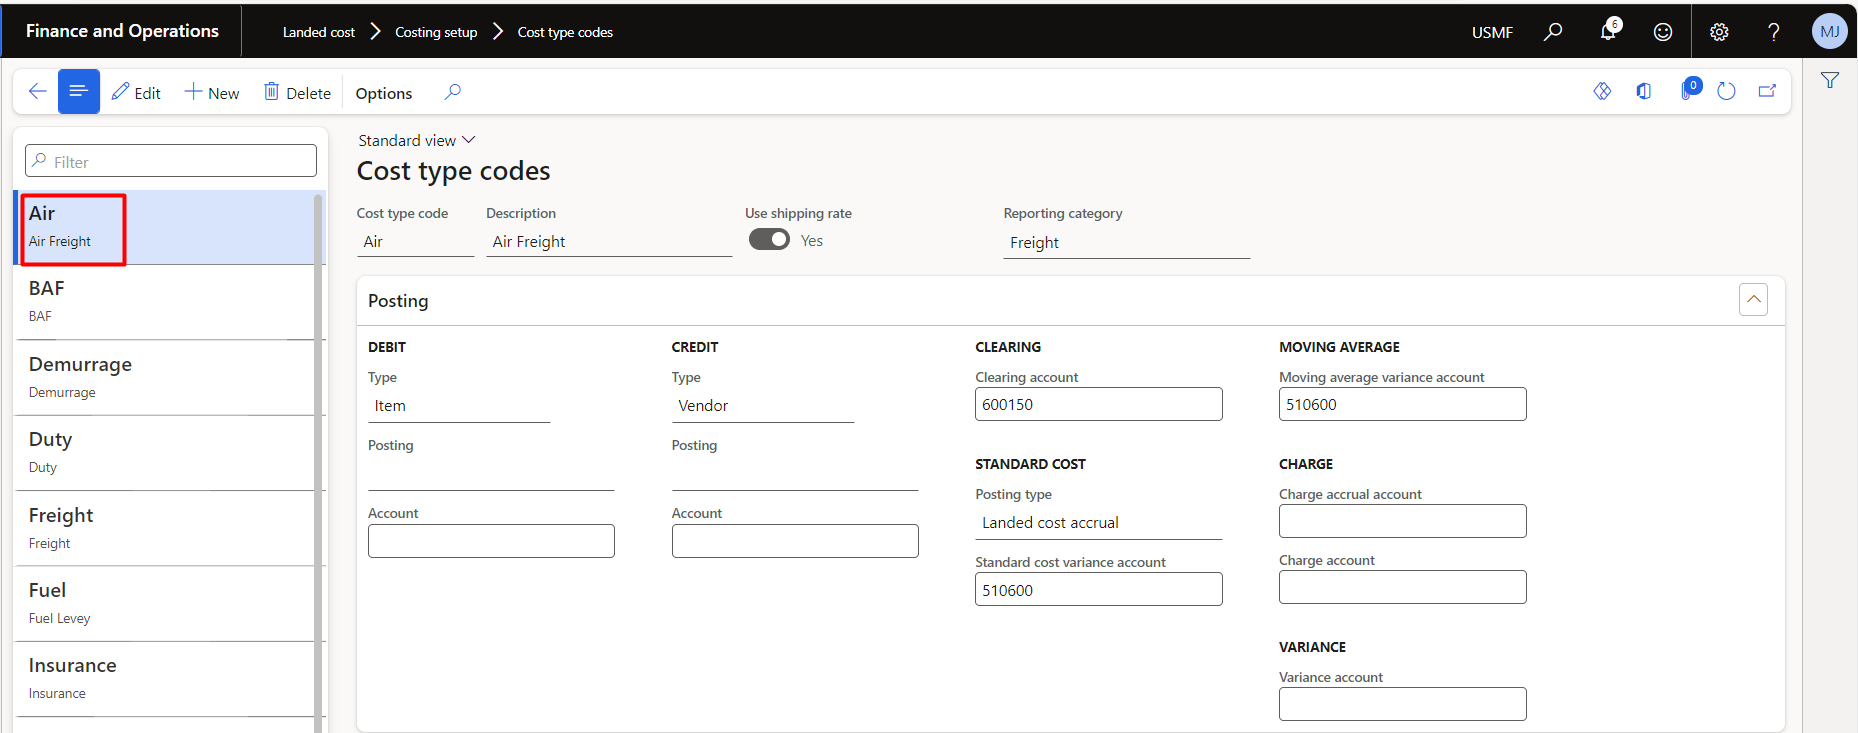
Let’s understand each field in this cost type code setup:
- Cost type code– Enter the name for the code.
- Description– Enter the code description.
- Use shipping rate– Set this toggle to Yes if you use the voyage exchange rate (also known as a management rate) to determine the value of this cost. In this instance, the shipping rate will be used to exchange foreign currency invoices rather than the default or spot exchange rate.
- Reporting category– Determines the reporting category for the cost type. You can run reports by the reporting category or the cost type.
- Debit type– Determines whether the cost should debit the item, the ledger account, or the vendor.
- Debit posting– If the Debit type field is set to Ledger account, select the posting description that you want to use.
- Debit account– If the Debit type field is set to Ledger account, select which debit account to use.
- Credit type– Determines whether the cost type should credit the item, the ledger account, or the vendor.
- Credit posting– If the Credit type field is set to Ledger account, select the posting description that you want to use.
- Credit account– If the Credit type field is set to Ledger account, select which credit account to use.
- Clearing account– Select which clearing account that you want to use. To help with the reconciliation process, we recommend that you create a separate clearing account for each cost type.
- Standard cost type– If you’re using standard costing, you need to select the posting description.
- Standard cost variance account– If you’re using standard costing, you need to select the account where you’ll post the variances. On the Item pricing page, this account will use the landed cost breakdown. You can generate this breakdown by running the periodic routine to update prices.
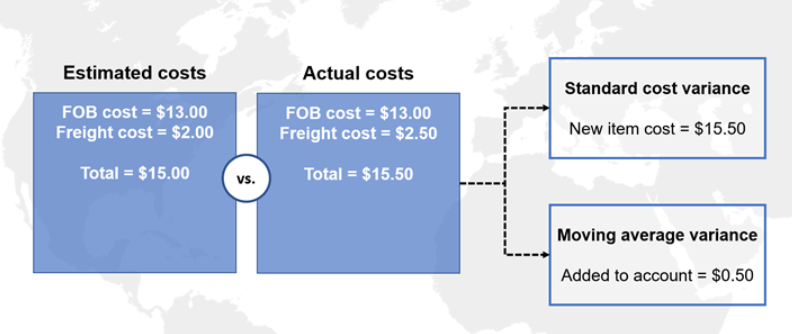
Example
The standard price of an item is USD $15.00, the Freight on Board (FOB) price is $13.00, and the freight cost is $ 2.00. When the stock invoice is received, the item is received at $15.00 but with a variance of $2.00 because the FOB is $13.00. This variance is recorded to the standard price variance account that is set up in the item posting profile. Because the freight estimate was $2.00, no variance is added when the stock invoice is posted. However, when the actual freight invoice is received, the freight is $2.50 for each unit. As a result, a $0.50 variance is added to the item cost.
For example, the estimated freight is $2.00. However, when the freight invoice is received, the freight is $2.50 for each item. Therefore, the $0.50 variance must be posted to an account.
- Moving average variance account– If you use moving average costing, you need to select the account where you’ll post any variance.
Variance:
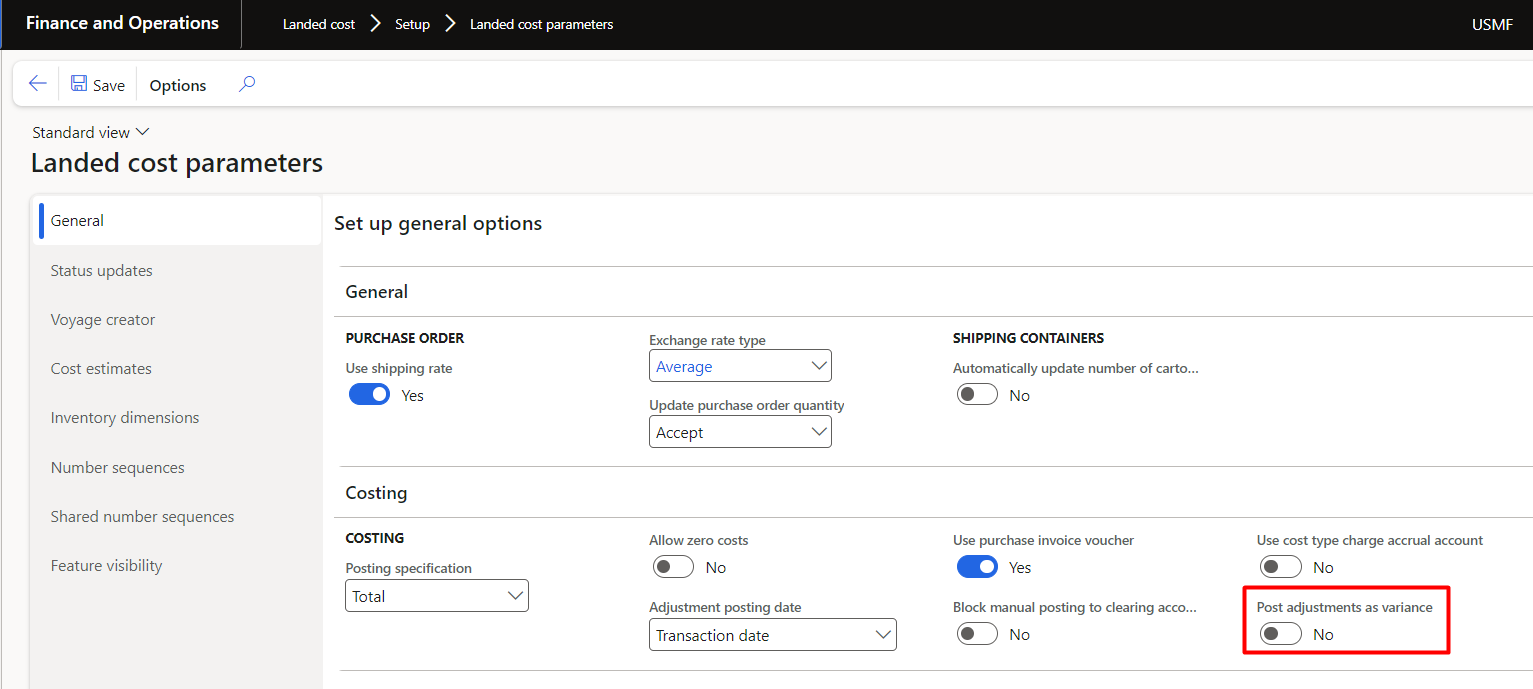
- When the Post adjustments as variance option on the Landed cost parameters page is set to Yes, all variances between estimated and actual cargo costs are posted to the moving average variance account that you specify on this page (cost type codes).
- When the Post adjustments as variance option is set to No, the standard functionality will be used. The variance is applied to inventory or to the moving average variance account that you specify on this page (cost type codes), depending on the amount of stock on hand.
Split cost type codes for multiple voyages:
This is a separate feature in D365.
This can be challenging to do when there are numerous voyages involved each with its own charges and cost type codes that are merged into a single invoiced issued by the shipping provider. This feature enables you to split vendor invoice journals based on the cost code type. Now, when you are creating a vendor invoice journal that includes multiple voyages, you can add multiple journal lines for each cost type code. This will allow your organizations to allocate costs on a more granular basis by breaking down costs from each voyage according to the cost type code.
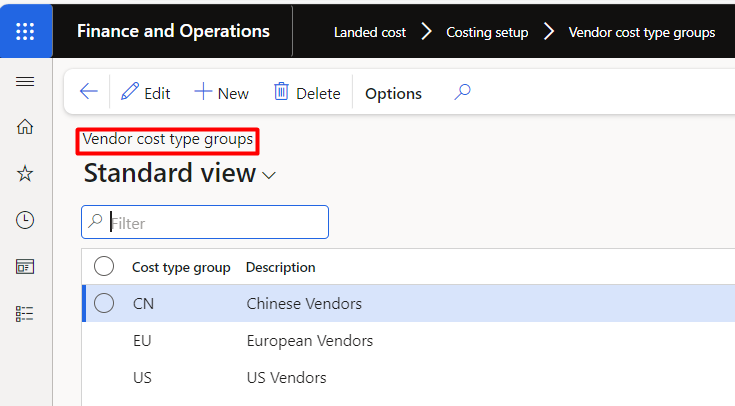
Vendor cost type groups:
Vendor cost type groups help to define how auto cost charges are identified and applied to a voyage.
We can create a particular shipping type rate for specific products types and can associate on multiple same group of vendors in D365.
Navigation: Landed cost > Costing setup > Vendor cost type groups
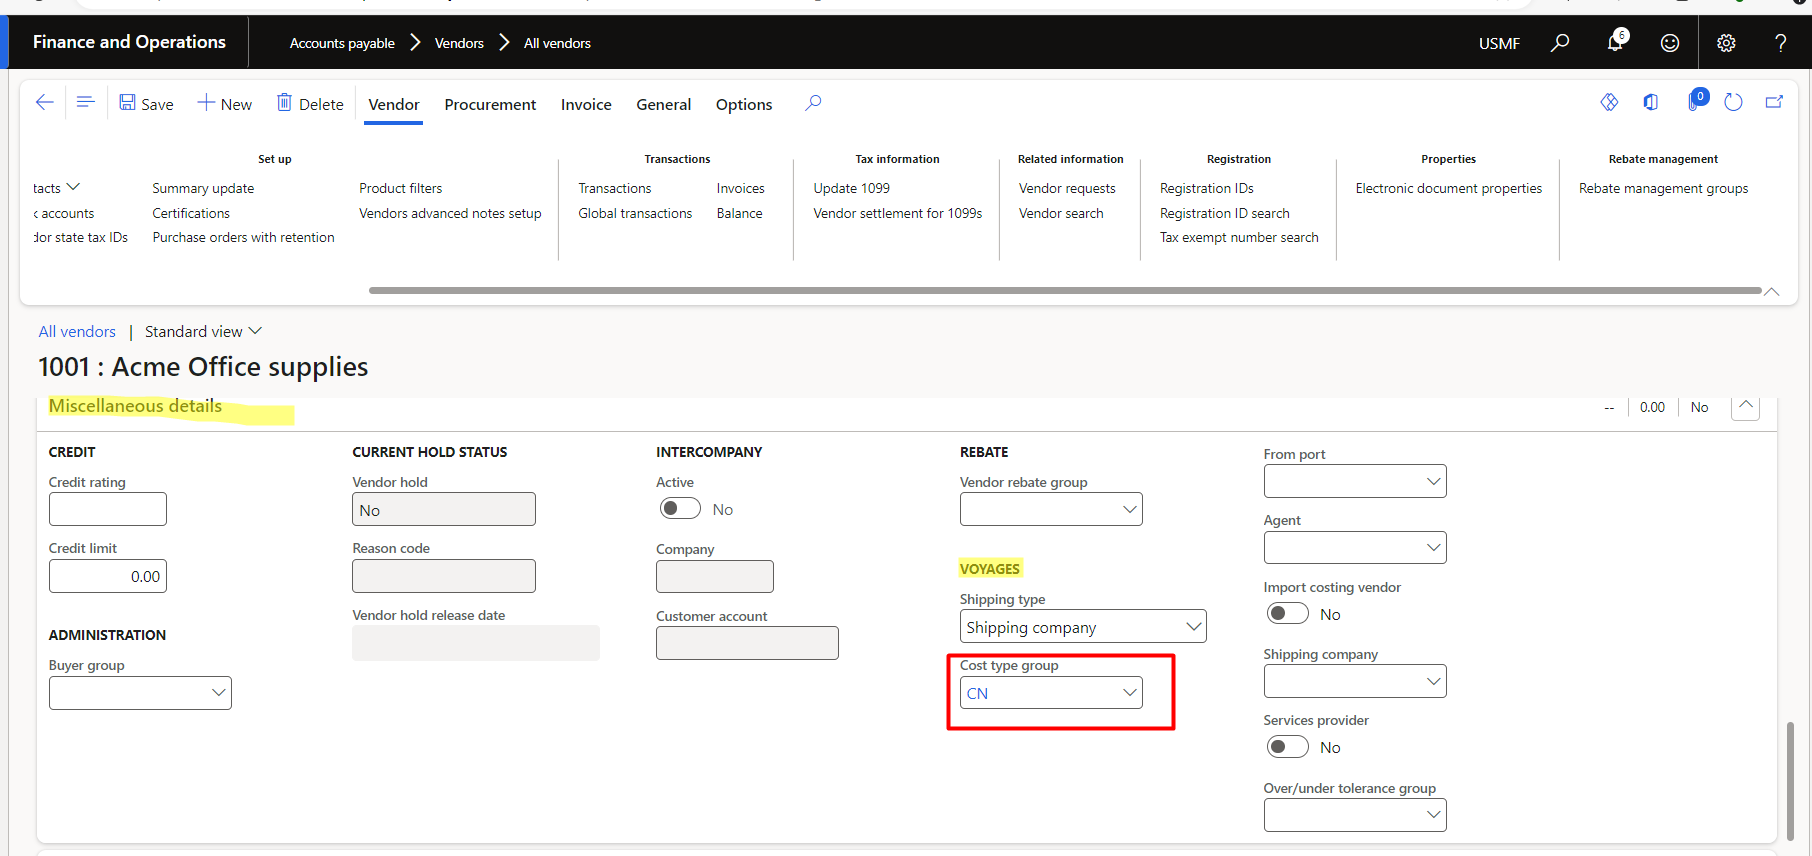
This will be assigned on vendor:
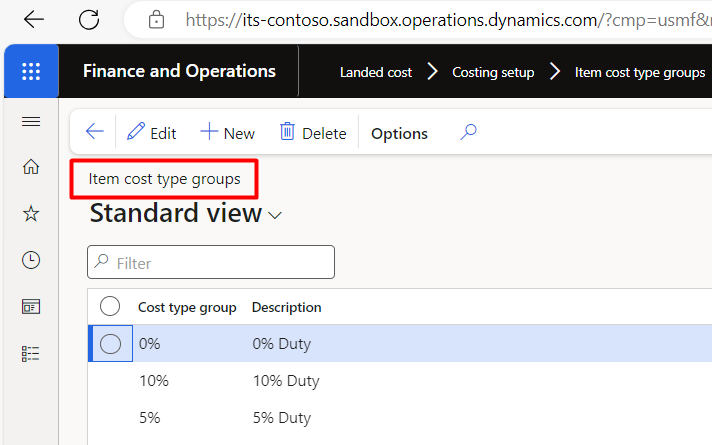
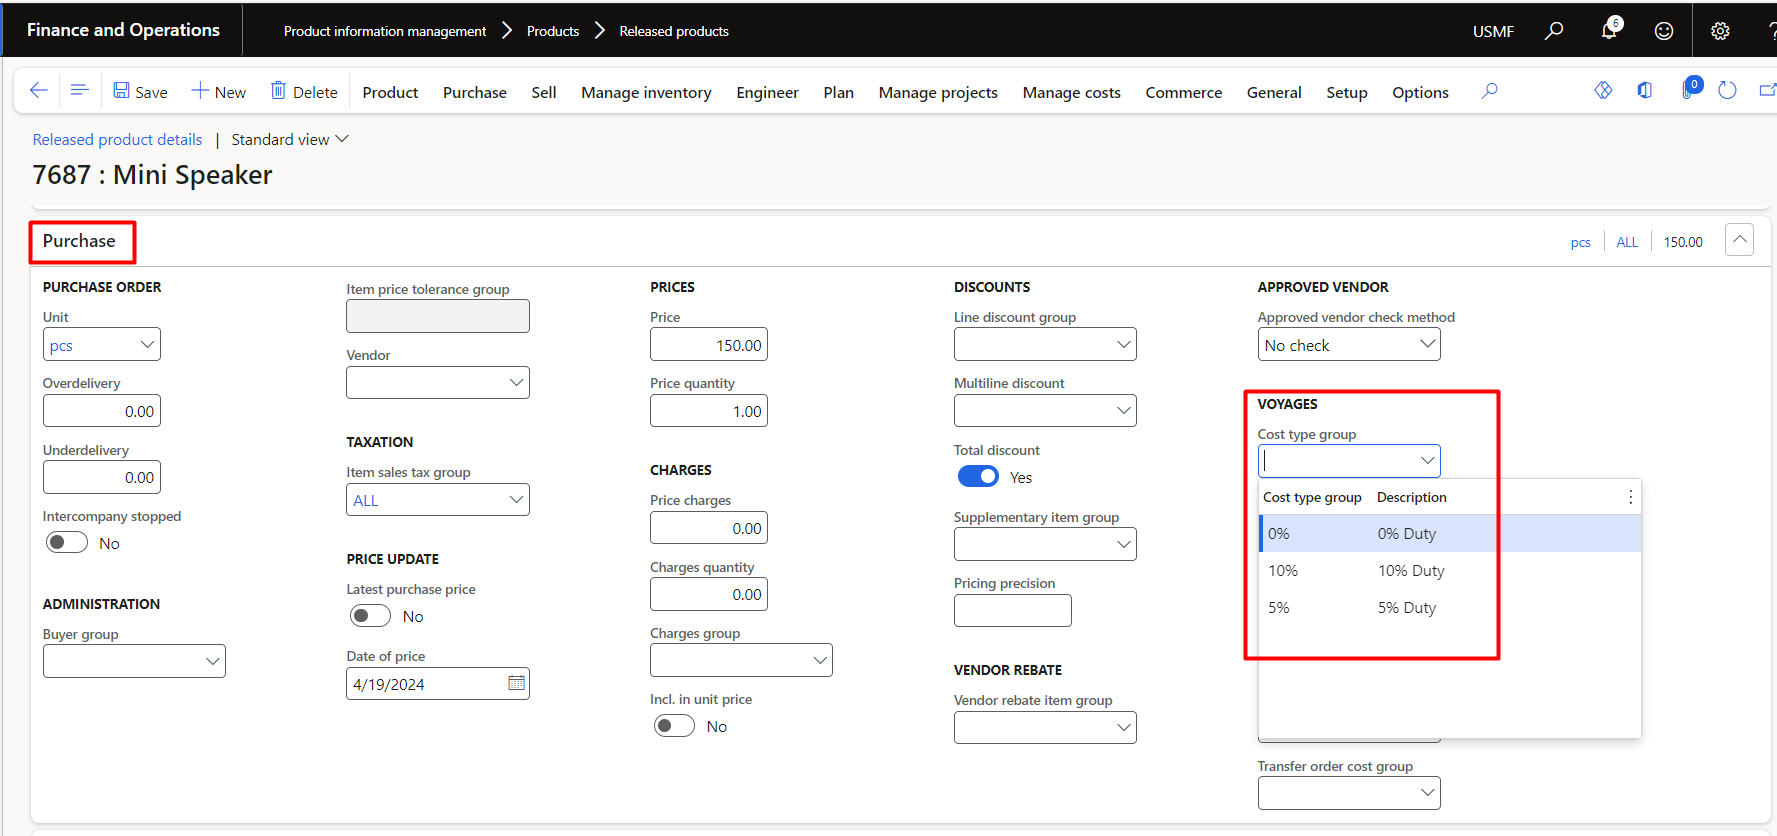
Item cost type groups:
Item cost type groups help to define how auto cost charges are identified and applied to a voyage. Similar items are grouped together. For example, all items with a 5 percent duty rate belong to a specific cost type group.
Navigation: Landed cost > Costing setup > Item cost type groups
This will be assigned to the item on released products from:
Cost templates:
Cost templates can help simplify the process by reducing the number of choices that users must make to obtain an accurate estimate.
Navigation: Landed cost > Costing setup > Cost templates
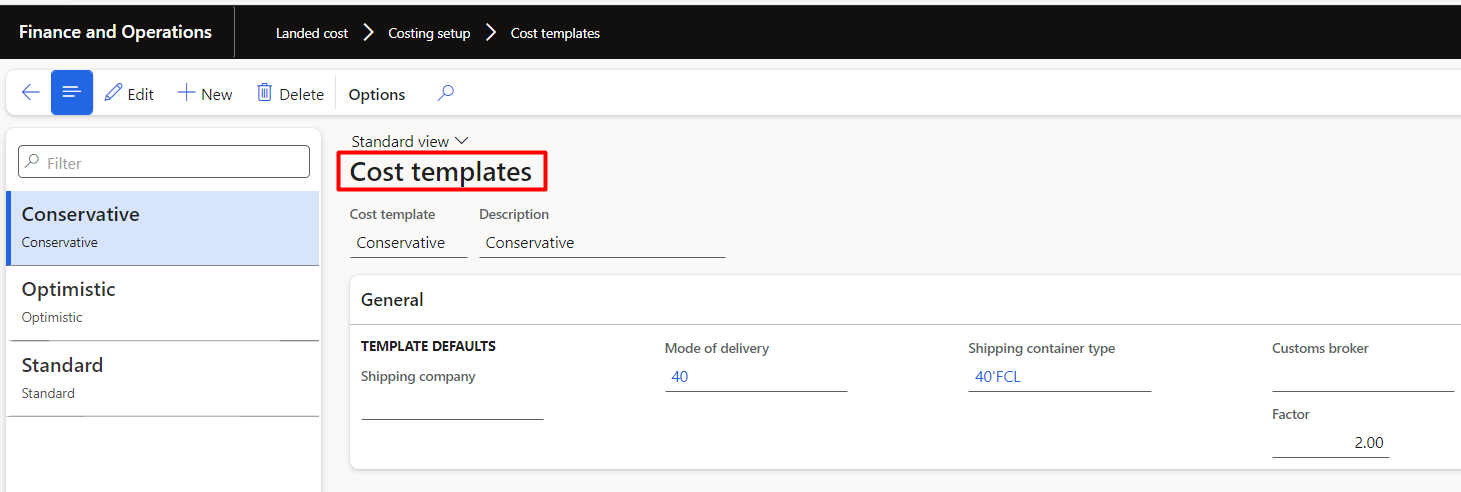
Lets understand the fields that important to memorise:
Cost template – This name usually describes the factor or cost multiplier.
Shipping company – Select the vendor account of the shipping company that you want associated with this template.
Custom broker – Select the custom broker (vendor) that you want to associate with this template. This field helps determine the auto costs that are associated with the cost template.
Factor – Enter a factor that you want applied to the final cost estimate of goods. For example, if you want to add 15 percent to the calculated cost estimate, enter 1.15.
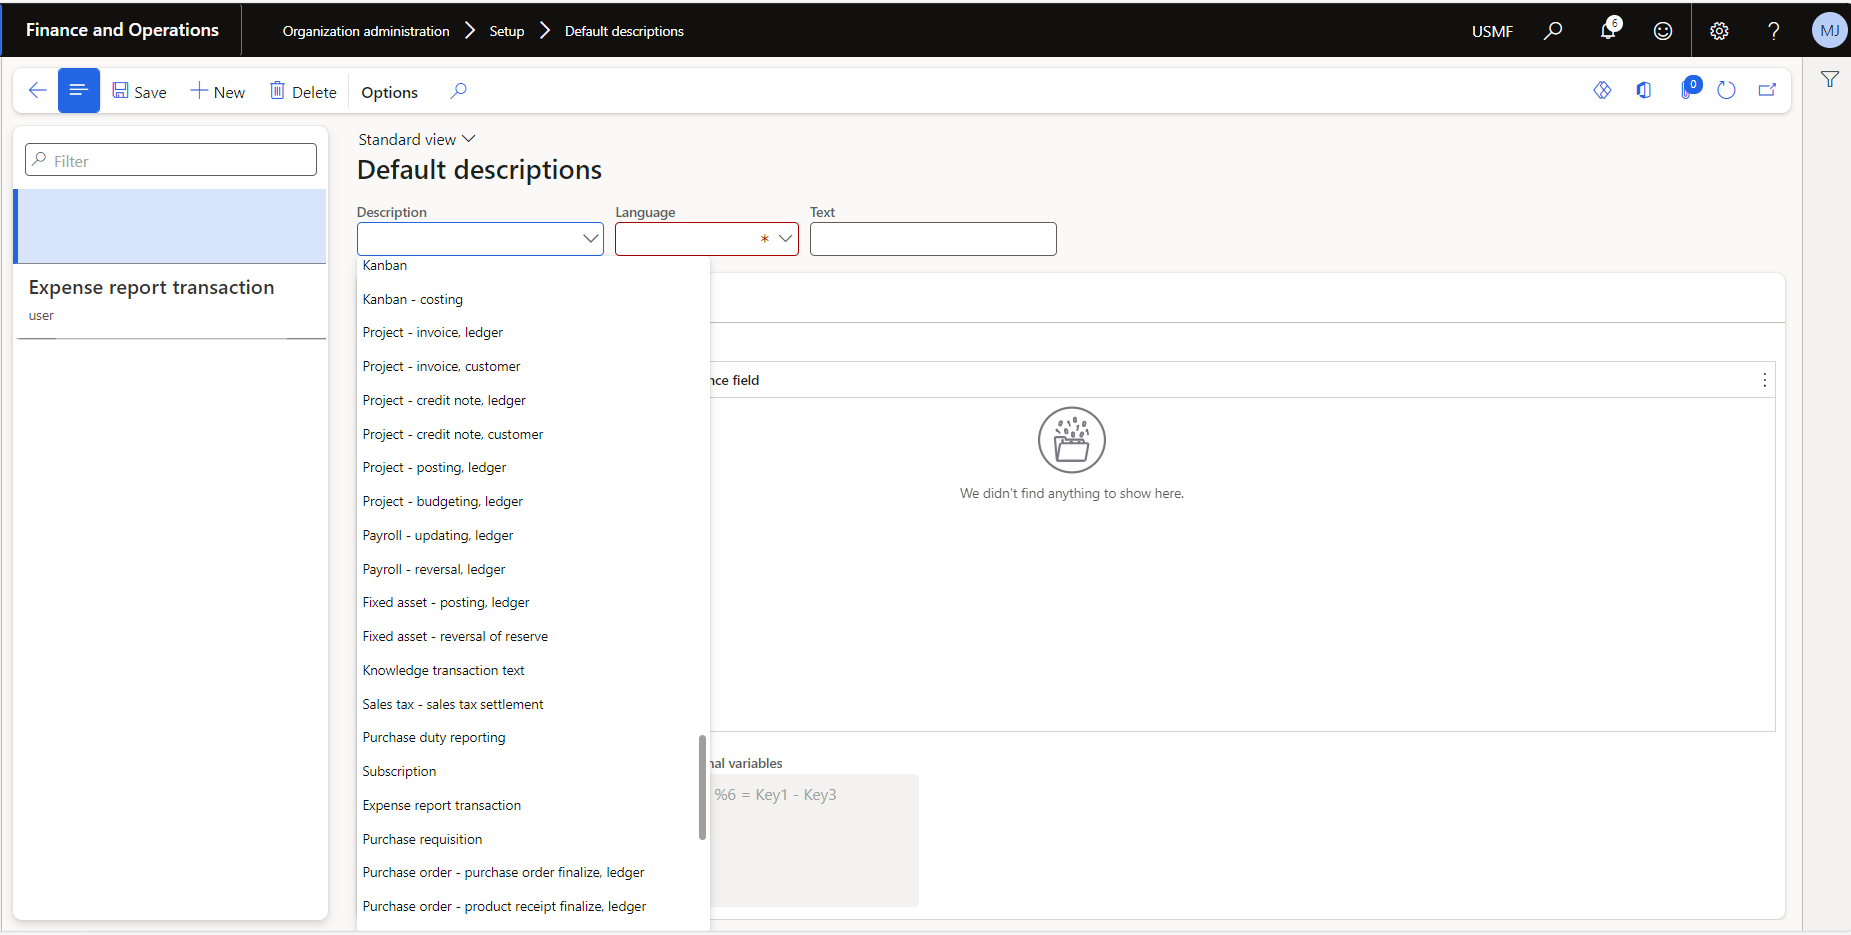
General ledger configuration:
You can use default descriptions to automatically update the Description field when vouchers are posted to the general ledger. This functionality has been expanded to work with Landed cost.
Navigation: Go to Organizational administration > Setup > Default descriptions


Leave a Reply
You must be logged in to post a comment.

