
Microsoft Dynamics D365-Create and Manage Employees
Process Overview: Workers for the first stores will be added manually in D365. This document shows the steps to accomplish adding workers.
Requirements – Work Items
- Decision – One employee address book will be shared for all stores, so store employees can go into any store and log in. FIT
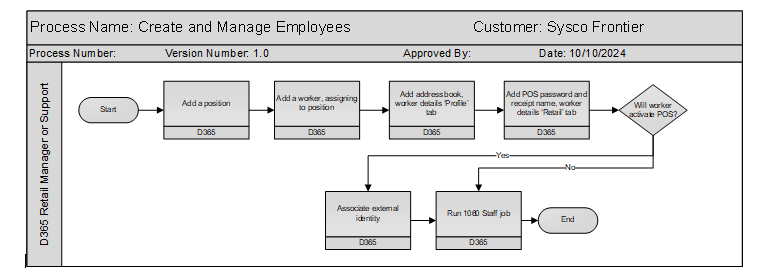
Process Steps:
- Add a position, if open positions do not already exist
- Add the worker record and details
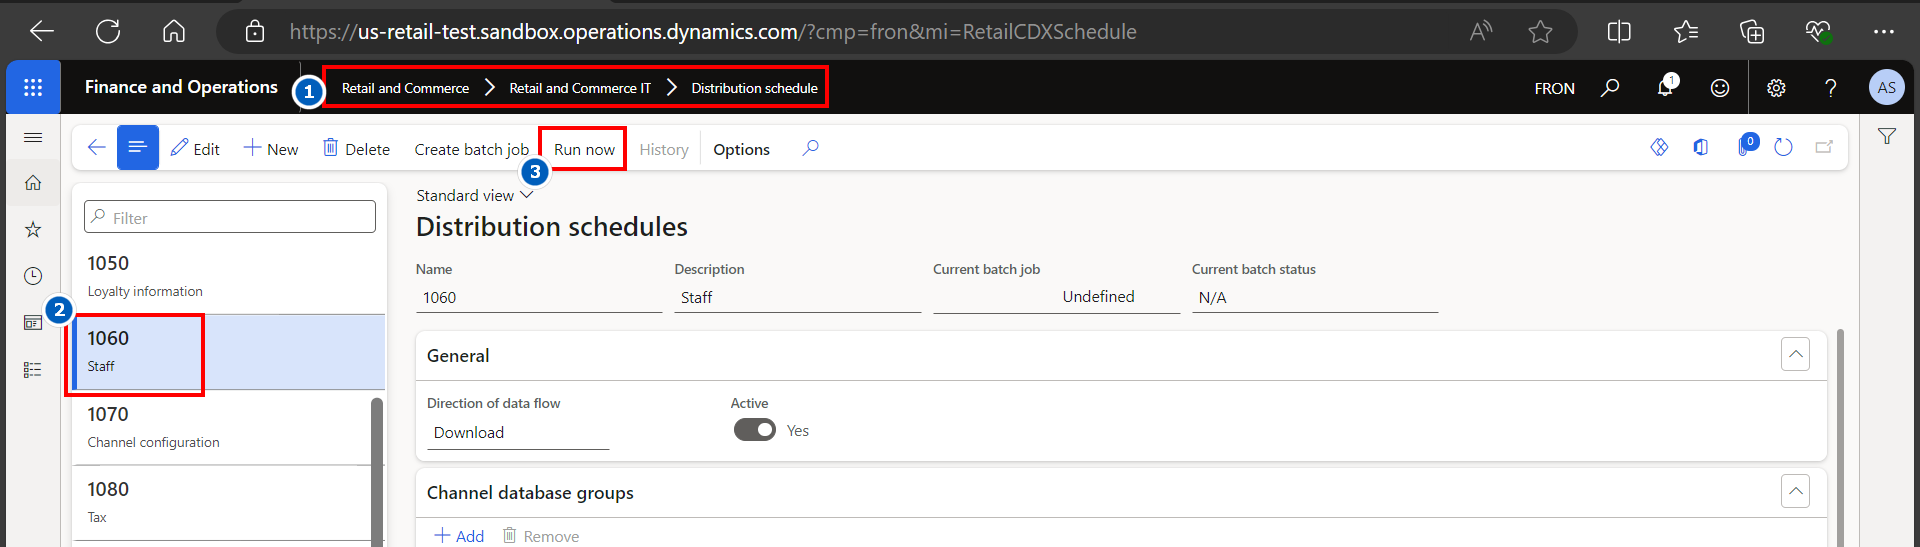
- Run the update job to propagate to POS system
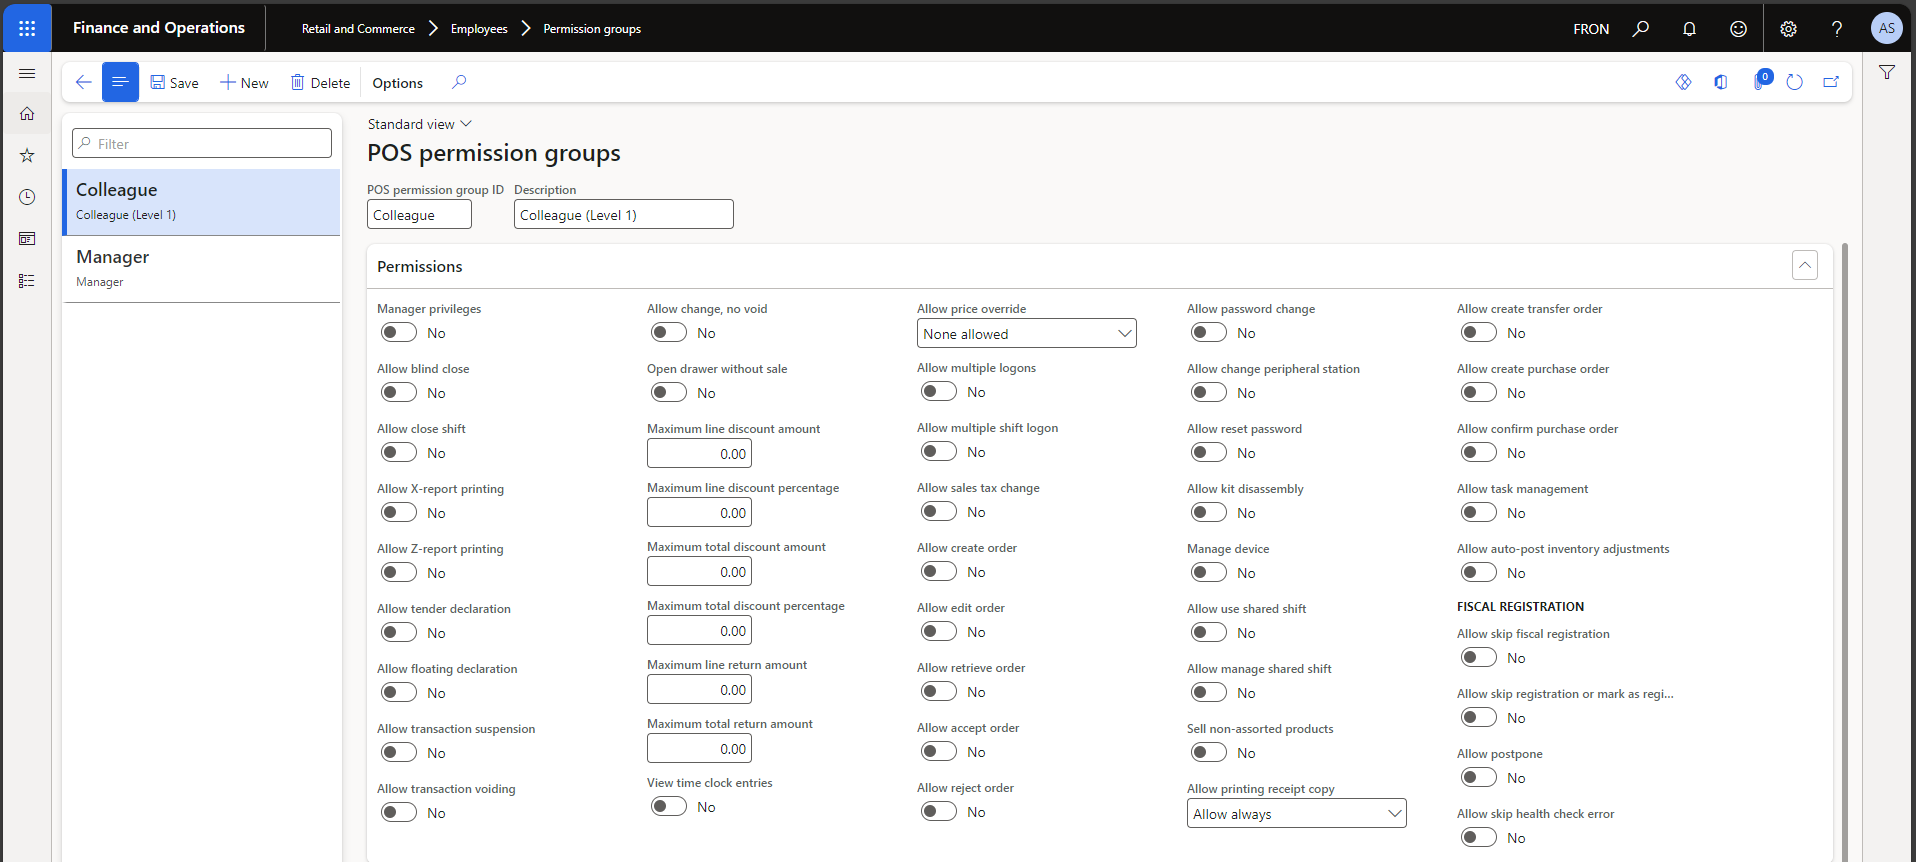
let’s discuss permission groups and how many ‘jobs’ we need. The permission group setup screen is below.
Step by step screen clips.
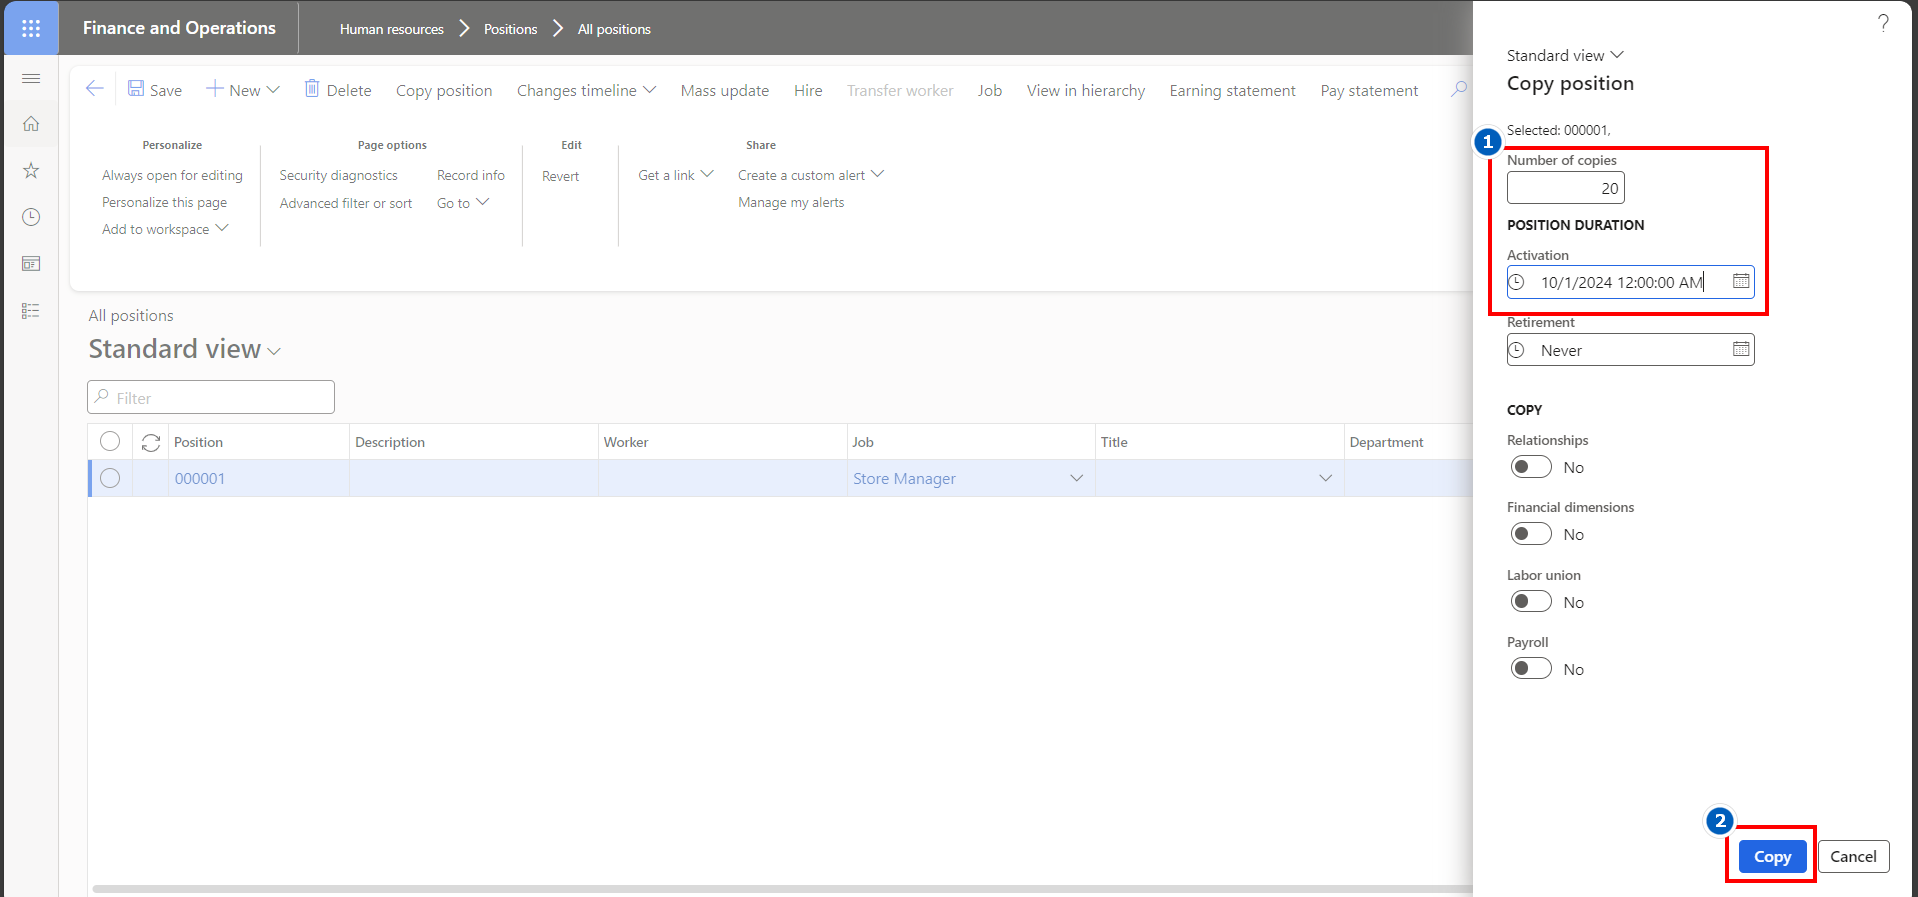
Add a position. Positions are linked to jobs that give the worker POS permissions.

Use (1) ‘New’ to create a single position. Use (2) ‘Copy position’ to create multiple positions at once. Be sure to date the position prior to the start date of the employee. ‘Copy’ illustrated below.
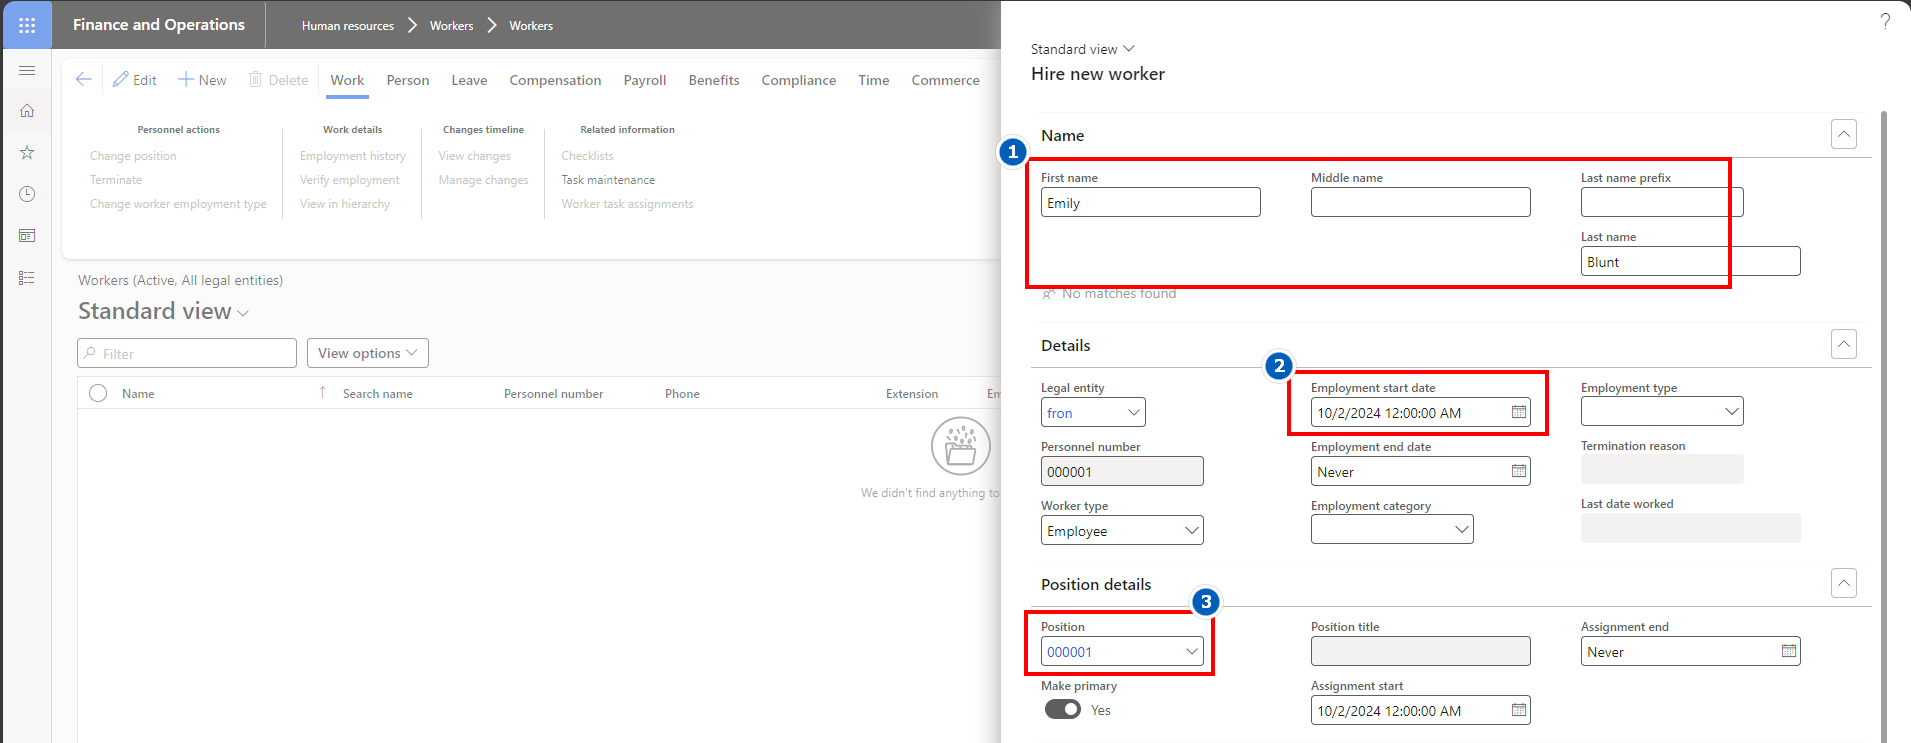
Add the employee:

do we want to manually number employees to match Sysco HR personnel number? That will be the ‘login’ ID. The ‘Personnel number’ auto-numbered below. We can also set the number sequence to be shorter (not so many digits).

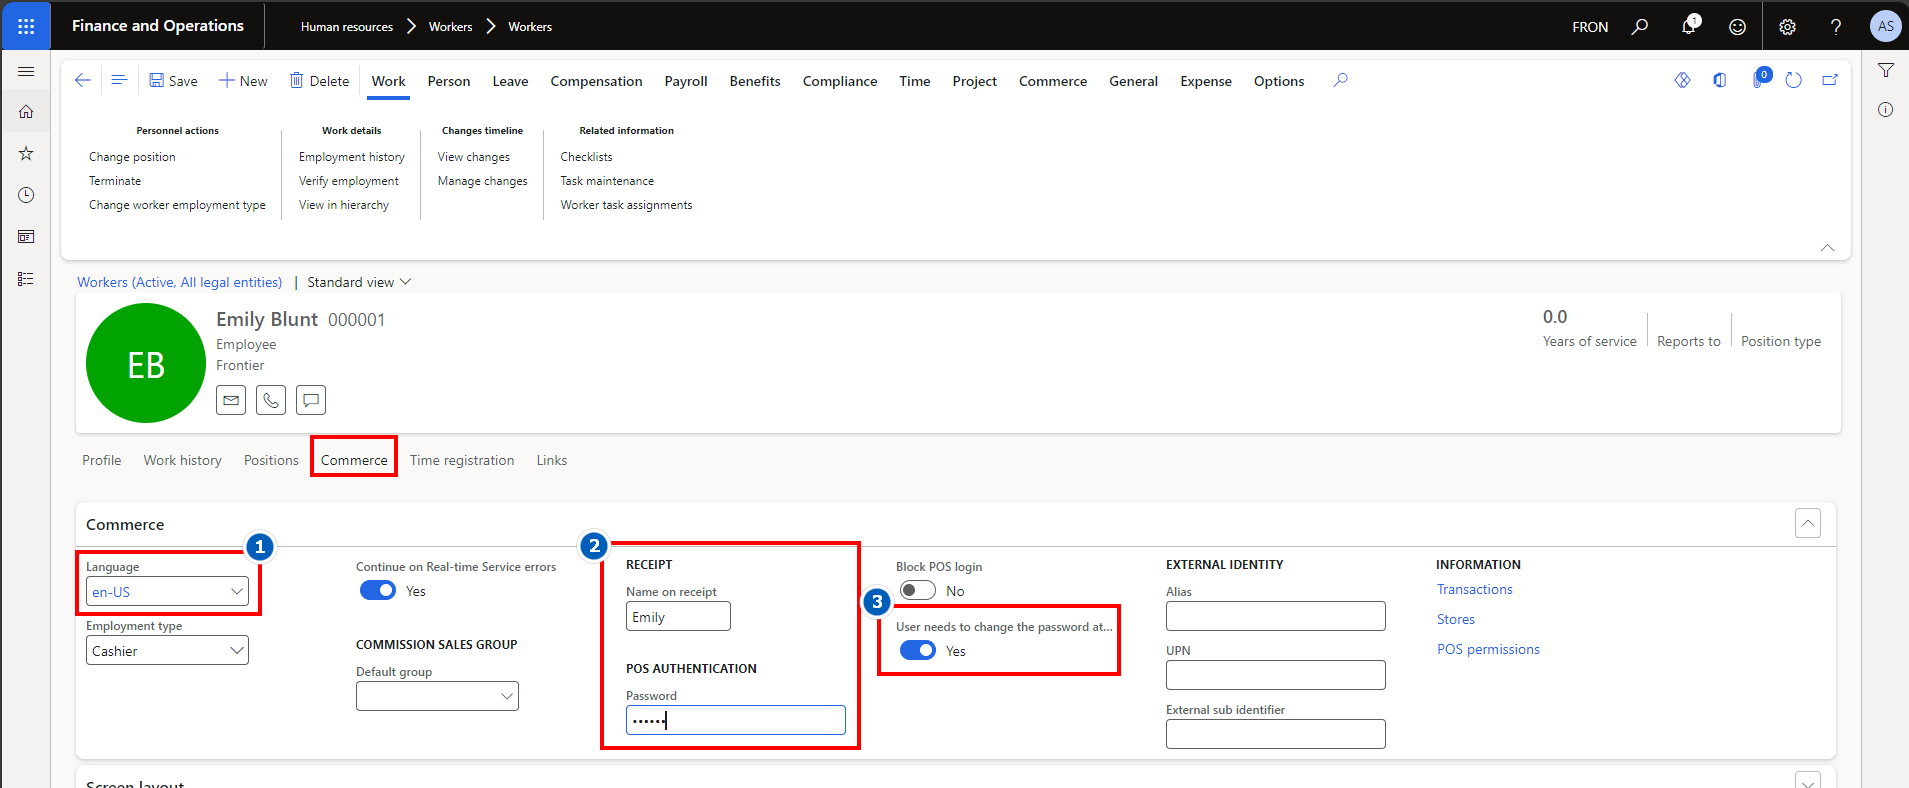
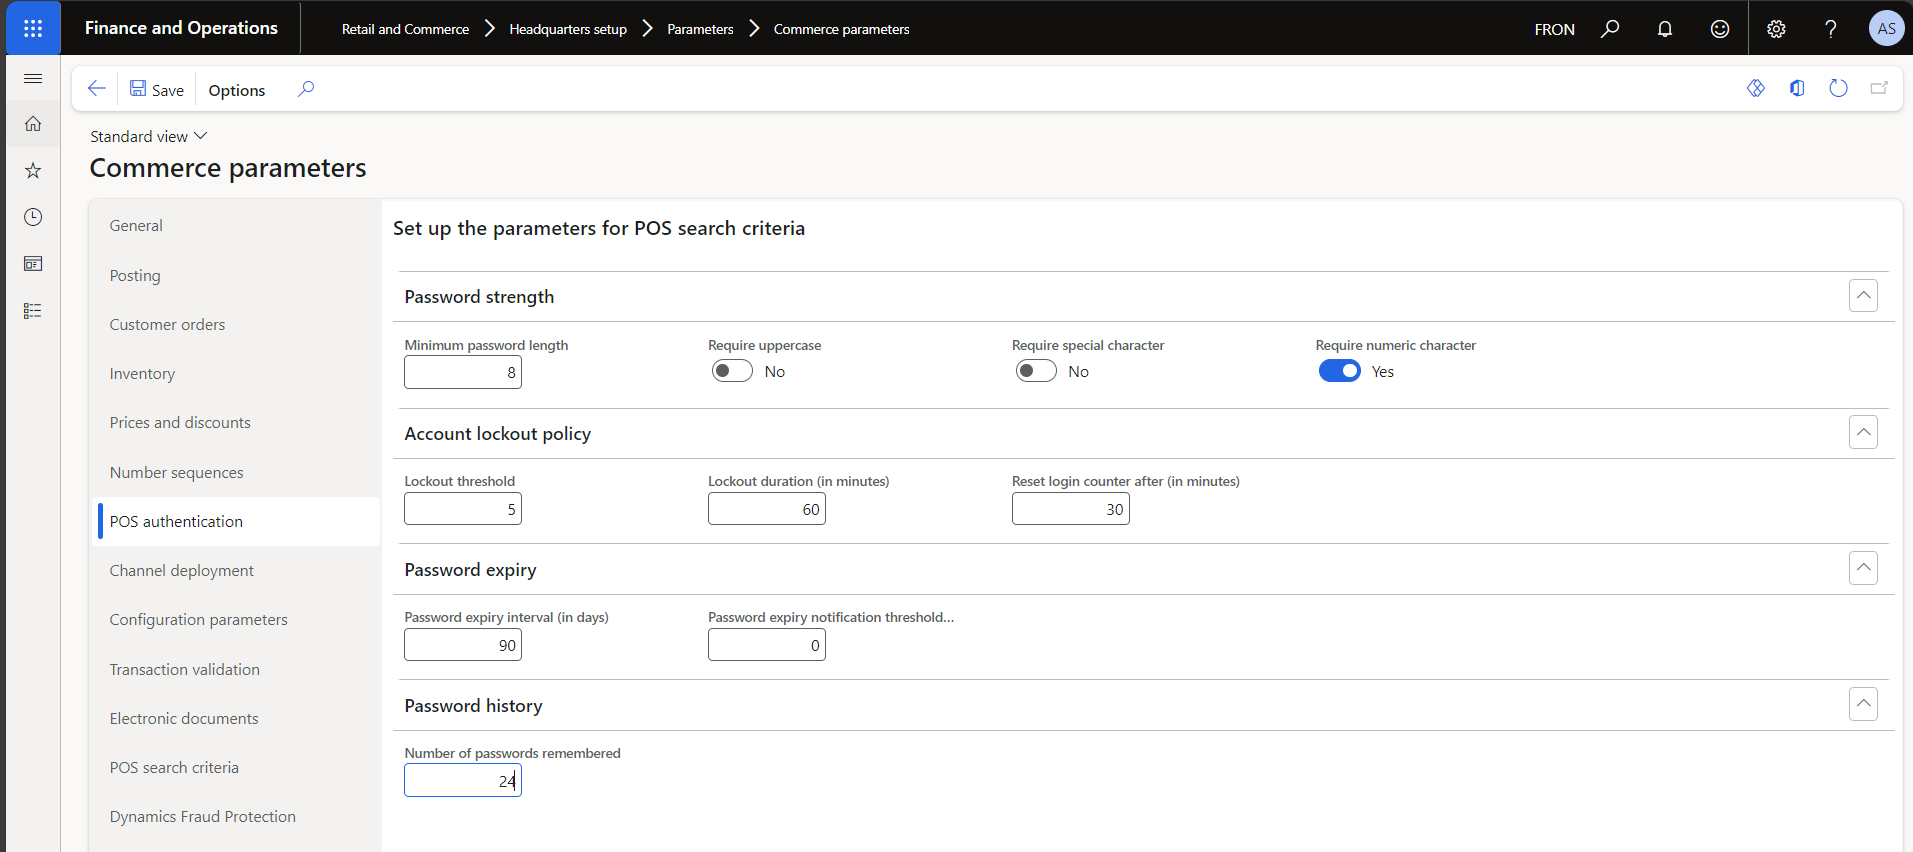
PW default? Used 12345678. Discuss password rules. Clip below of the options.
If the user is going to activate POS machines, we will need the following set up (this links an AAD user to this worker)


Run the 1060 job to publish worker changes to POS.


Leave a Reply
You must be logged in to post a comment.

